This feature is available on our Enterprise Plan.
Want to chat about whether this feature is right for you? Our support team is always happy to hear from you.
Connecting a Git Repository on your GitHub Enterprise Server to your Site allows you to work on your website files locally and sync your changes to CloudCannon. CloudCannon also syncs file changes you make in CloudCannon back to your GitHub Enterprise Server.
To connect a Git Repository on GitHub.com instead, please read our documentation on connecting a Git Repository from GitHub.
Create a GitHub App#
Before you configure your GitHub Enterprise Server in CloudCannon, you need to create a new GitHub App. You only need to do this once per server. CloudCannon recommends creating the GitHub App under a GitHub organization.
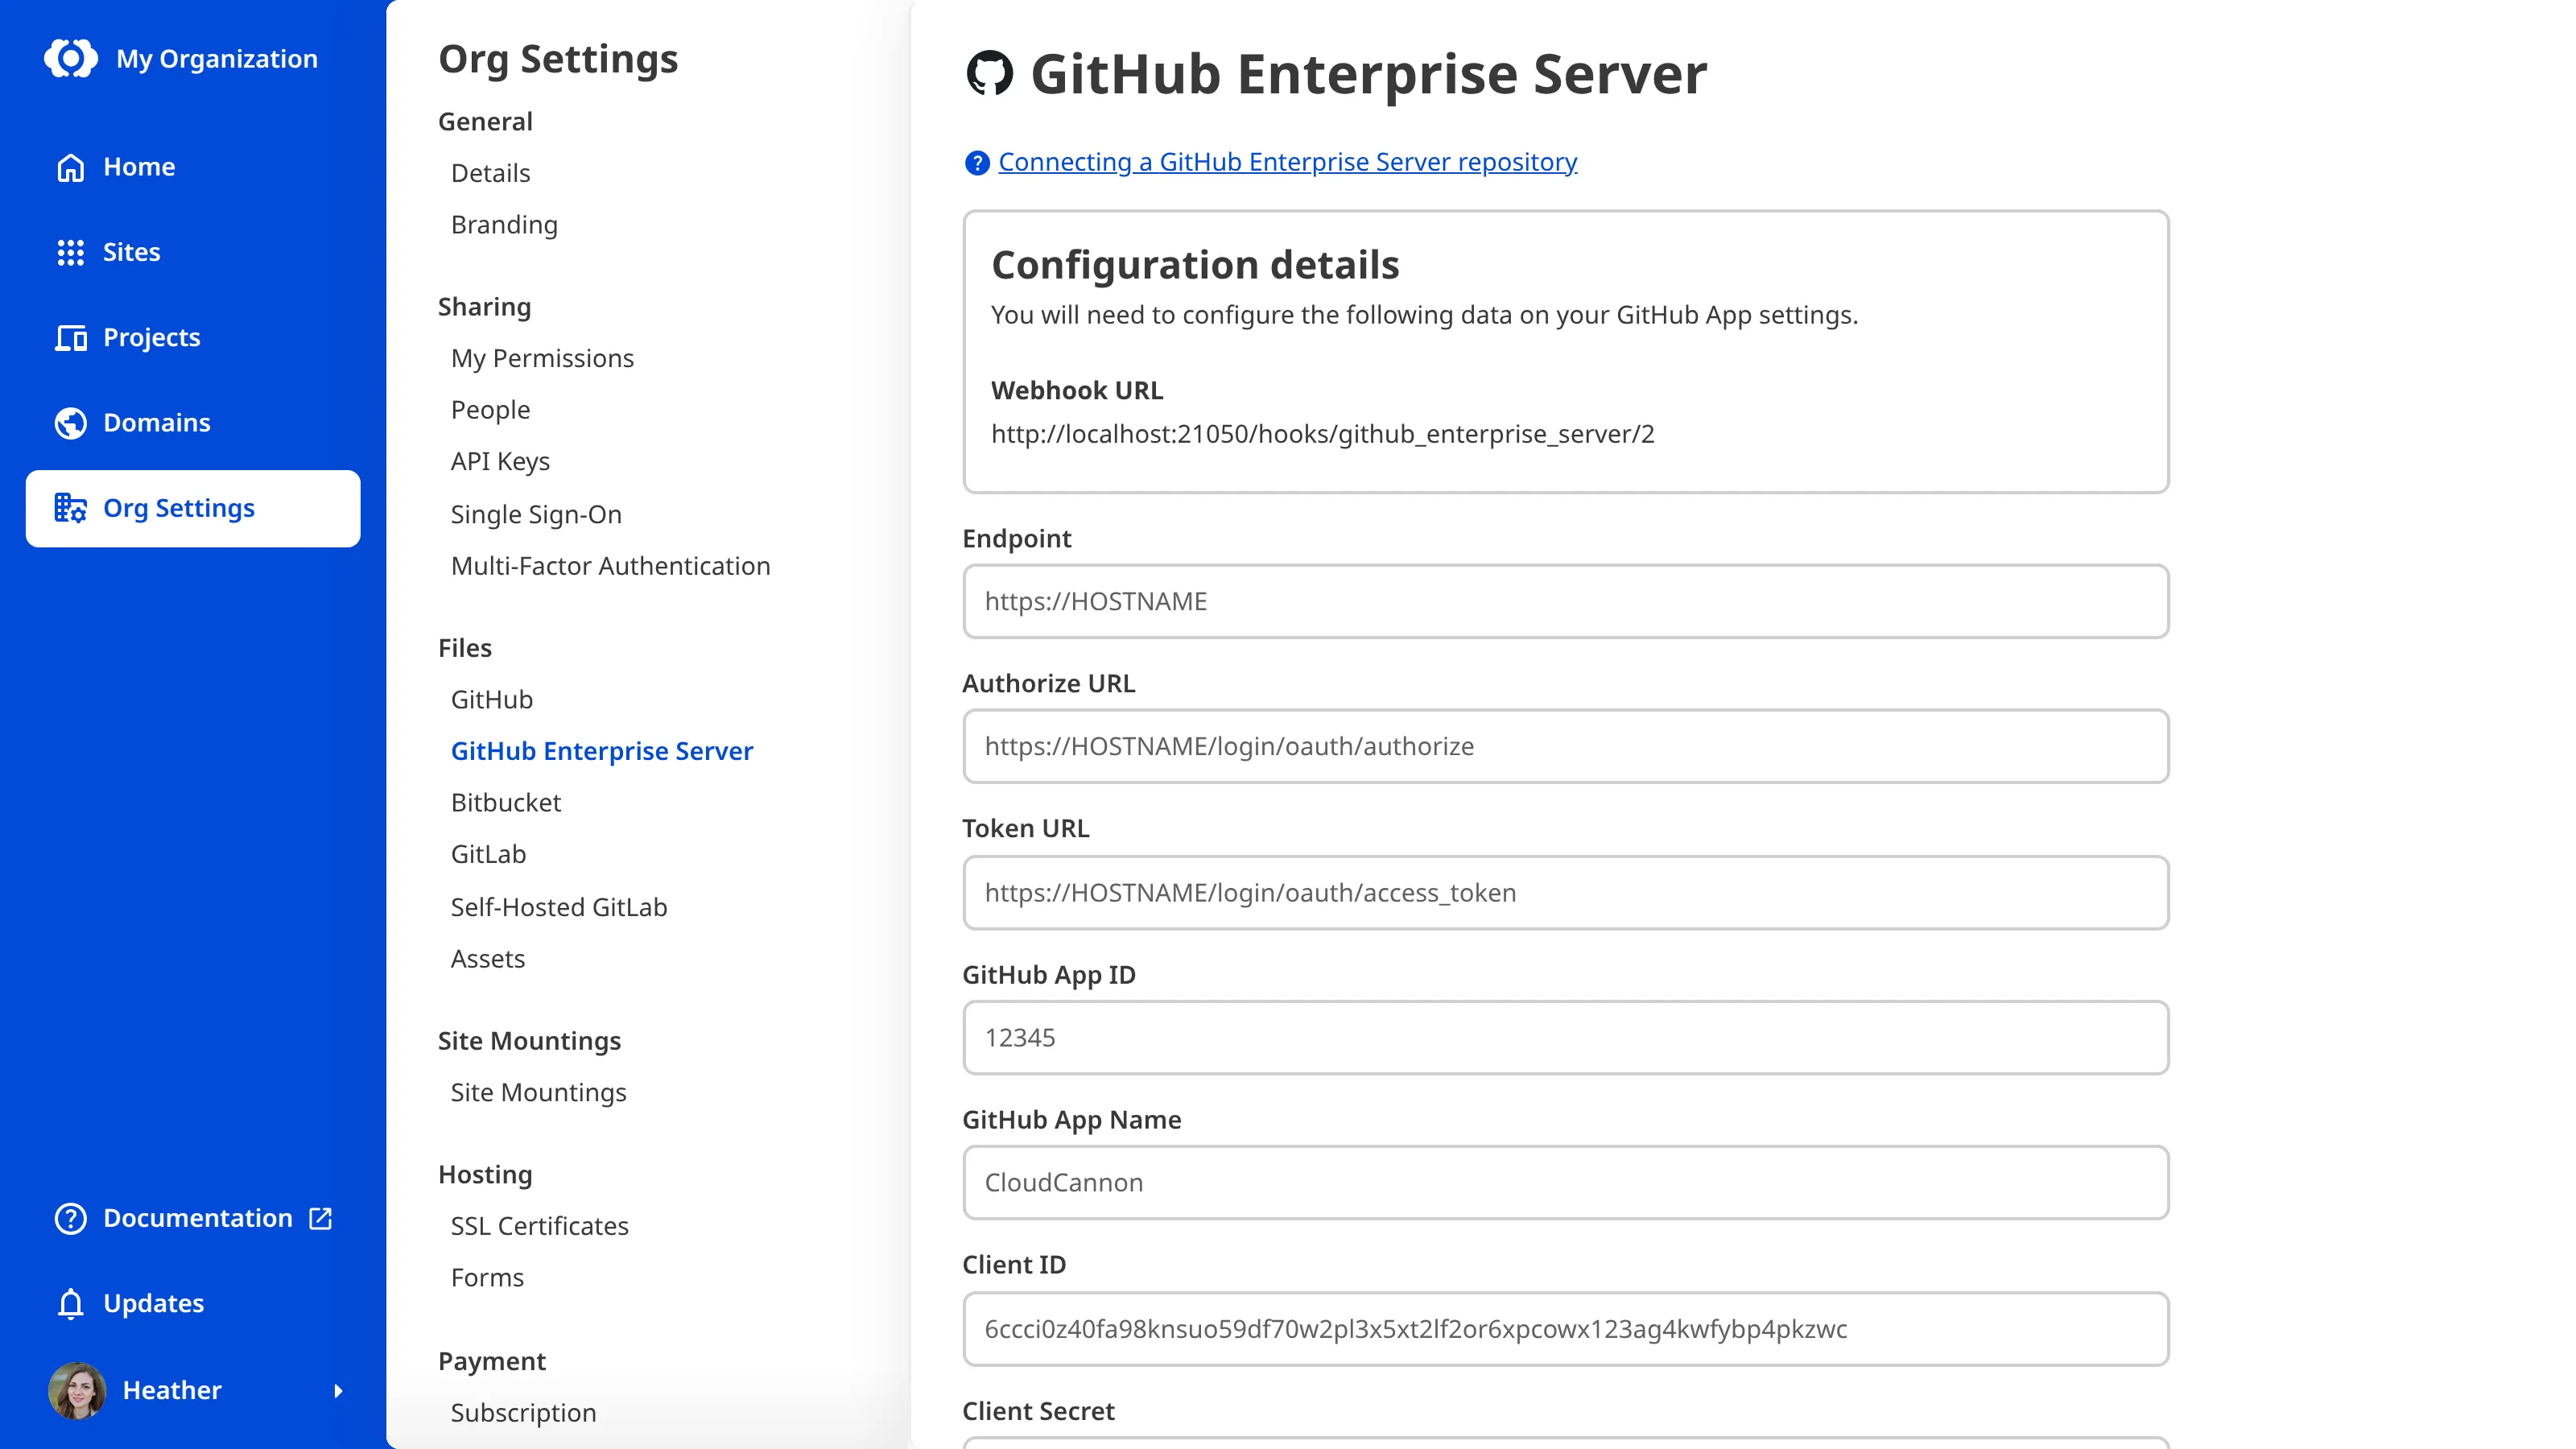
The GitHub App needs your Organization's webhook URL. You can find it in the Webhook URL row of the Configuration details section on the GitHub Enterprise Server page under Org Settings.
To create a GitHub App:
- On your GitHub Enterprise Server instance, open your Settings, then select Developer settings and GitHub Apps.
- Click the New GitHub App button.
- Enter the following values in the Register new GitHub App form:
- GitHub App name:
CloudCannon - Homepage URL:
https://app.cloudcannon.com - Callback URL:
https://app.cloudcannon.com/github_enterprise_server/authorize - Setup URL:
https://app.cloudcannon.com/github_enterprise_server/install - Redirect on update:
true - Webhook URL:
https://app.cloudcannon.com/hooks/github_enterprise_server/{organization_id} - Webhook secret: A random string with high entropy
- GitHub App name:
- Set the following values in the Permissions section:
- Repository permissions:
- Commit statuses:
Read and Write - Contents:
Read and Write - Metadata:
Read-only - Pull requests:
Read and Write
- Commit statuses:
- User permissions:
- Email addresses:
Read-only
- Email addresses:
- Repository permissions:
- Check the Meta and Push checkboxes under Subscribe to events.
- Select the option that best suits your team under Where can this GitHub App be installed?.
- Click the Create GitHub App button.
GitHub will create your GitHub App.
Generate a client secret and private key#
After you create your GitHub App, you can generate a client secret and a private key for it. CloudCannon uses these keys, along with your other GitHub App details, to authenticate its requests to your GitHub Enterprise Server. You will need both keys when you configure your GitHub Enterprise Server in CloudCannon.
To generate a client secret and private key:
- Click the Generate a new client secret button in the General settings of your GitHub App.
- Copy the generated client secret and store it in a safe place.
- Click the Generate a private key button in the General settings. GitHub will generate a PEM file and download it automatically.
- Store the downloaded PEM file in a safe place.
You now have the client secret and private key you need to configure your GitHub Enterprise Server in CloudCannon.
Configure your GitHub Enterprise Server#
Before you sync with a Git Repository on your GitHub Enterprise Server, you need to configure your instance in CloudCannon. You only need to do this once per Organization.
To configure your GitHub Enterprise Server:
- Navigate to the GitHub Enterprise Server page under the Files heading in your Org Settings.
- Enter the details for your GitHub Enterprise Server instance:
- Endpoint: The URL of your instance, including
https://(for example,https://HOSTNAME). This field is required. - Authorize URL:
https://HOSTNAME/login/oauth/authorize - Token URL:
https://HOSTNAME/login/oauth/access_token - GitHub App ID: The ID that GitHub assigned to your GitHub App.
- GitHub App Name:
CloudCannon, the name you gave your GitHub App when creating a GitHub App. - Client ID: The client ID that GitHub assigned to your GitHub App.
- Client Secret: The client secret you generated earlier.
- Webhook Secret: The random string with high entropy you entered in the Webhook secret field of your GitHub App.
- Private Key: The contents of the PEM file you generated earlier.
- Endpoint: The URL of your instance, including
- Click the Configure GitHub Enterprise Server button.
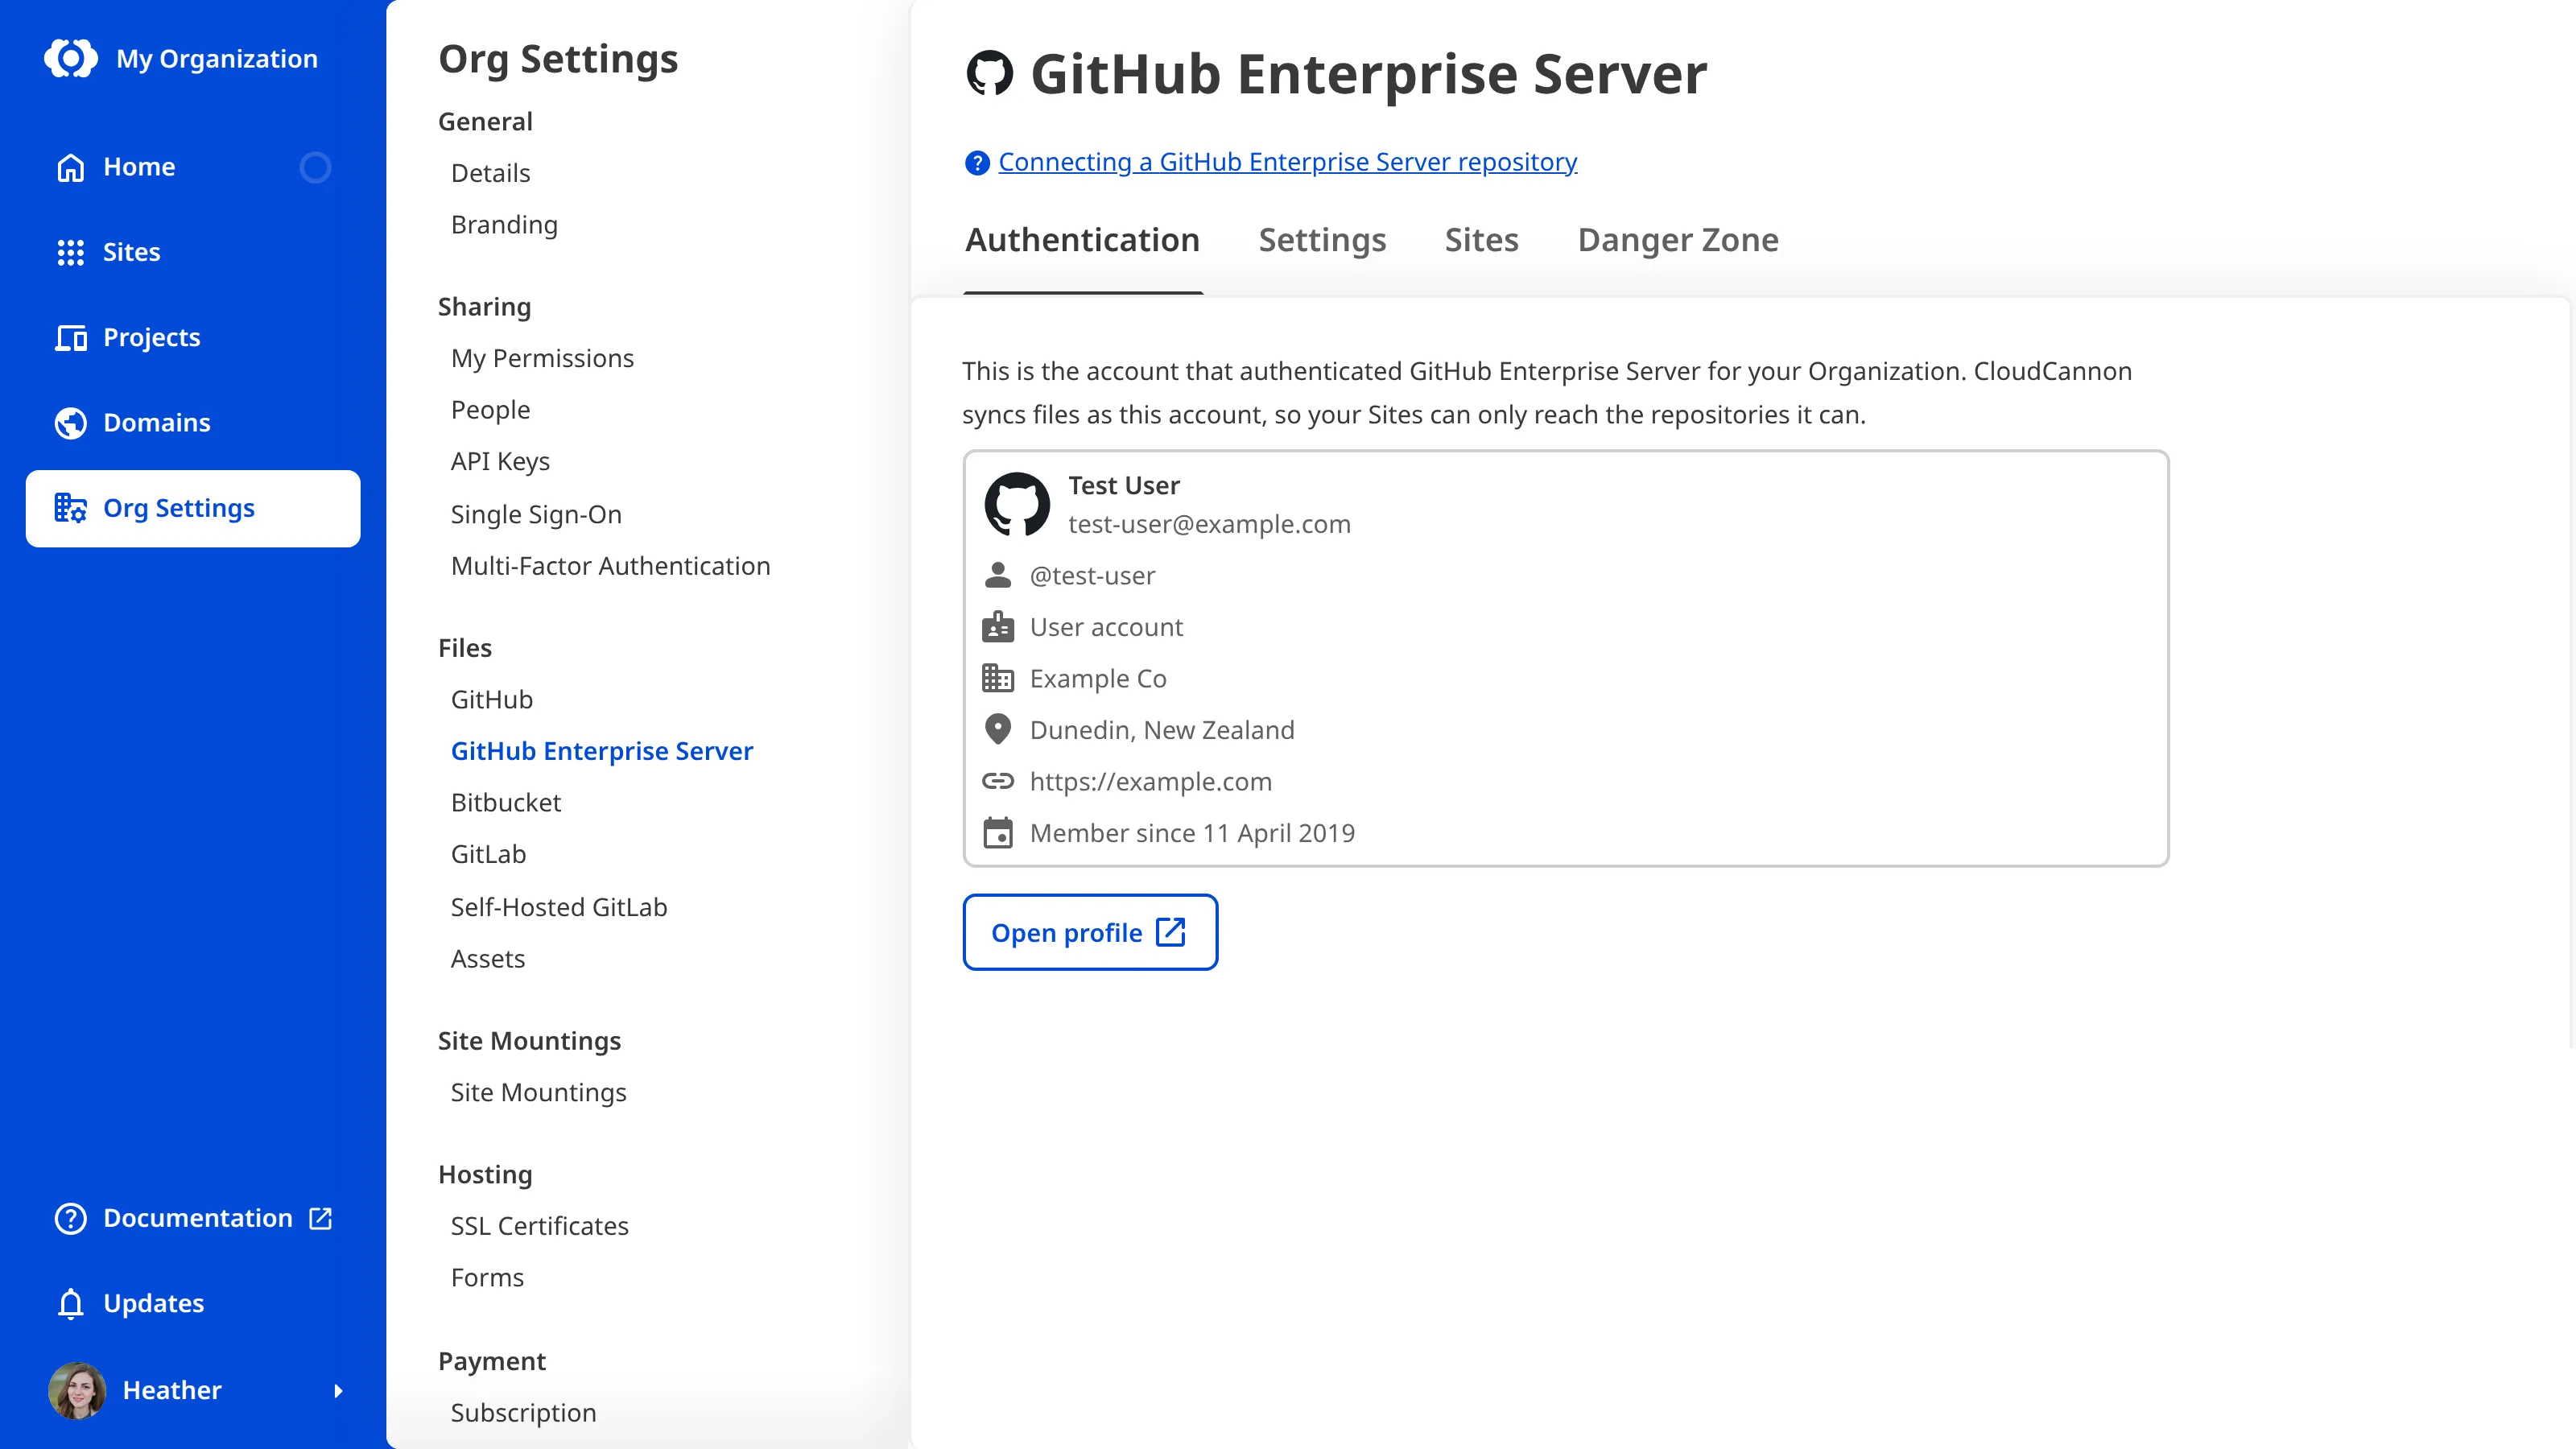
CloudCannon will save your server details and show the Authentication, Settings, Sites, and Danger Zone tabs on the GitHub Enterprise Server page. If a field is missing or invalid, CloudCannon will show an error under that field instead.
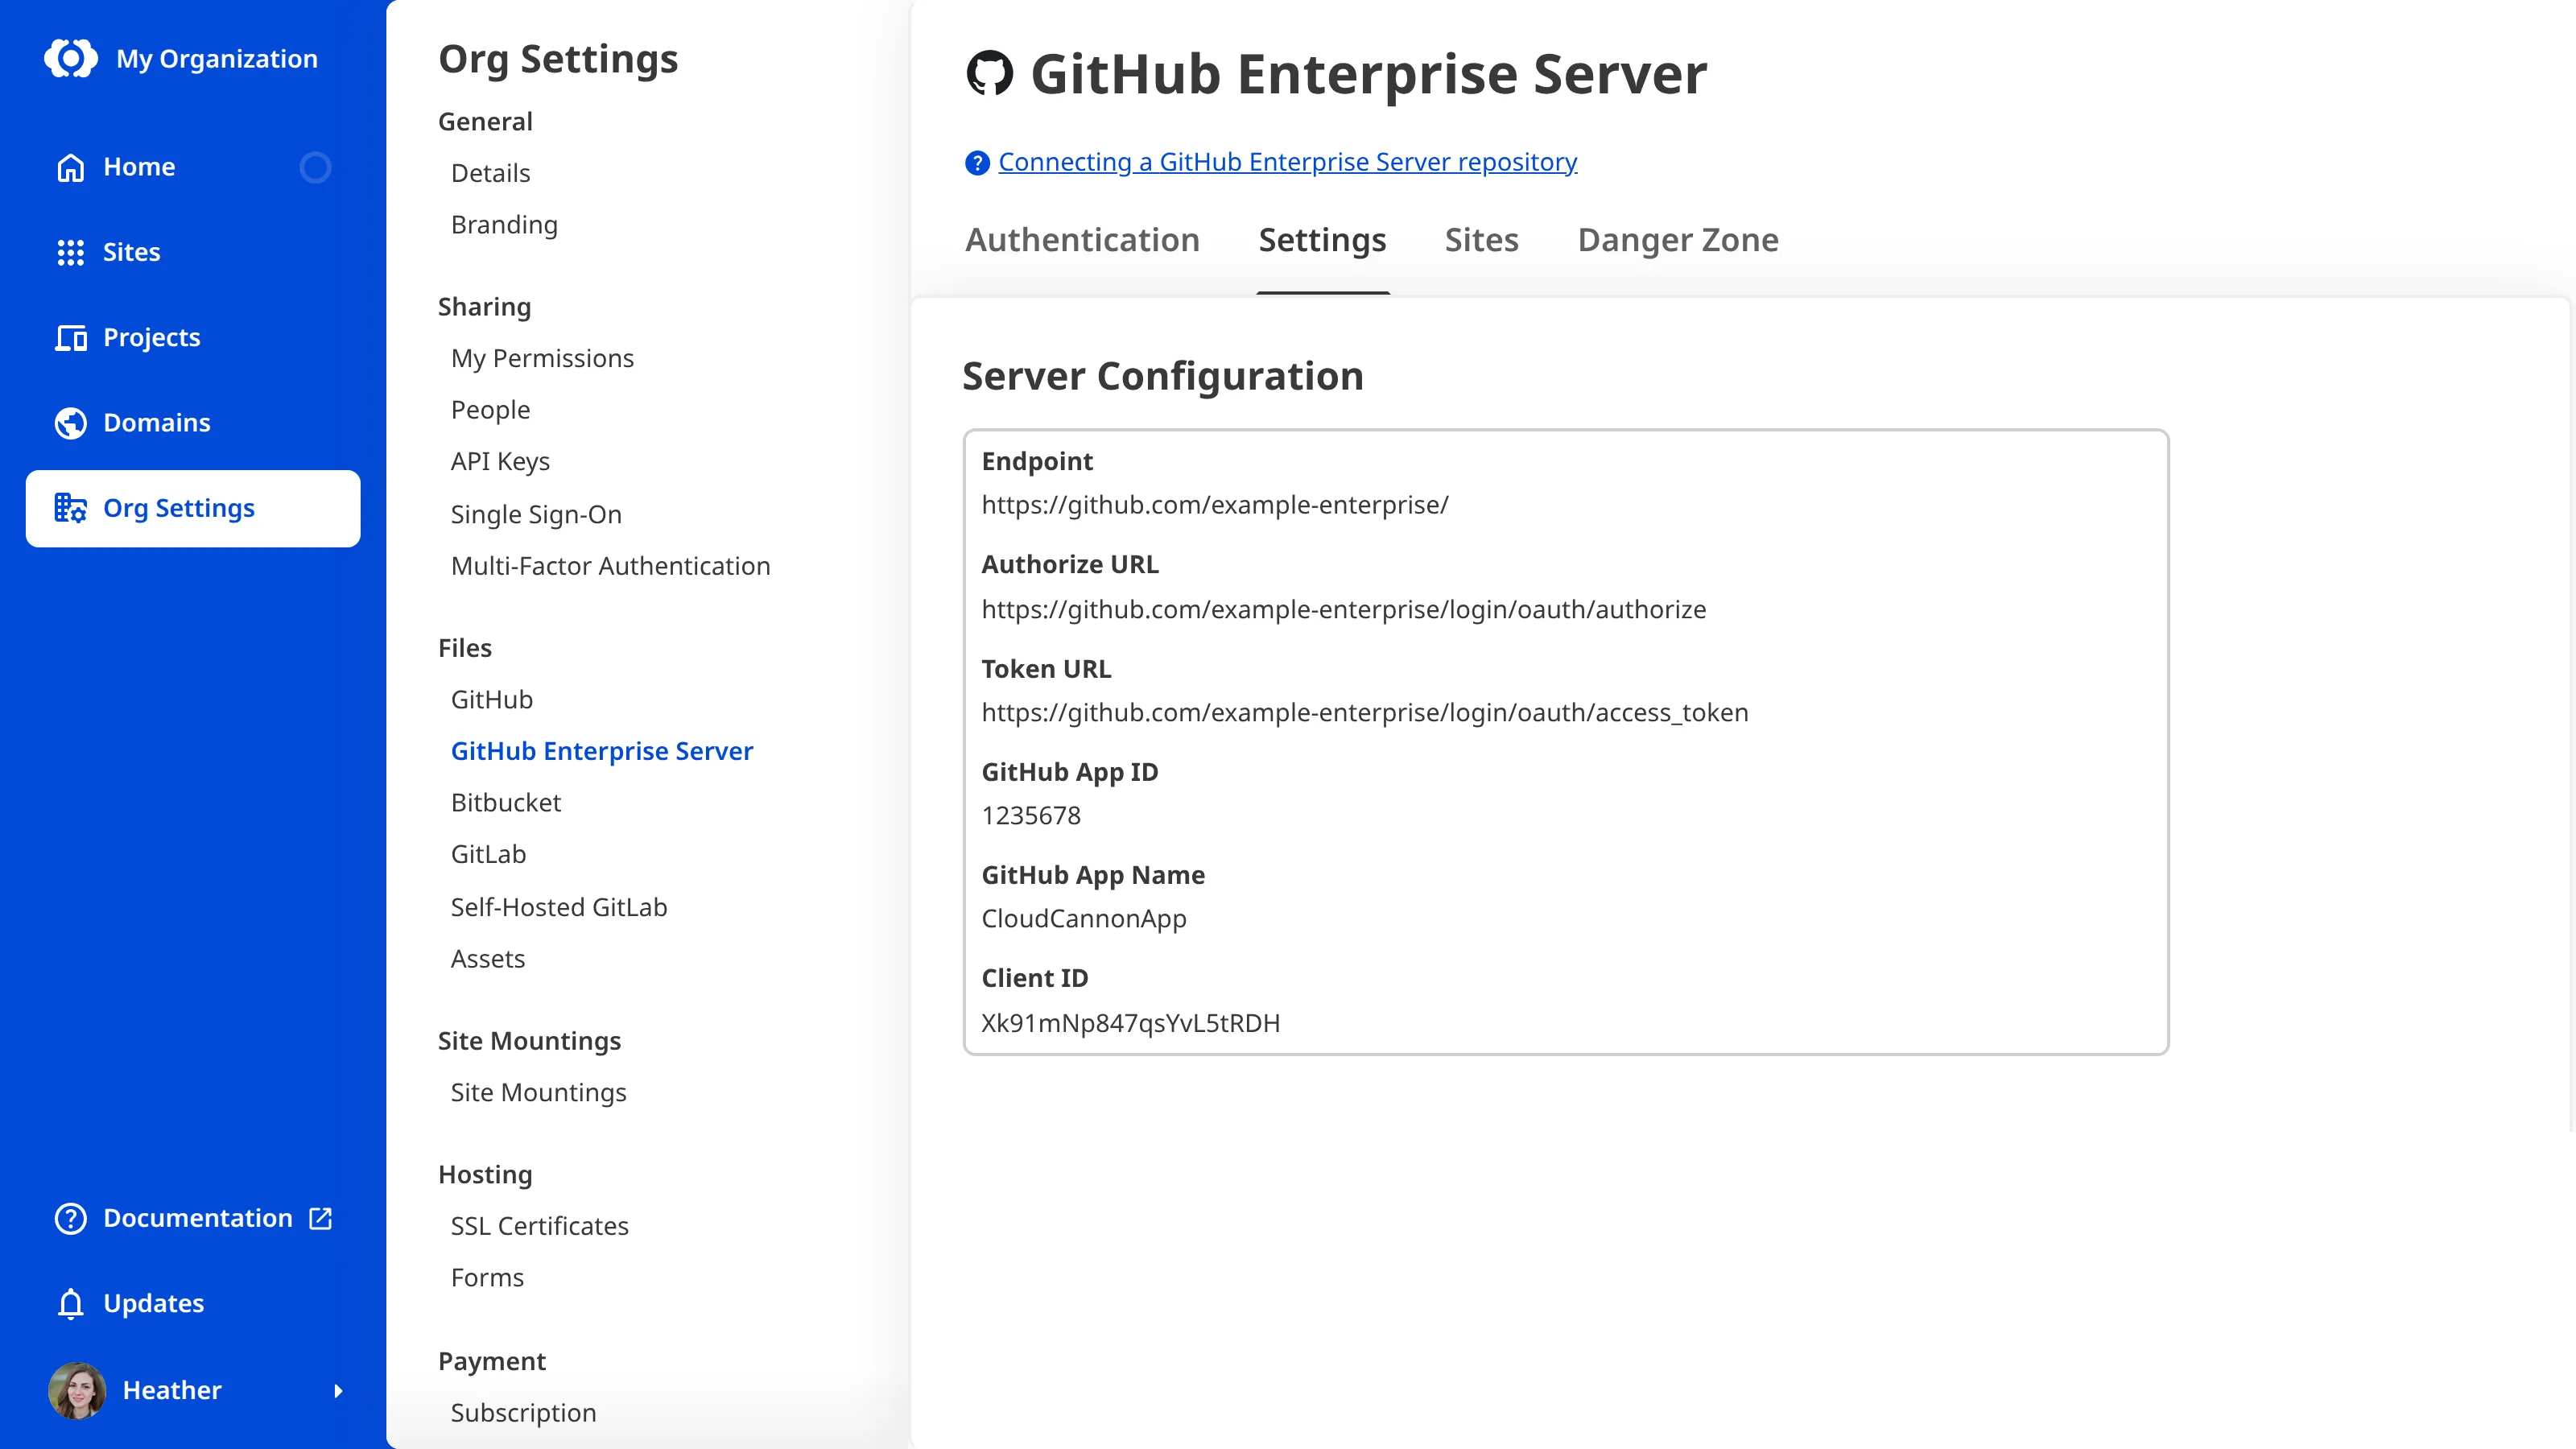
The Settings tab shows the server details you entered under the Server Configuration heading, other than the secrets and private key. You cannot edit these details after you configure your server. To change them, disconnect your GitHub Enterprise Server and configure it again.
Sync with a Git Repository#
To sync your Site with a Git Repository on your GitHub Enterprise Server:
- Navigate to the Syncing page under Site Settings.
- Select the GitHub Enterprise Server repository option in the provider dropdown.
- Click the Authorize button.
CloudCannon will redirect you to your GitHub Enterprise Server to authorize CloudCannon.
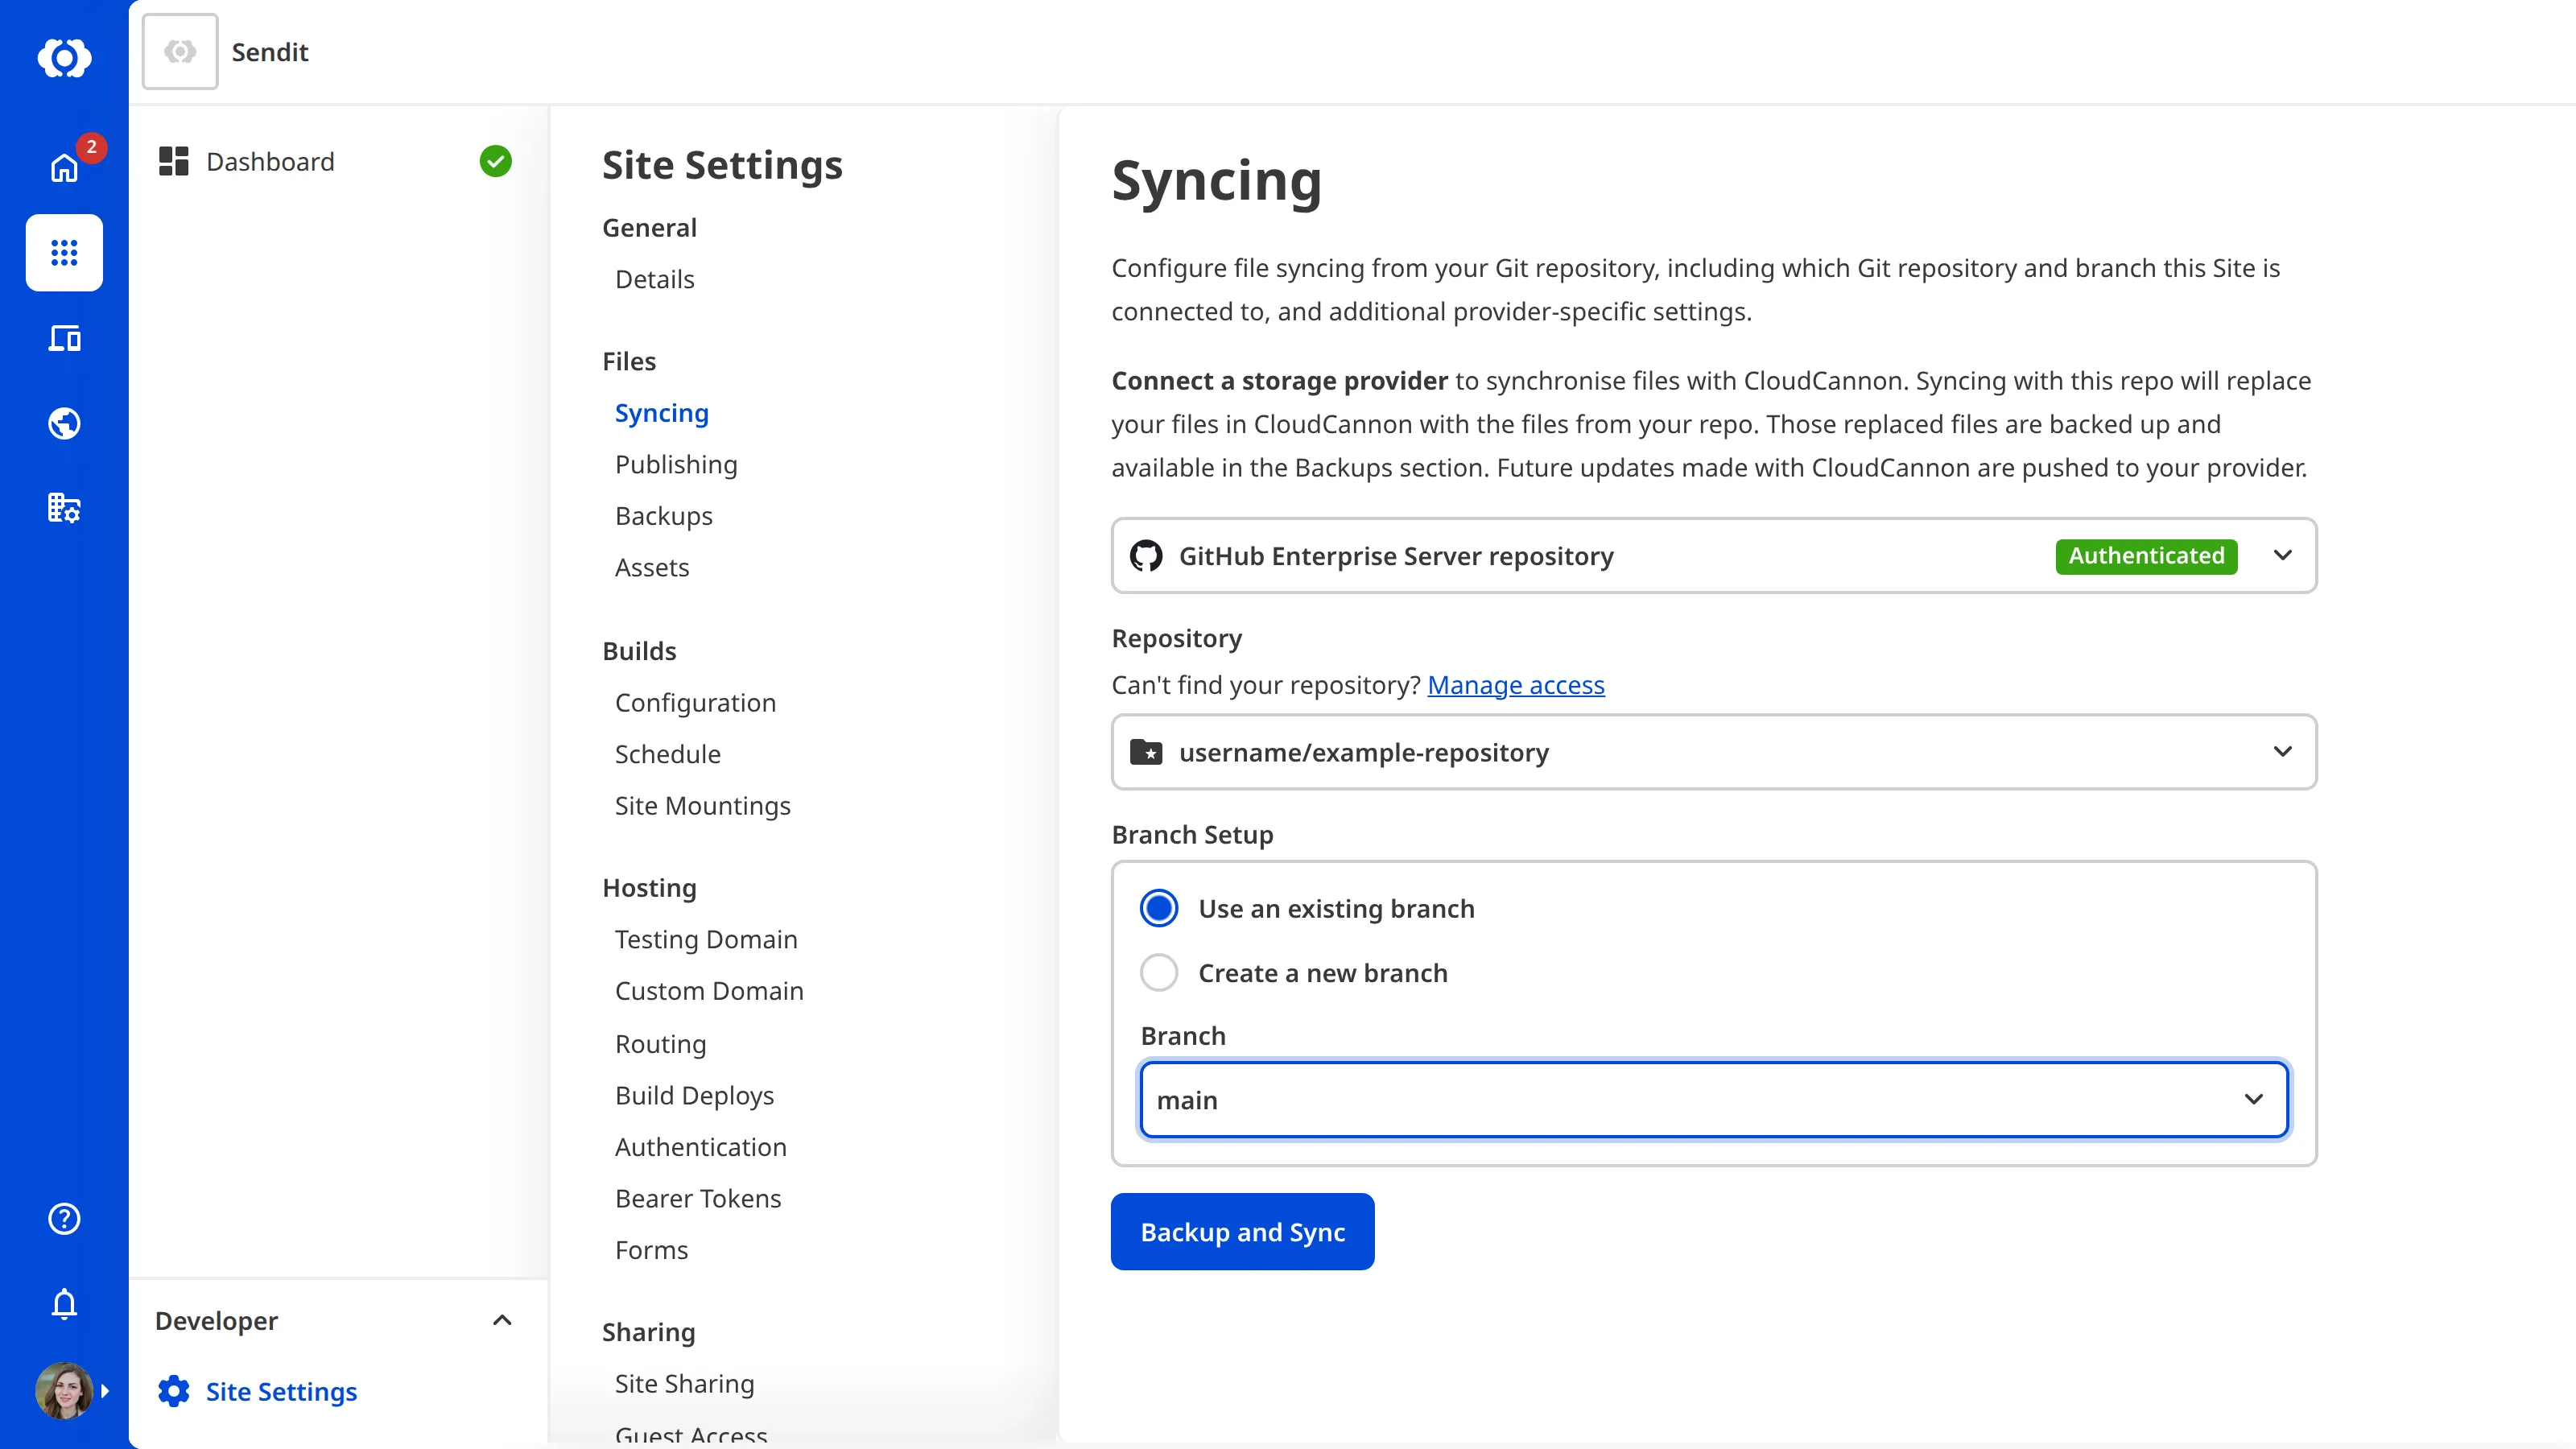
The remaining steps are the same as for a Git Repository on GitHub.com. For more information, please read our documentation on connecting a Git Repository from GitHub.
Disconnect your GitHub Enterprise Server#
Disconnecting your GitHub Enterprise Server removes the server and its stored credentials from your Organization. CloudCannon keeps the files for any Sites that synced with it. You will need to enter your server details again to reconnect.
You can only disconnect your server after you unauthenticate it. If the Danger Zone tab shows an Unauthenticate button, unauthenticate your GitHub Enterprise Server first, which stops syncing for every Site that uses it. For more information, please read our documentation on unauthenticating your Git Provider.
To disconnect your GitHub Enterprise Server:
- Navigate to the GitHub Enterprise Server page under the Files heading in your Org Settings.
- Select the Danger Zone tab.
- Click the Disconnect GitHub Enterprise Server button.
- Click the Confirm button.
CloudCannon will remove your server details and show the configuration form on the GitHub Enterprise Server page.