Connecting a GitLab Git Repository A storage location for the code and files that make up your website. CloudCannon supports the repository providers GitHub, GitLab, and Bitbucket, and highly recommends using a repository to store your website's files for better version control and collaboration. A website in CloudCannon that includes all the files, content, configuration, and settings needed to edit, build, and host a complete website.Git Repository
Site
To connect a self-hosted GitLab Git Repository instead, please read our documentation on connecting a self-hosted GitLab repository as your source.
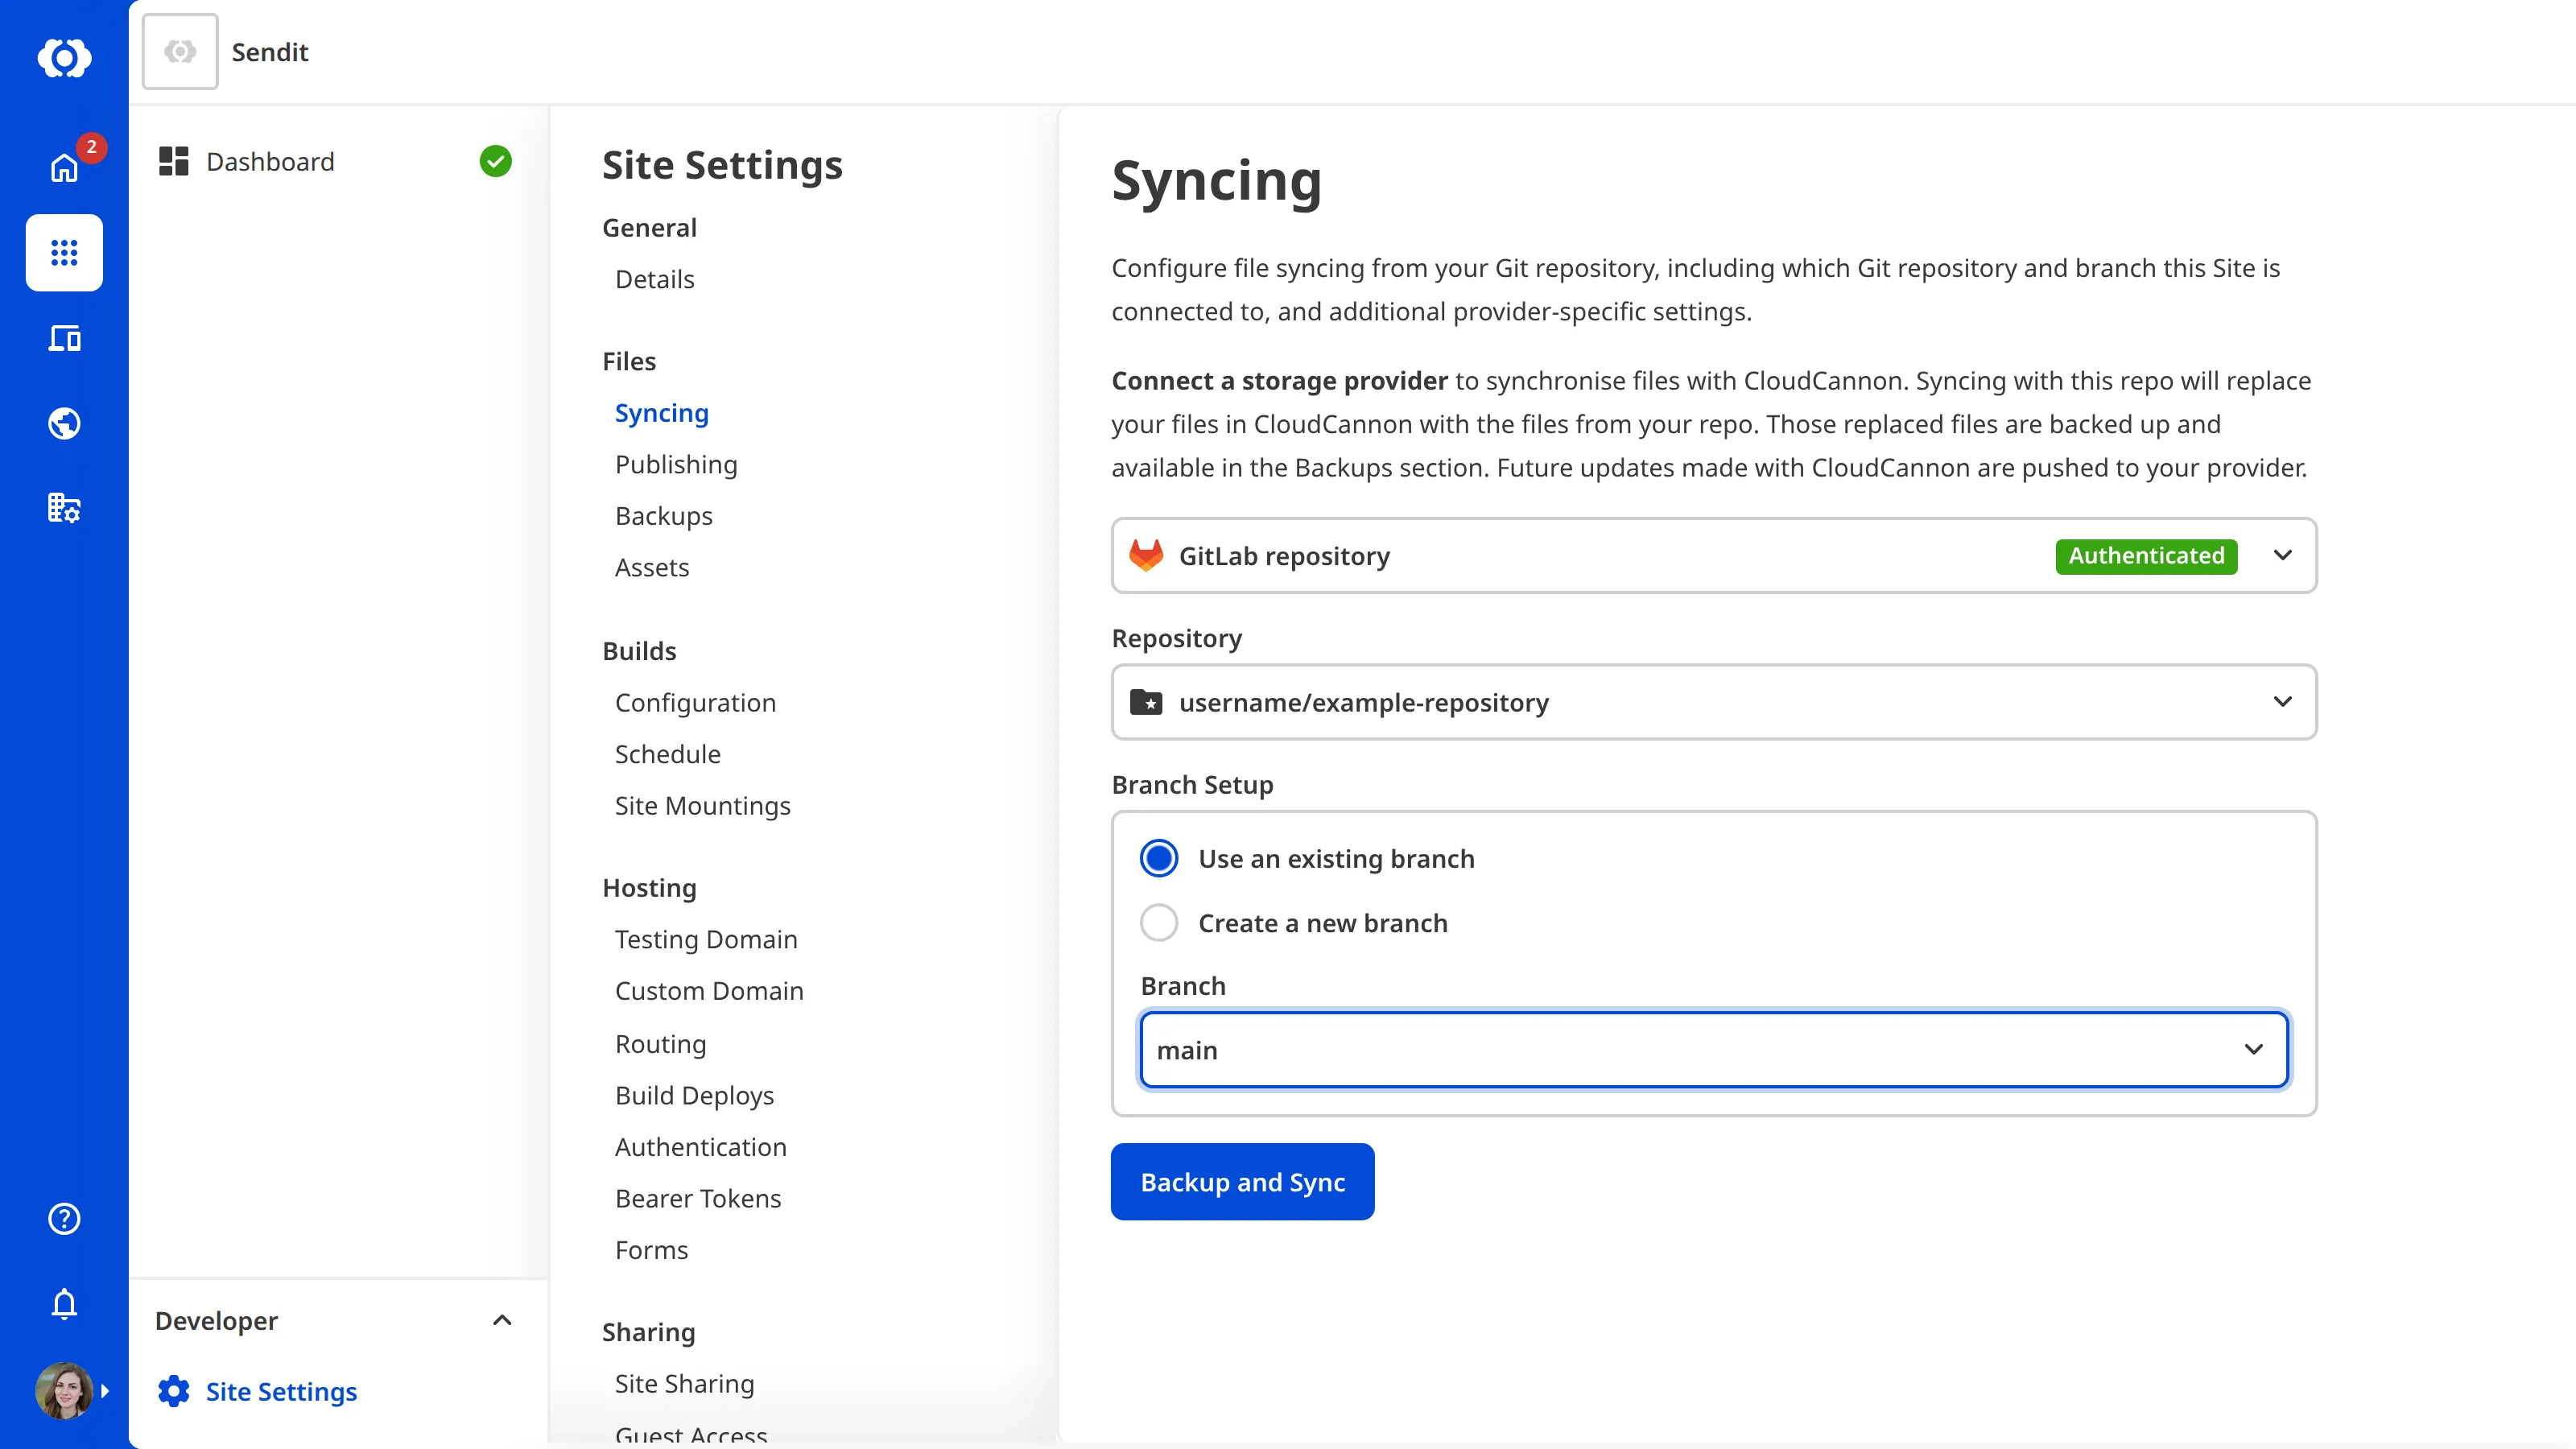
To connect a GitLab Git Repository and start syncing files:
- Navigate to the Syncing page under Site Settings.
- Select the GitLab repository option from the provider dropdown.
- Click the Authorize button.
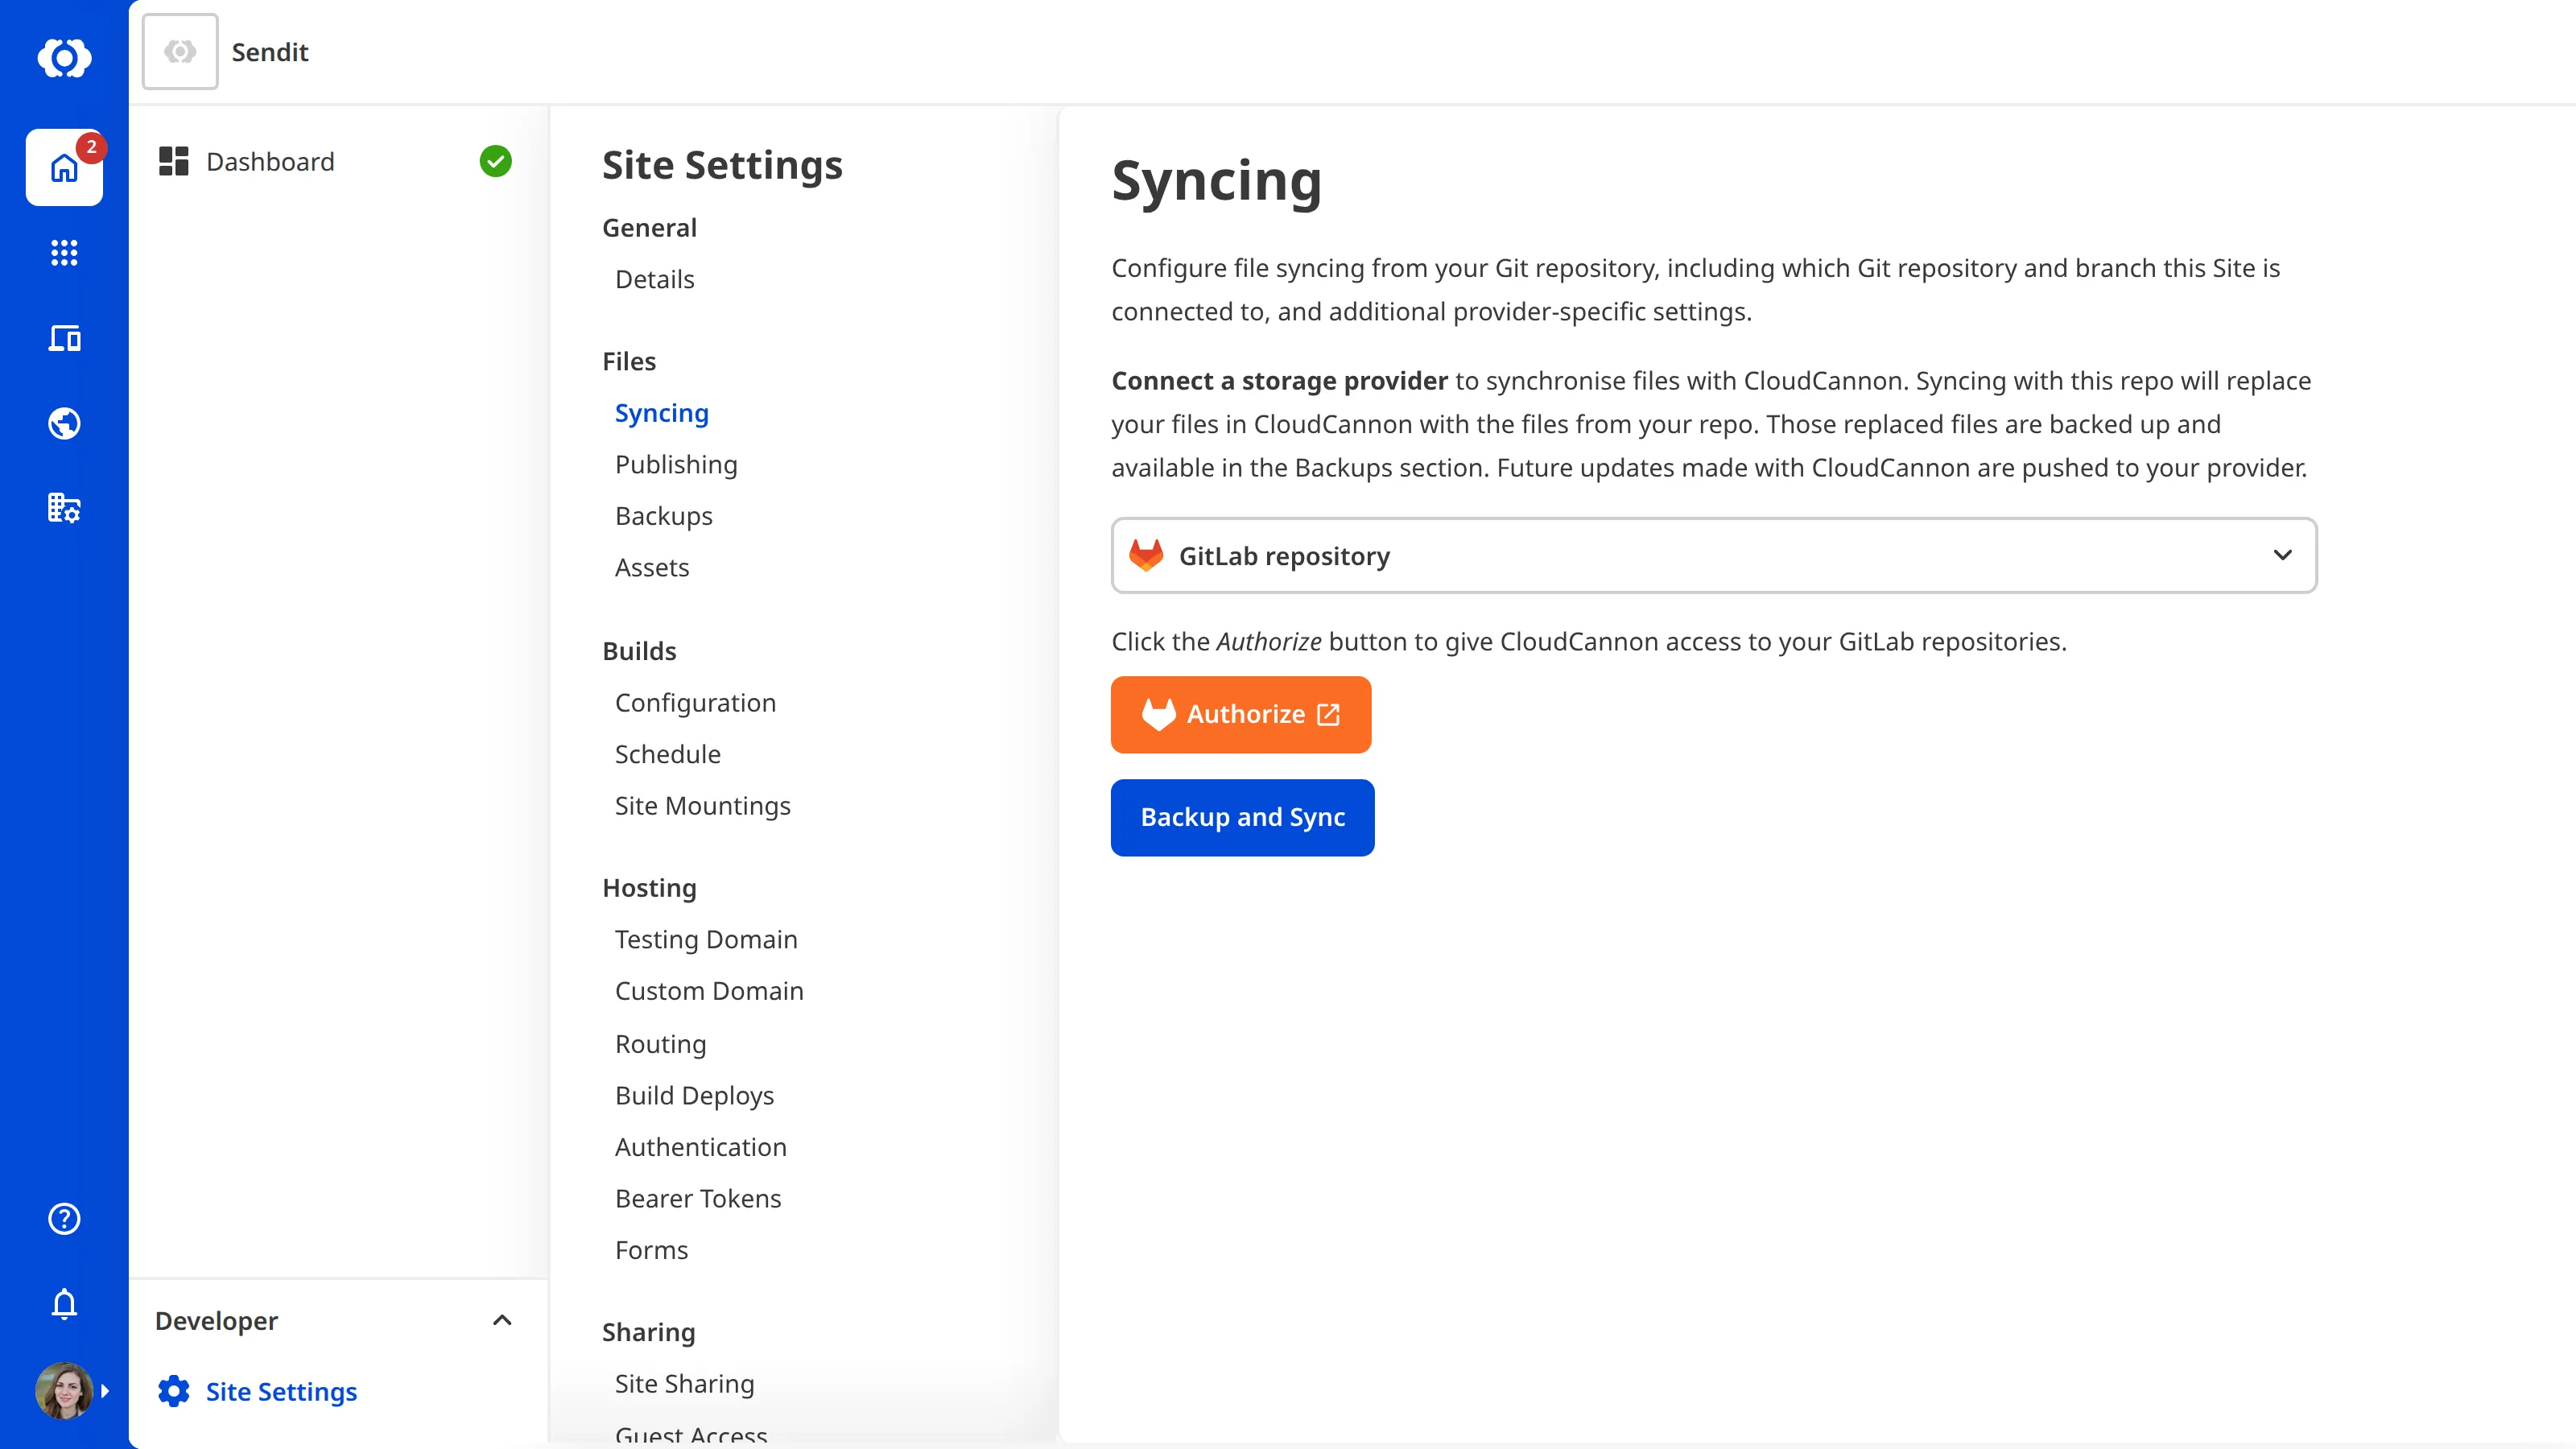
CloudCannon will open the Connect to GitLab modal, where you can choose one of two authentication methods. The same options appear on the Authentication tab of the GitLab page under Org Settings The settings page for a CloudCannon Organization, where organization administrators can manage organization-wide settings, including billing, team permissions, integrations, branding, and security policies. You can access this page using the Organization Settings link in the App Sidebar.Org Settings
Authenticate with your GitLab account#
When you authenticate with your GitLab user account, your CloudCannon Organization A workspace in CloudCannon that groups together Sites, Organization Members, and shared resources. It is also the unit CloudCannon bills for. You can define permissions for your Organization, controlling the access each Organization Member has to resources on CloudCannon. You can create and be a part of multiple Organizations.Organization
To authenticate with your GitLab user account:
- Select the Connect your GitLab account option under Authentication method in the Connect to GitLab modal.
- Click the Authenticate with GitLab button. CloudCannon will redirect you to GitLab.
- Log in to your GitLab account.
- Authorize CloudCannon to access your GitLab account.
GitLab will redirect you back to CloudCannon, where you can select a Git Repository to connect.
Authenticate with a group access token#
Alternatively, you can create a group access token in GitLab and save that token in CloudCannon. A group access token gives your CloudCannon Organization access to all the resources scoped to that token.
To create and configure a token, please read GitLab's documentation on group access tokens.
For full functionality in CloudCannon, your group access token should have at least the Maintainer role and the api, read_api, read_repository, and write_repository scopes.
To authenticate with a group access token:
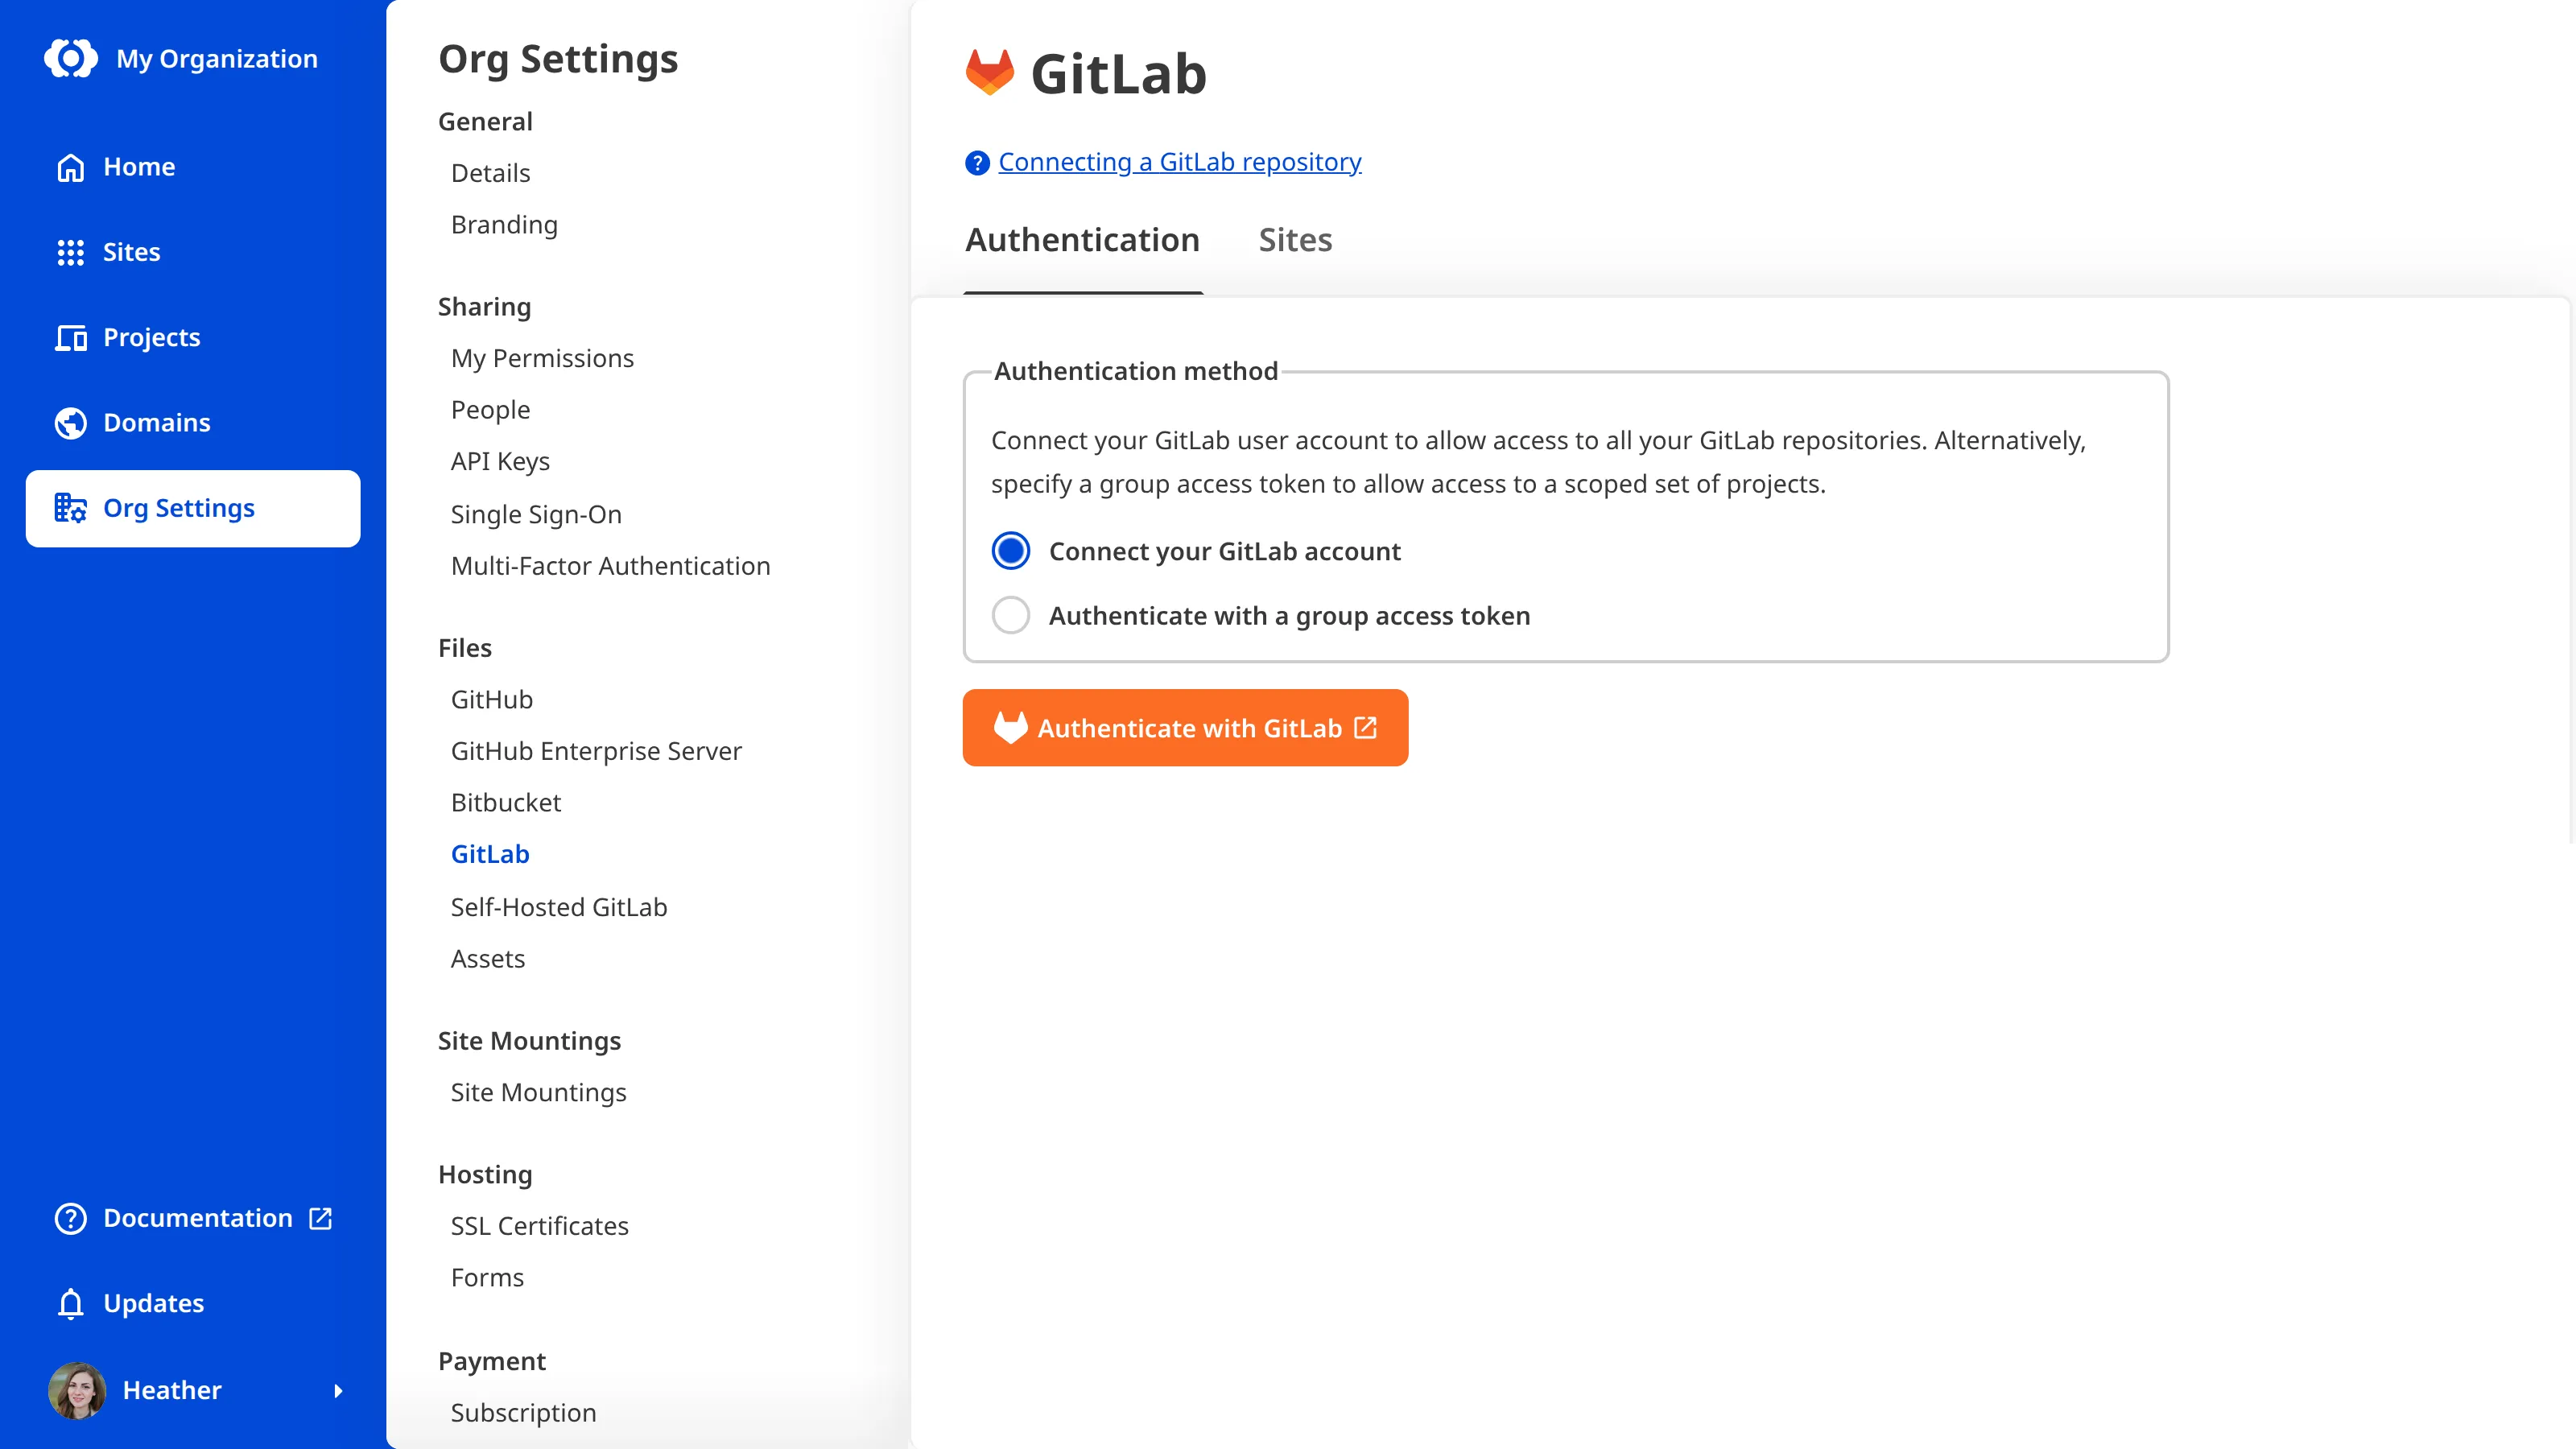
- Select the Authenticate with a group access token option under Authentication method in the Connect to GitLab modal.
- Paste your token into the Group Access Token field.
- Enter the expiry date of your token in the Expiry Date field. The date must be in the future.
- Click the Save and authenticate button.
CloudCannon will save your token and authenticate GitLab.
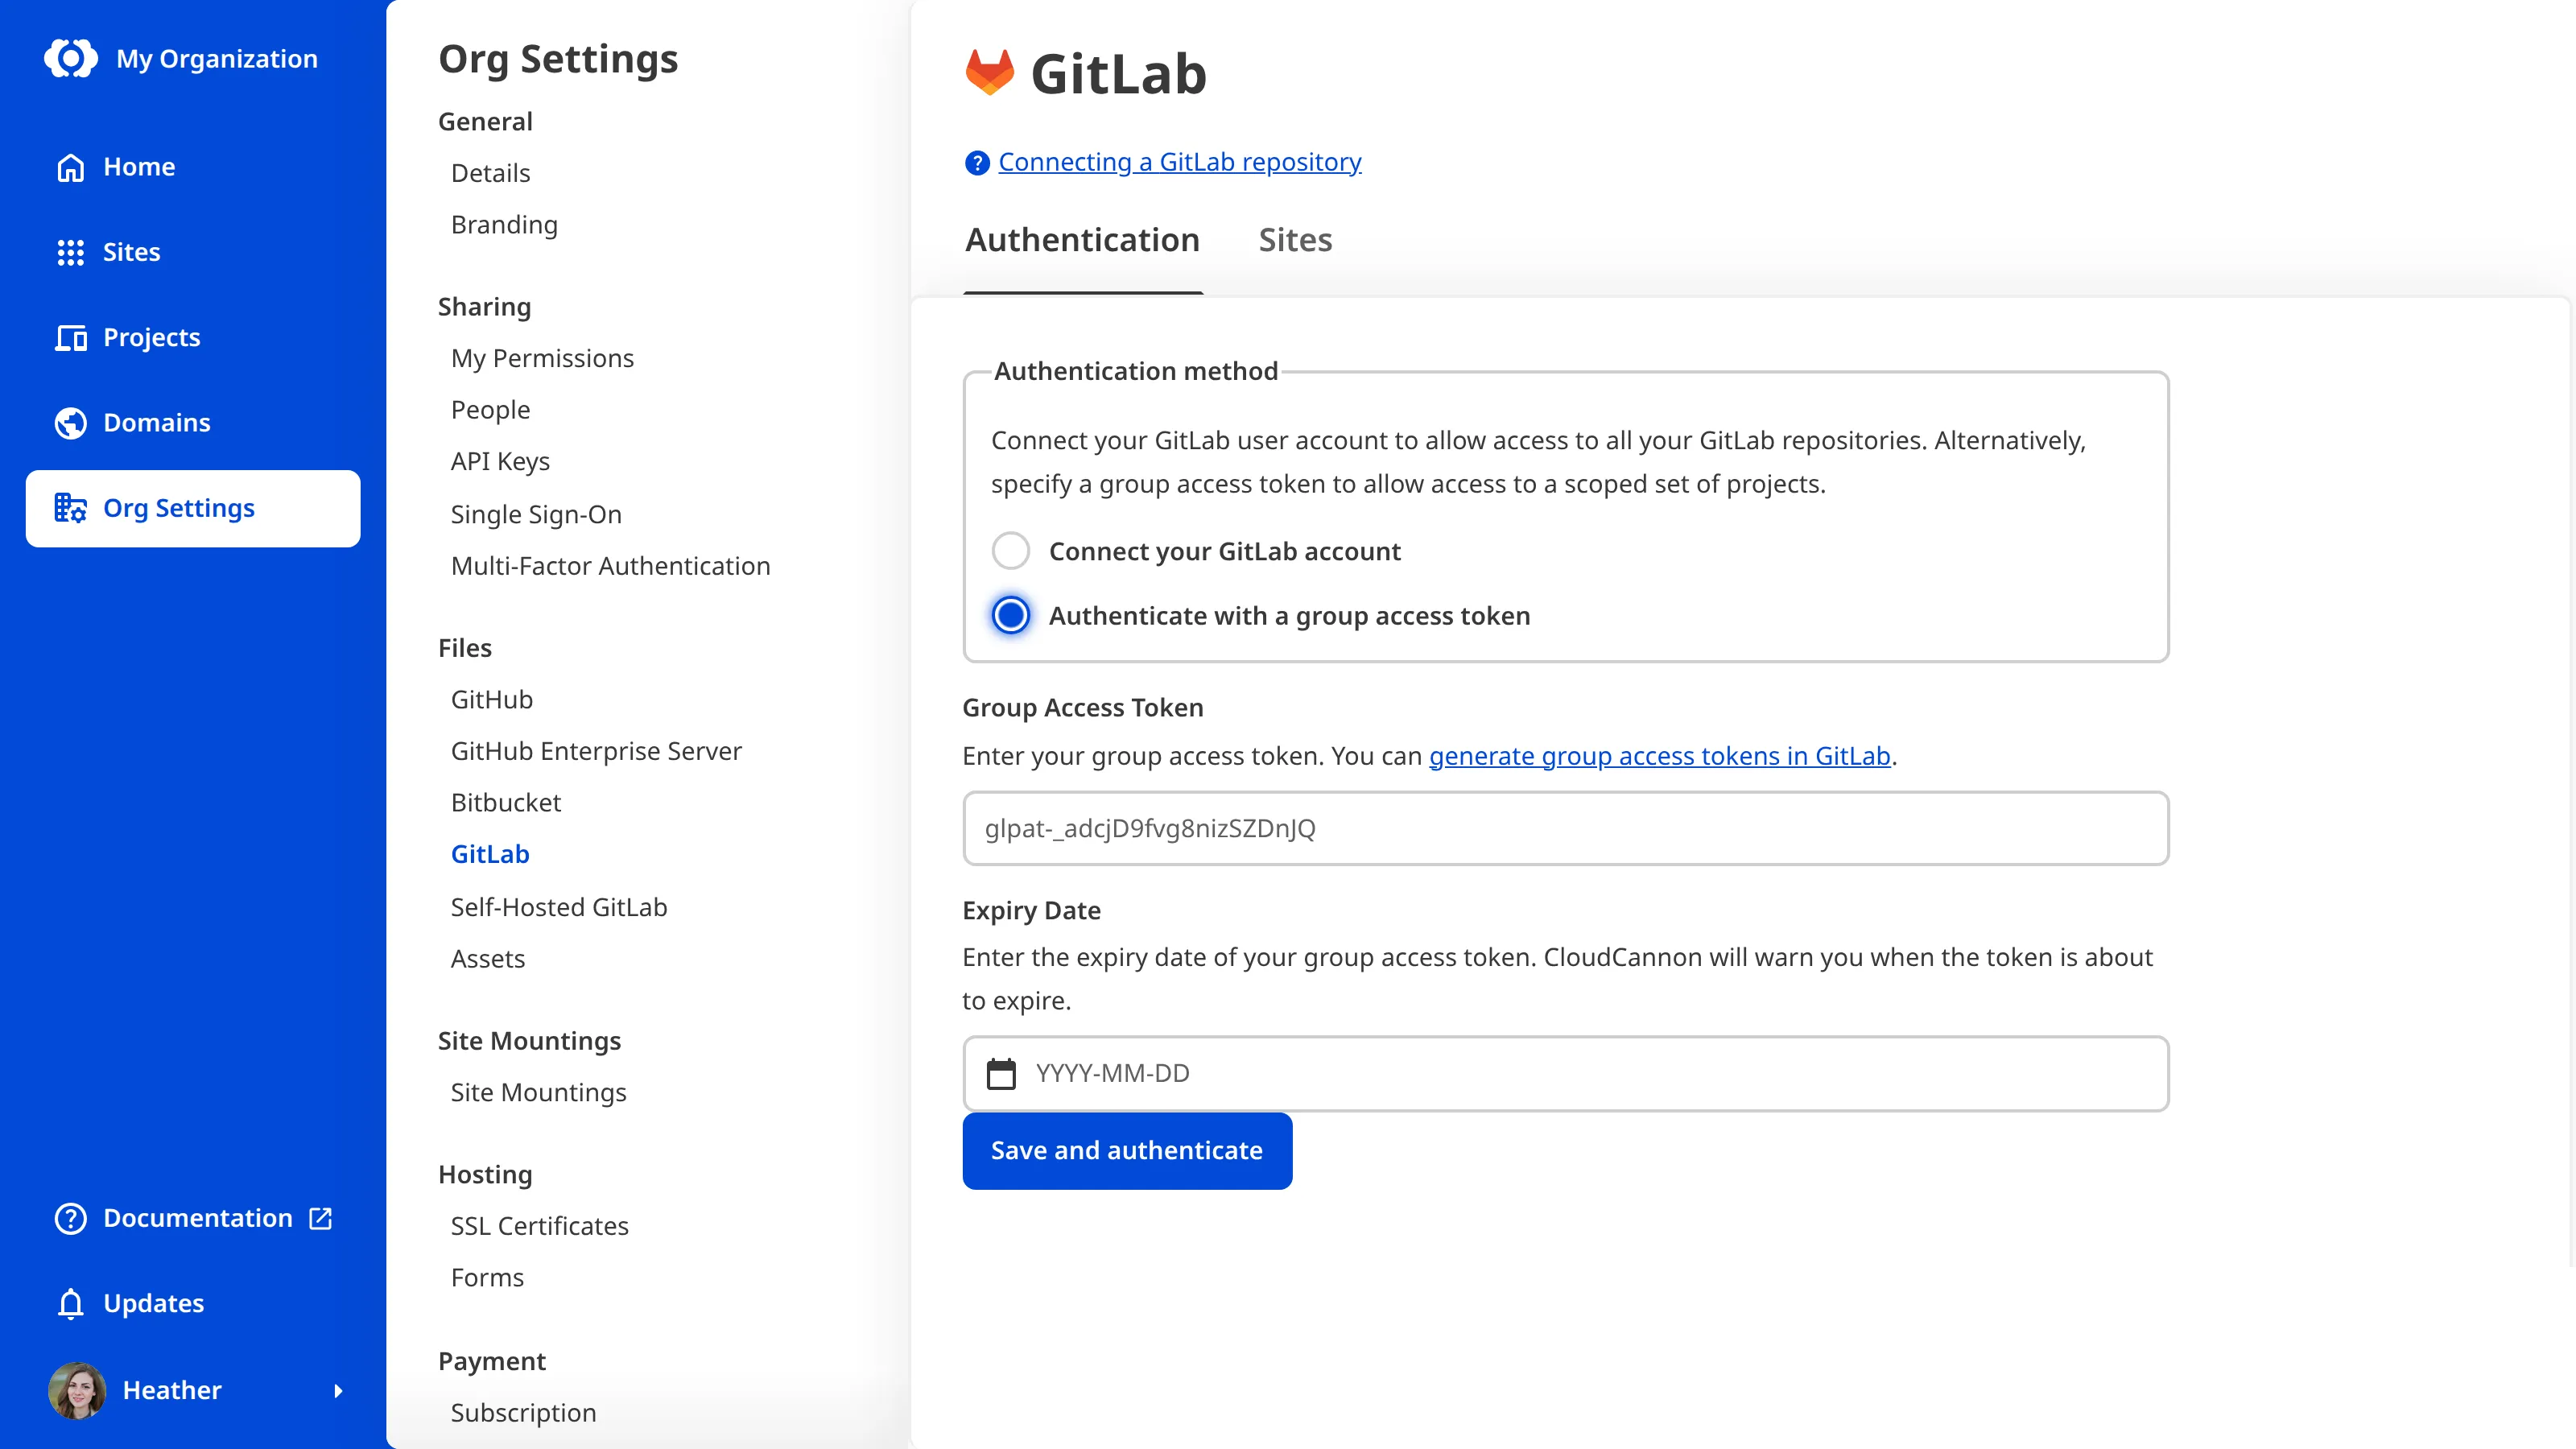
Once you've authenticated with a group access token, the Authentication tab on the GitLab page under Org Settings shows the token's bot account, labeled Authenticated with access token, and the date the token expires. CloudCannon will email the members of the Owners Permission Group in your Organization shortly before the token expires. To replace an expired or revoked token, unauthenticate GitLab, then authenticate again with a new token.

Select your Git Repository and branch#
Once you've authenticated, you can choose the GitLab Git Repository and branch to connect to your Site. Under the Branch Setup heading, you can sync from a branch that already exists in your Git Repository, or have CloudCannon create a new branch from a source branch. If your Git Repository has no branches, CloudCannon will show a link to add one in GitLab.
When you click the Backup and Sync button, CloudCannon will replace any existing files on your Site with the contents of the selected Git Repository. To cancel the process, exit the page instead.
To connect your Git Repository and branch:
- Select your Git Repository from the Repository dropdown.
- Choose the Use an existing branch option or the Create a new branch option under the Branch Setup heading.
- Pick your branch from the Branch dropdown. If you are creating a new branch, pick the branch to copy from the Source branch dropdown and enter a name in the New branch name field.
- Click the Backup and Sync button.
CloudCannon will connect your Site to your GitLab Git Repository. CloudCannon pulls in any changes you push to your Git Repository, and automatically commits and pushes any changes you make in CloudCannon.