An Access Key A personal credential that lets programs act in CloudCannon on your behalf, such as the CloudCannon CLI or a program built with the CloudCannon SDK. An Access Key is tied to your user account and inherits your full account access across every Organization and Site you belong to. CloudCannon shows the secret only once, when you create the key, and you manage your keys on the Access Keys page in your Account Settings.Access Key
An Access Key inherits your account's full permissions, and CloudCannon shows your Access Key Secret only once. Store the secret somewhere safe, such as a password manager, and revoke the key if it is ever exposed.
There are two ways to create an Access Key. You can create one yourself in Account Settings and supply it to your program, or, if you are setting up the CloudCannon CLI, you can let the CLI create and store one for you through your browser.
You can only make an Access Key for your own account. Access Keys should never be shared.
Create an Access Key through your Account Settings#
To create an Access Key in the app:
- Click on your Avatar at the bottom of the App Sidebar and select Account Settings from the Account Menu.
- Navigate to the Access Keys page.
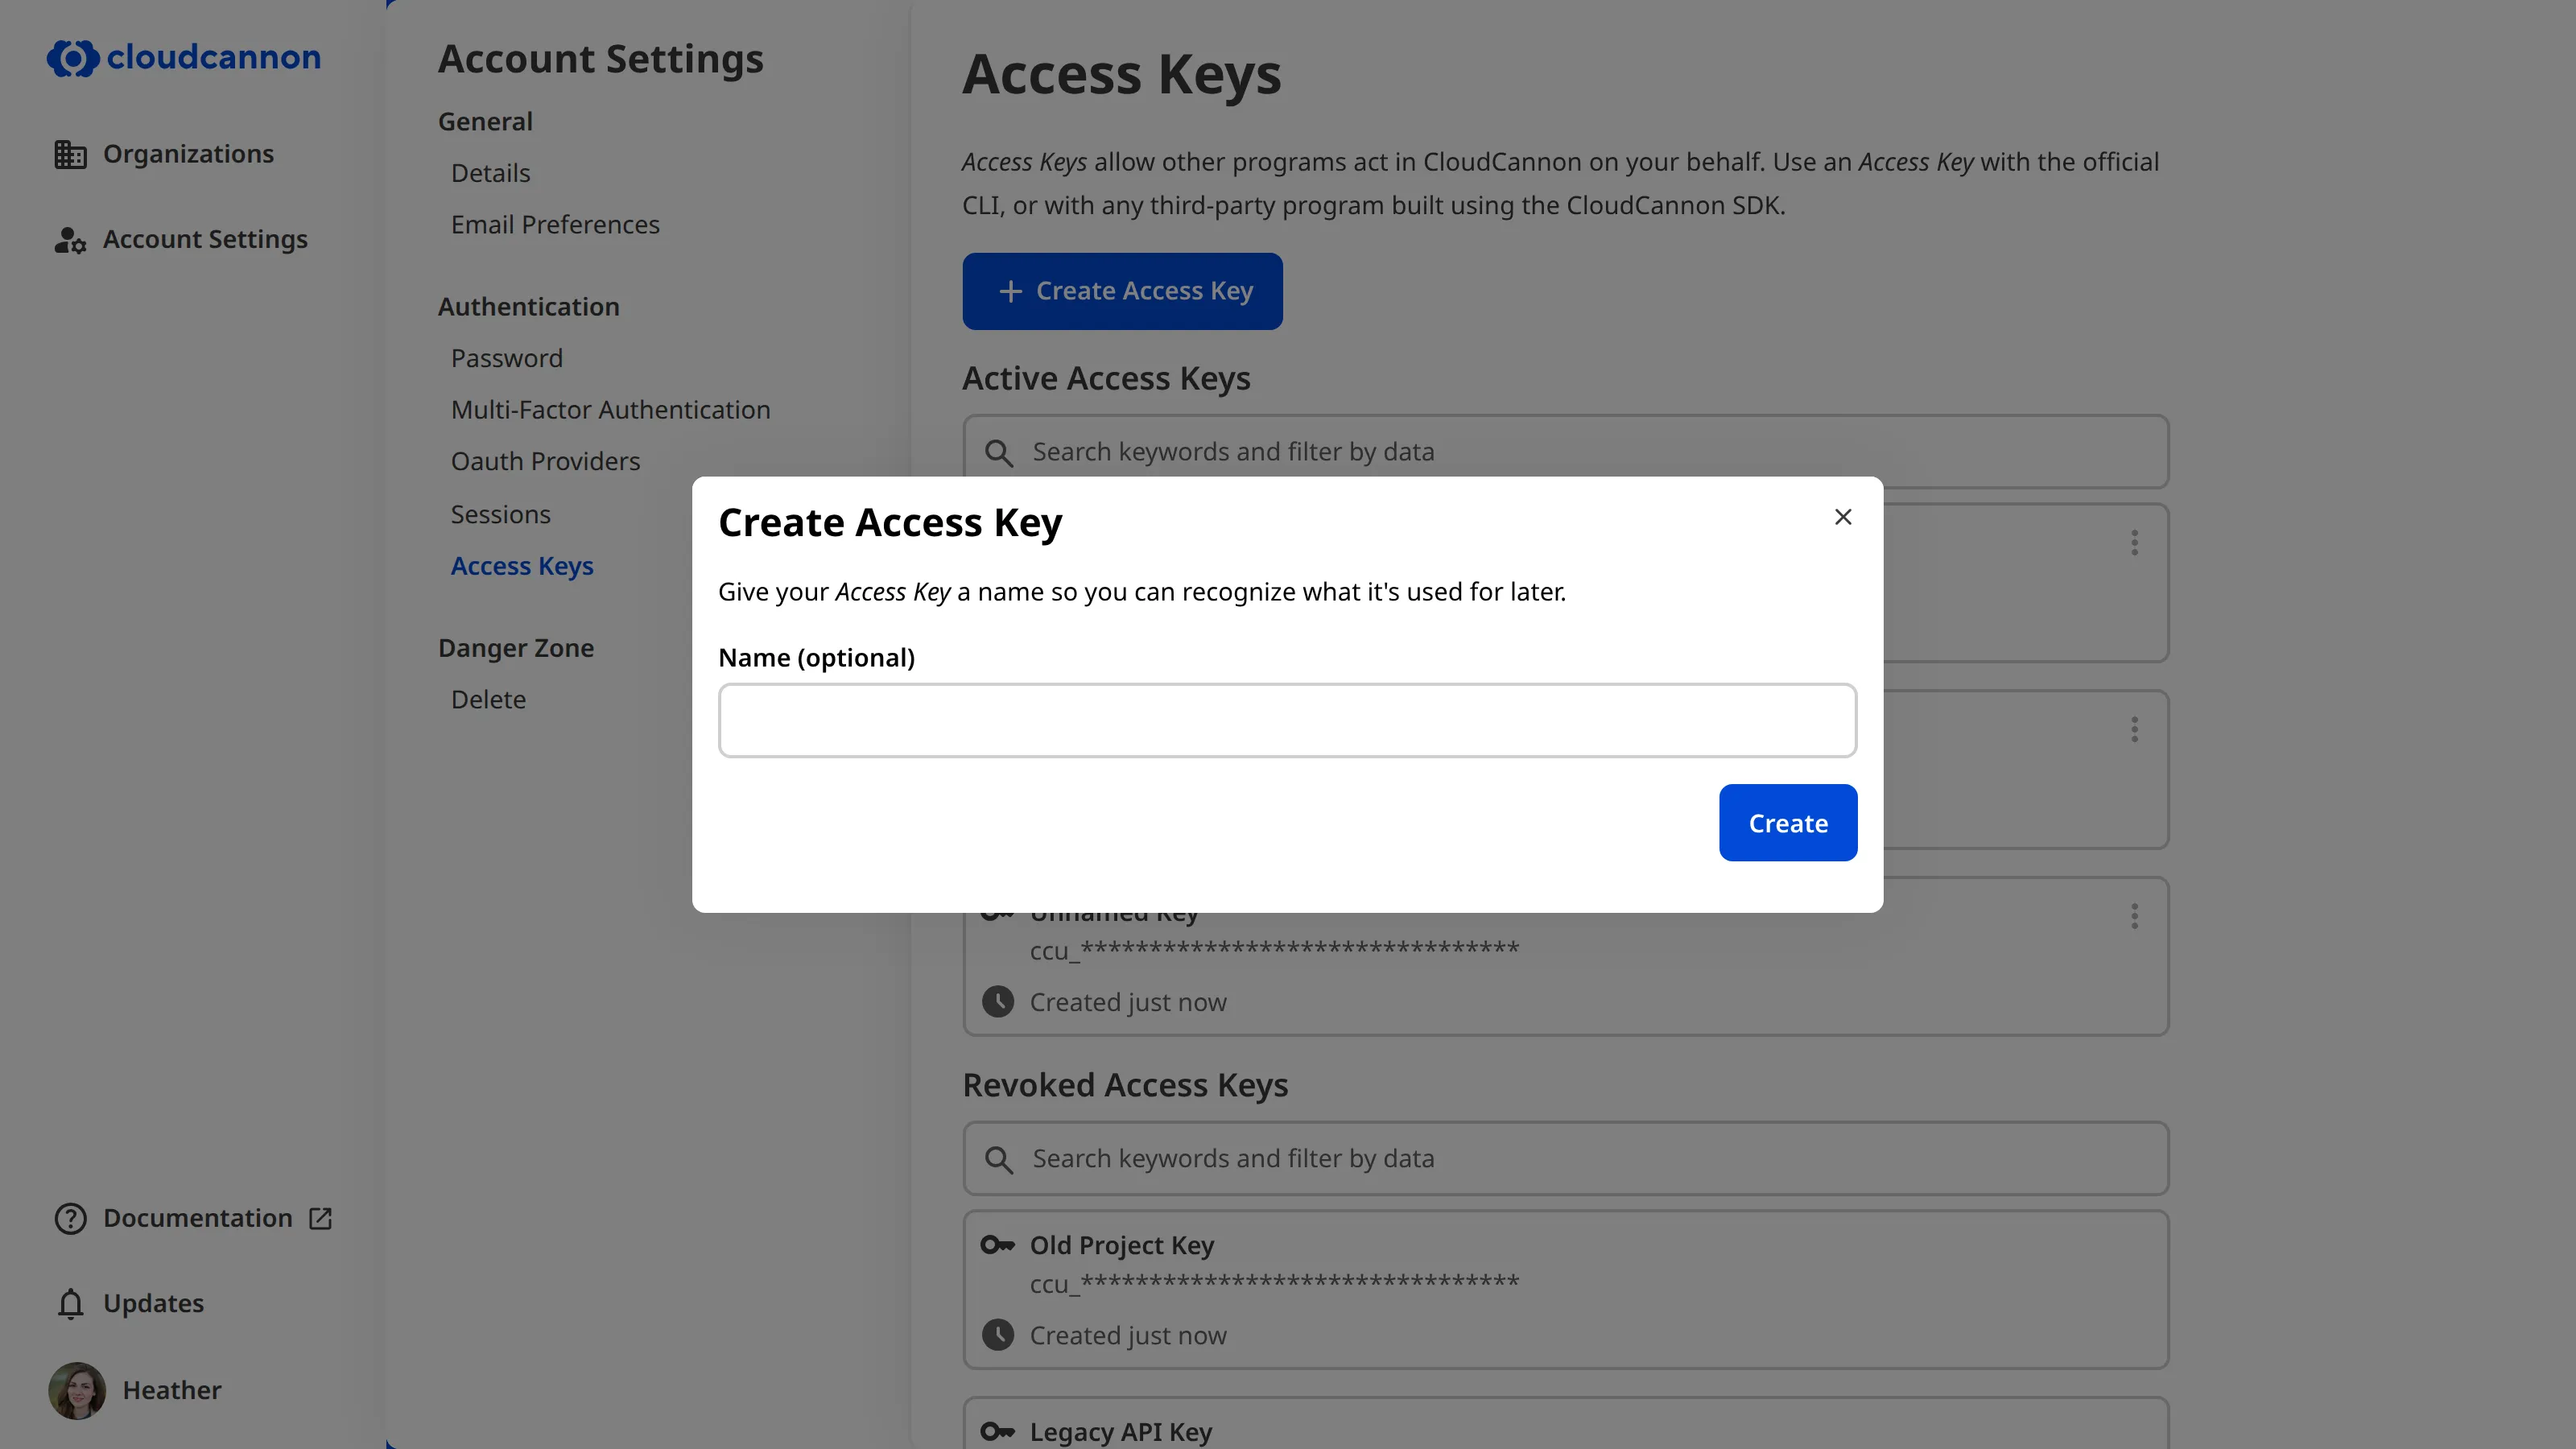
- Click the Create Access Key button. CloudCannon will open the Create Access Key modal.
- Optionally, enter a name for your Access Key in the Name field so you can recognize which program uses it later.
- Click the Create button.
- Copy your Access Key ID and Access Key Secret using the copy button beside each value, then store them somewhere safe.
- Click the Done button to close the modal.
The Access Key is now ready for use. Your new key appears in the Active Access Keys list, where CloudCannon shows its name, its Access Key ID, and the date you created it.
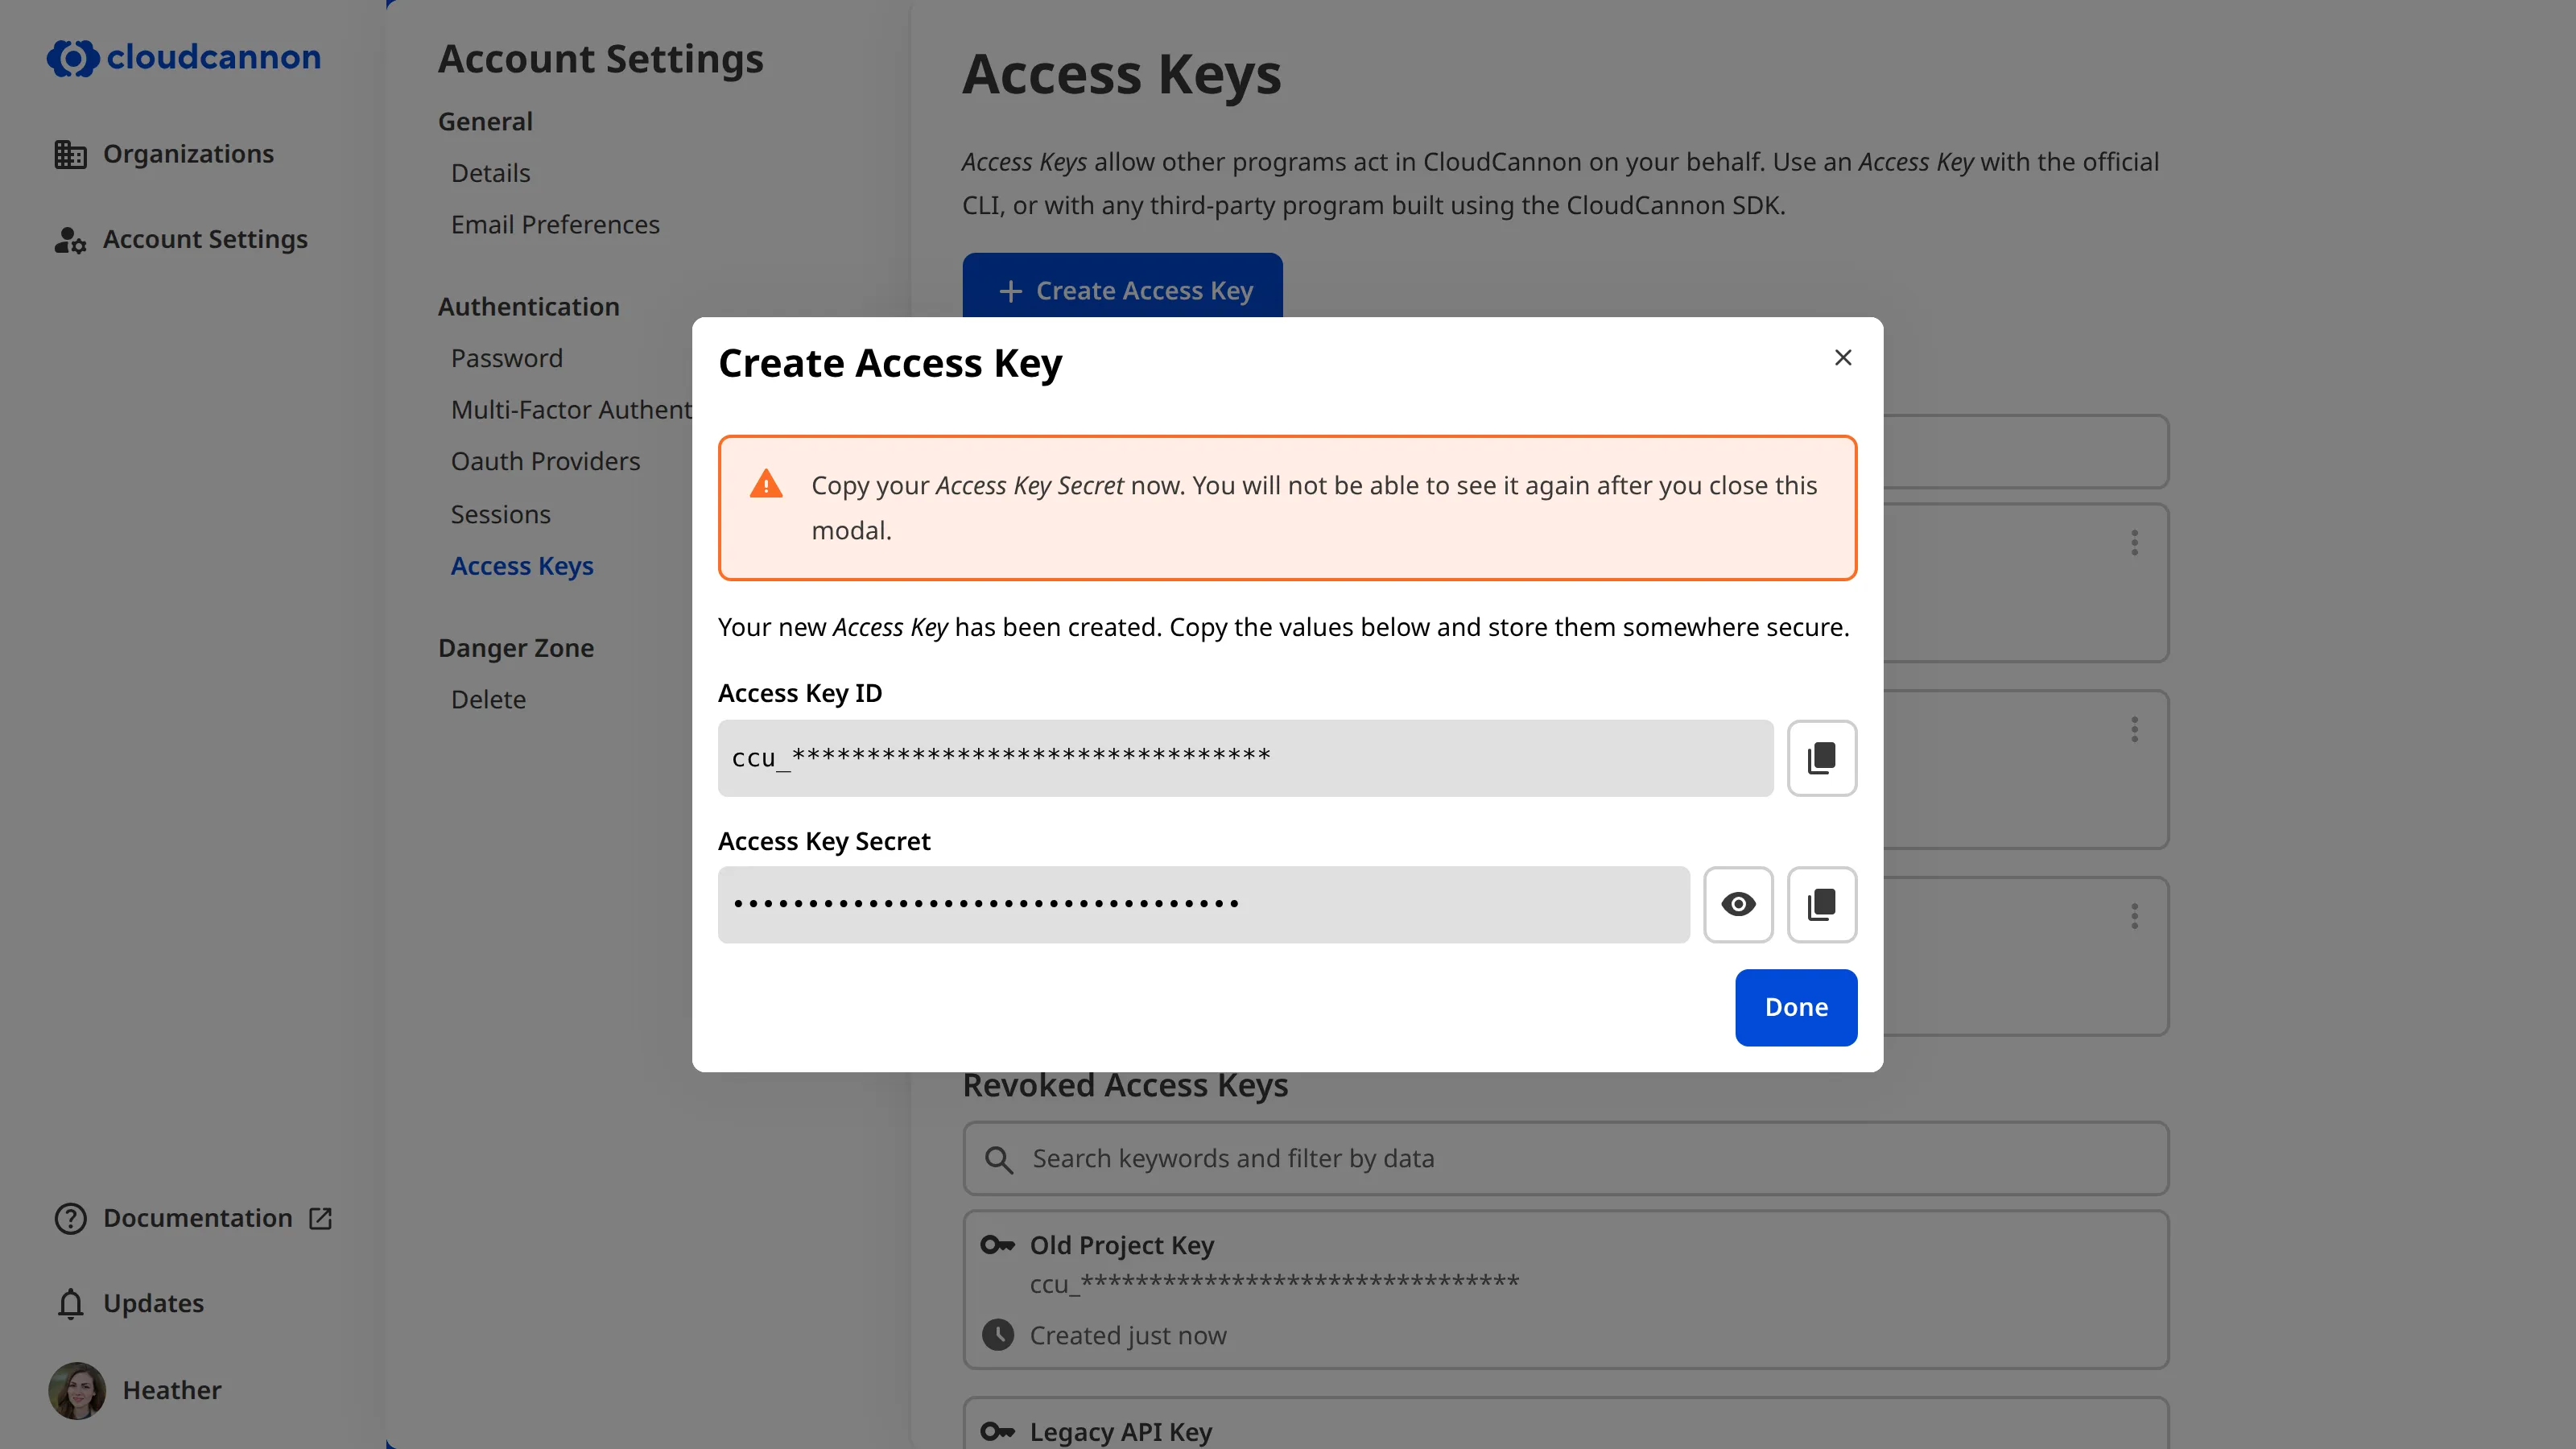
Because CloudCannon shows the Access Key Secret only once, you cannot retrieve it after you close the Create Access Key modal. If you lose the secret, revoke the key and create a new one.
Log in with the CloudCannon CLI#
If you are setting up the CloudCannon CLI, you do not need to create an Access Key through the app. The CLI can create one for you through your browser and configure itself automatically.
These instructions assume you already have the CloudCannon CLI installed.
To create an Access Key with the CloudCannon CLI:
- Run the
cloudcannon logincommand in your terminal. The CLI will print a URL and wait for you to paste your authorization code. - Open the URL shown in your terminal (
https://app.cloudcannon.com/cli/login) in your browser. Log in to CloudCannon if you are not already logged in. - On the Authorize the CloudCannon CLI page, review what the CLI will be able to do, then click the Authorize CLI button. CloudCannon will create an Access Key named CloudCannon CLI and open the CloudCannon CLI Authorized page.
- On the CloudCannon CLI Authorized page, click the Copy to Clipboard button to copy your authorization code. You can click the visibility button to reveal the code before you copy it.
- Paste the authorization code into your terminal.
The CLI stores your credentials and can now act on your behalf. CloudCannon adds a matching Access Key named CloudCannon CLI to your Active Access Keys list, which you can revoke at any time.
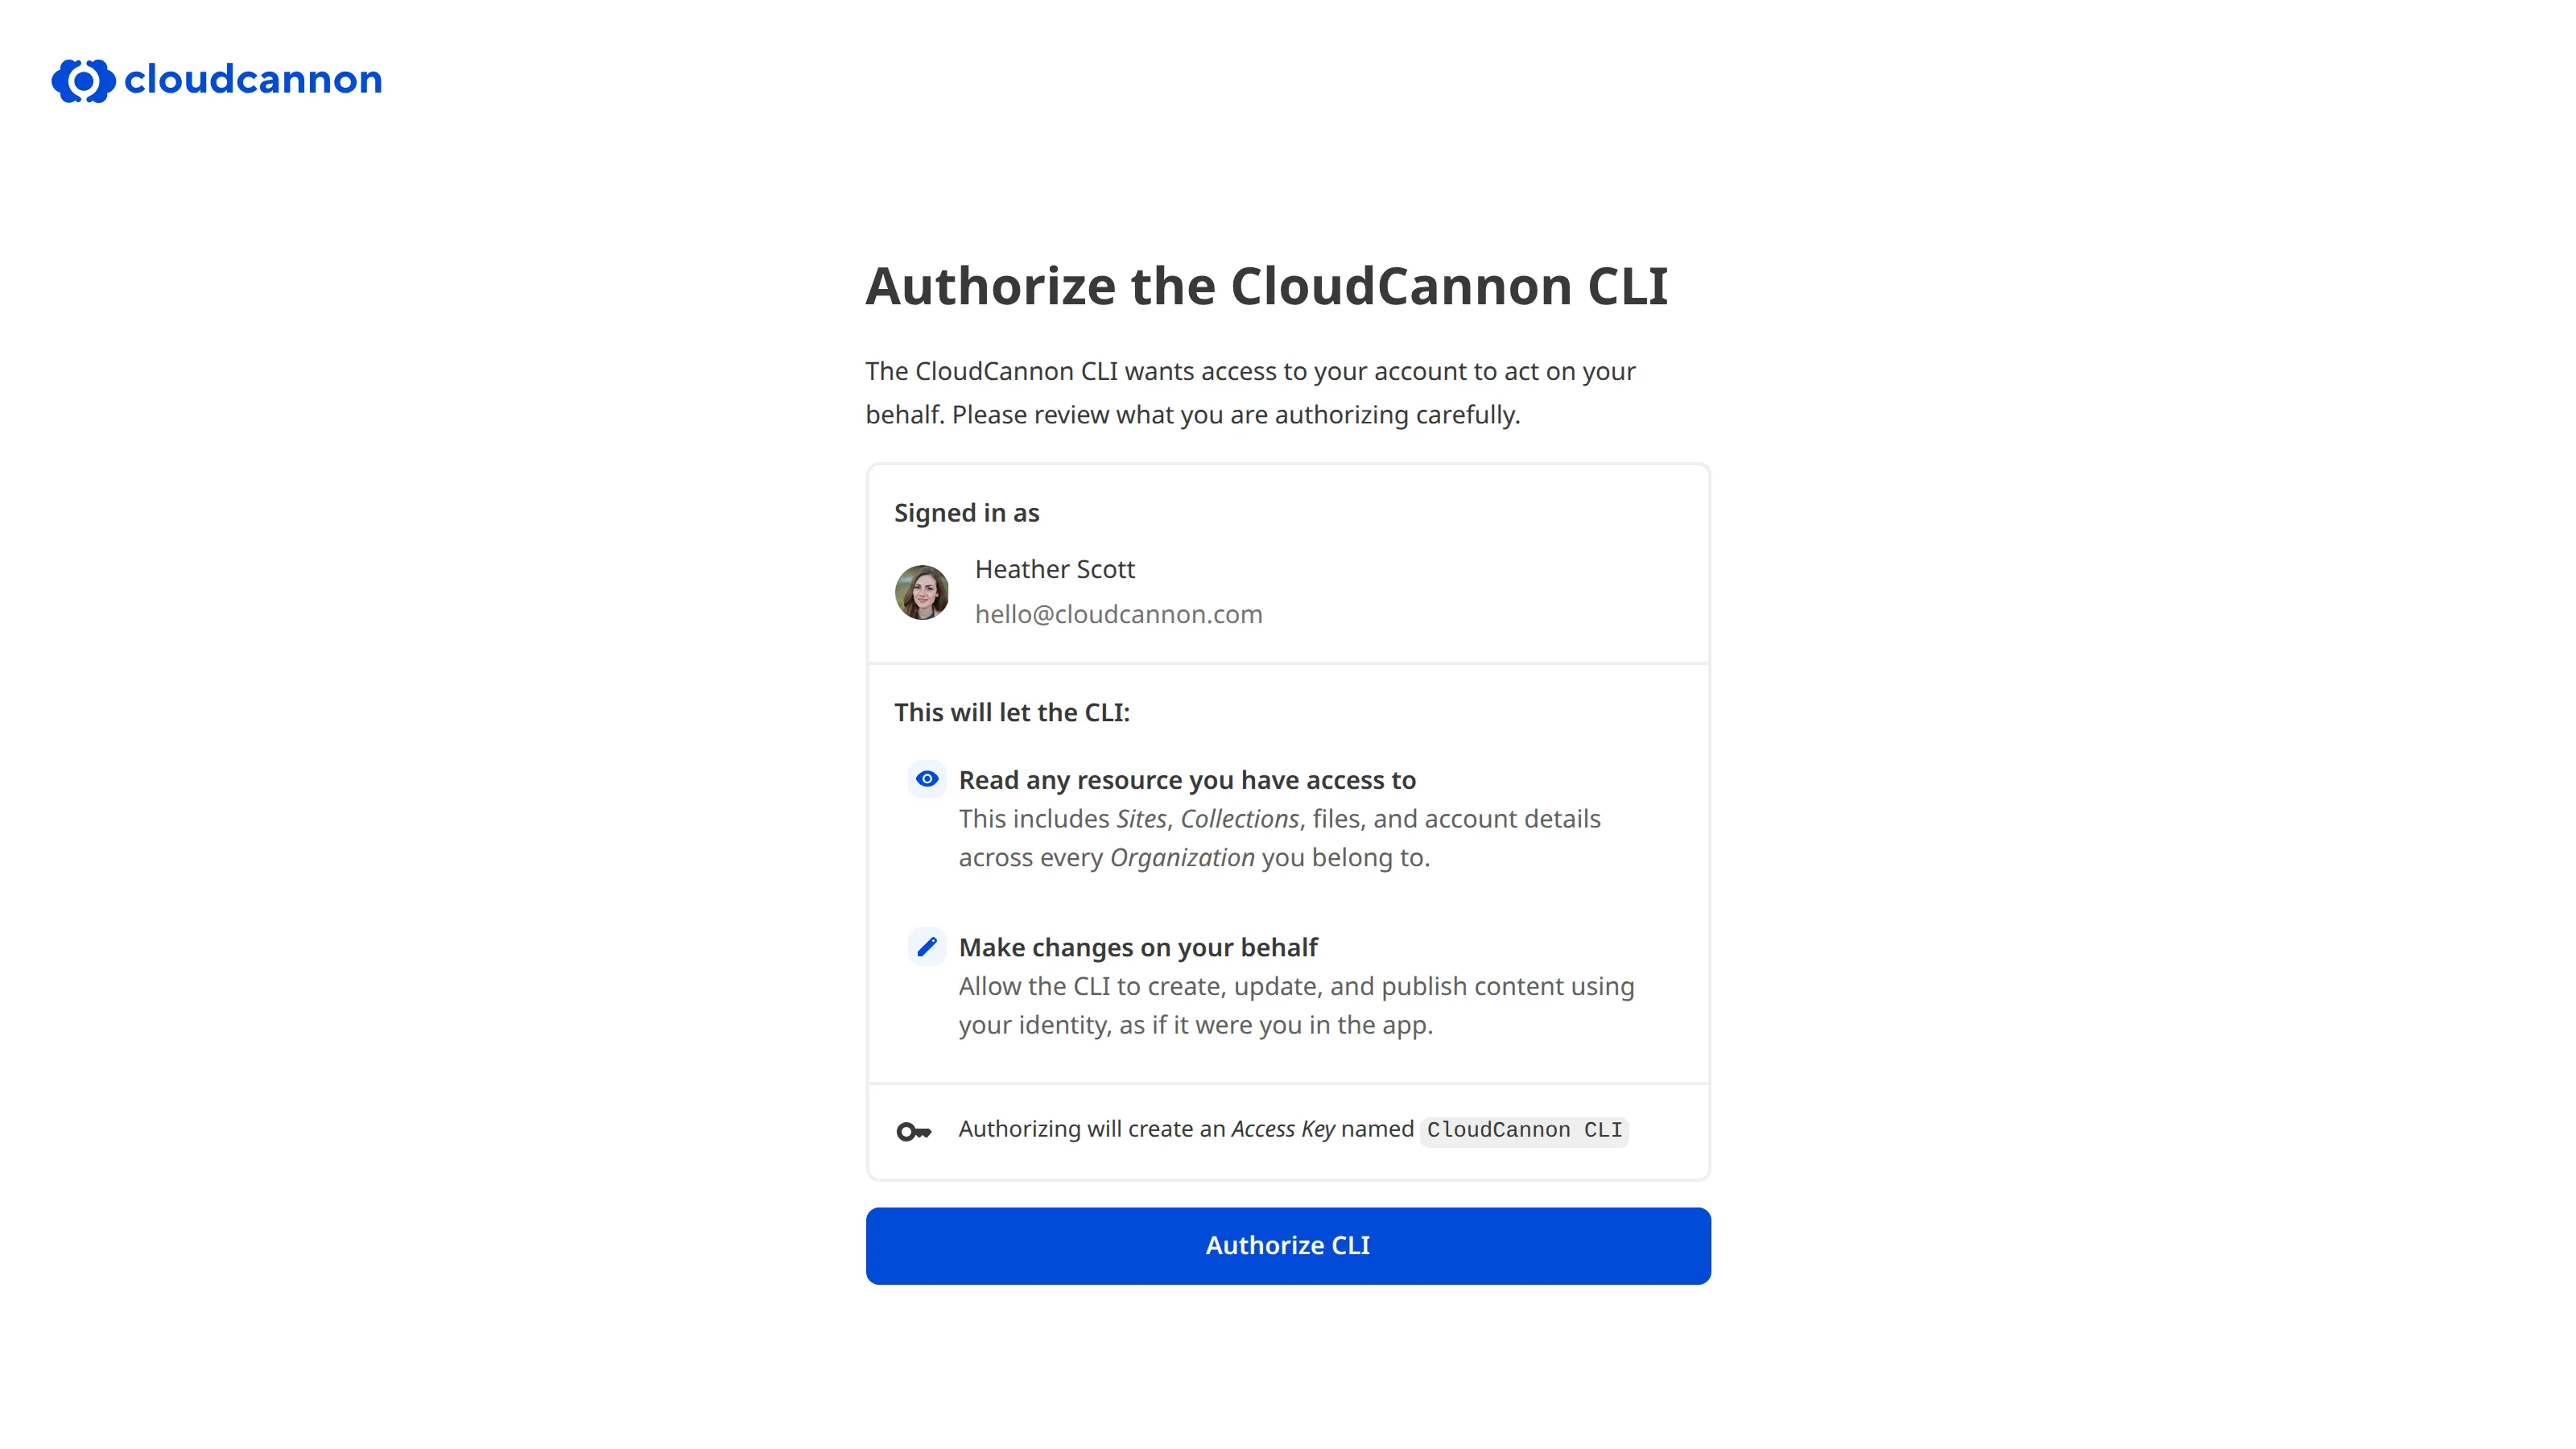
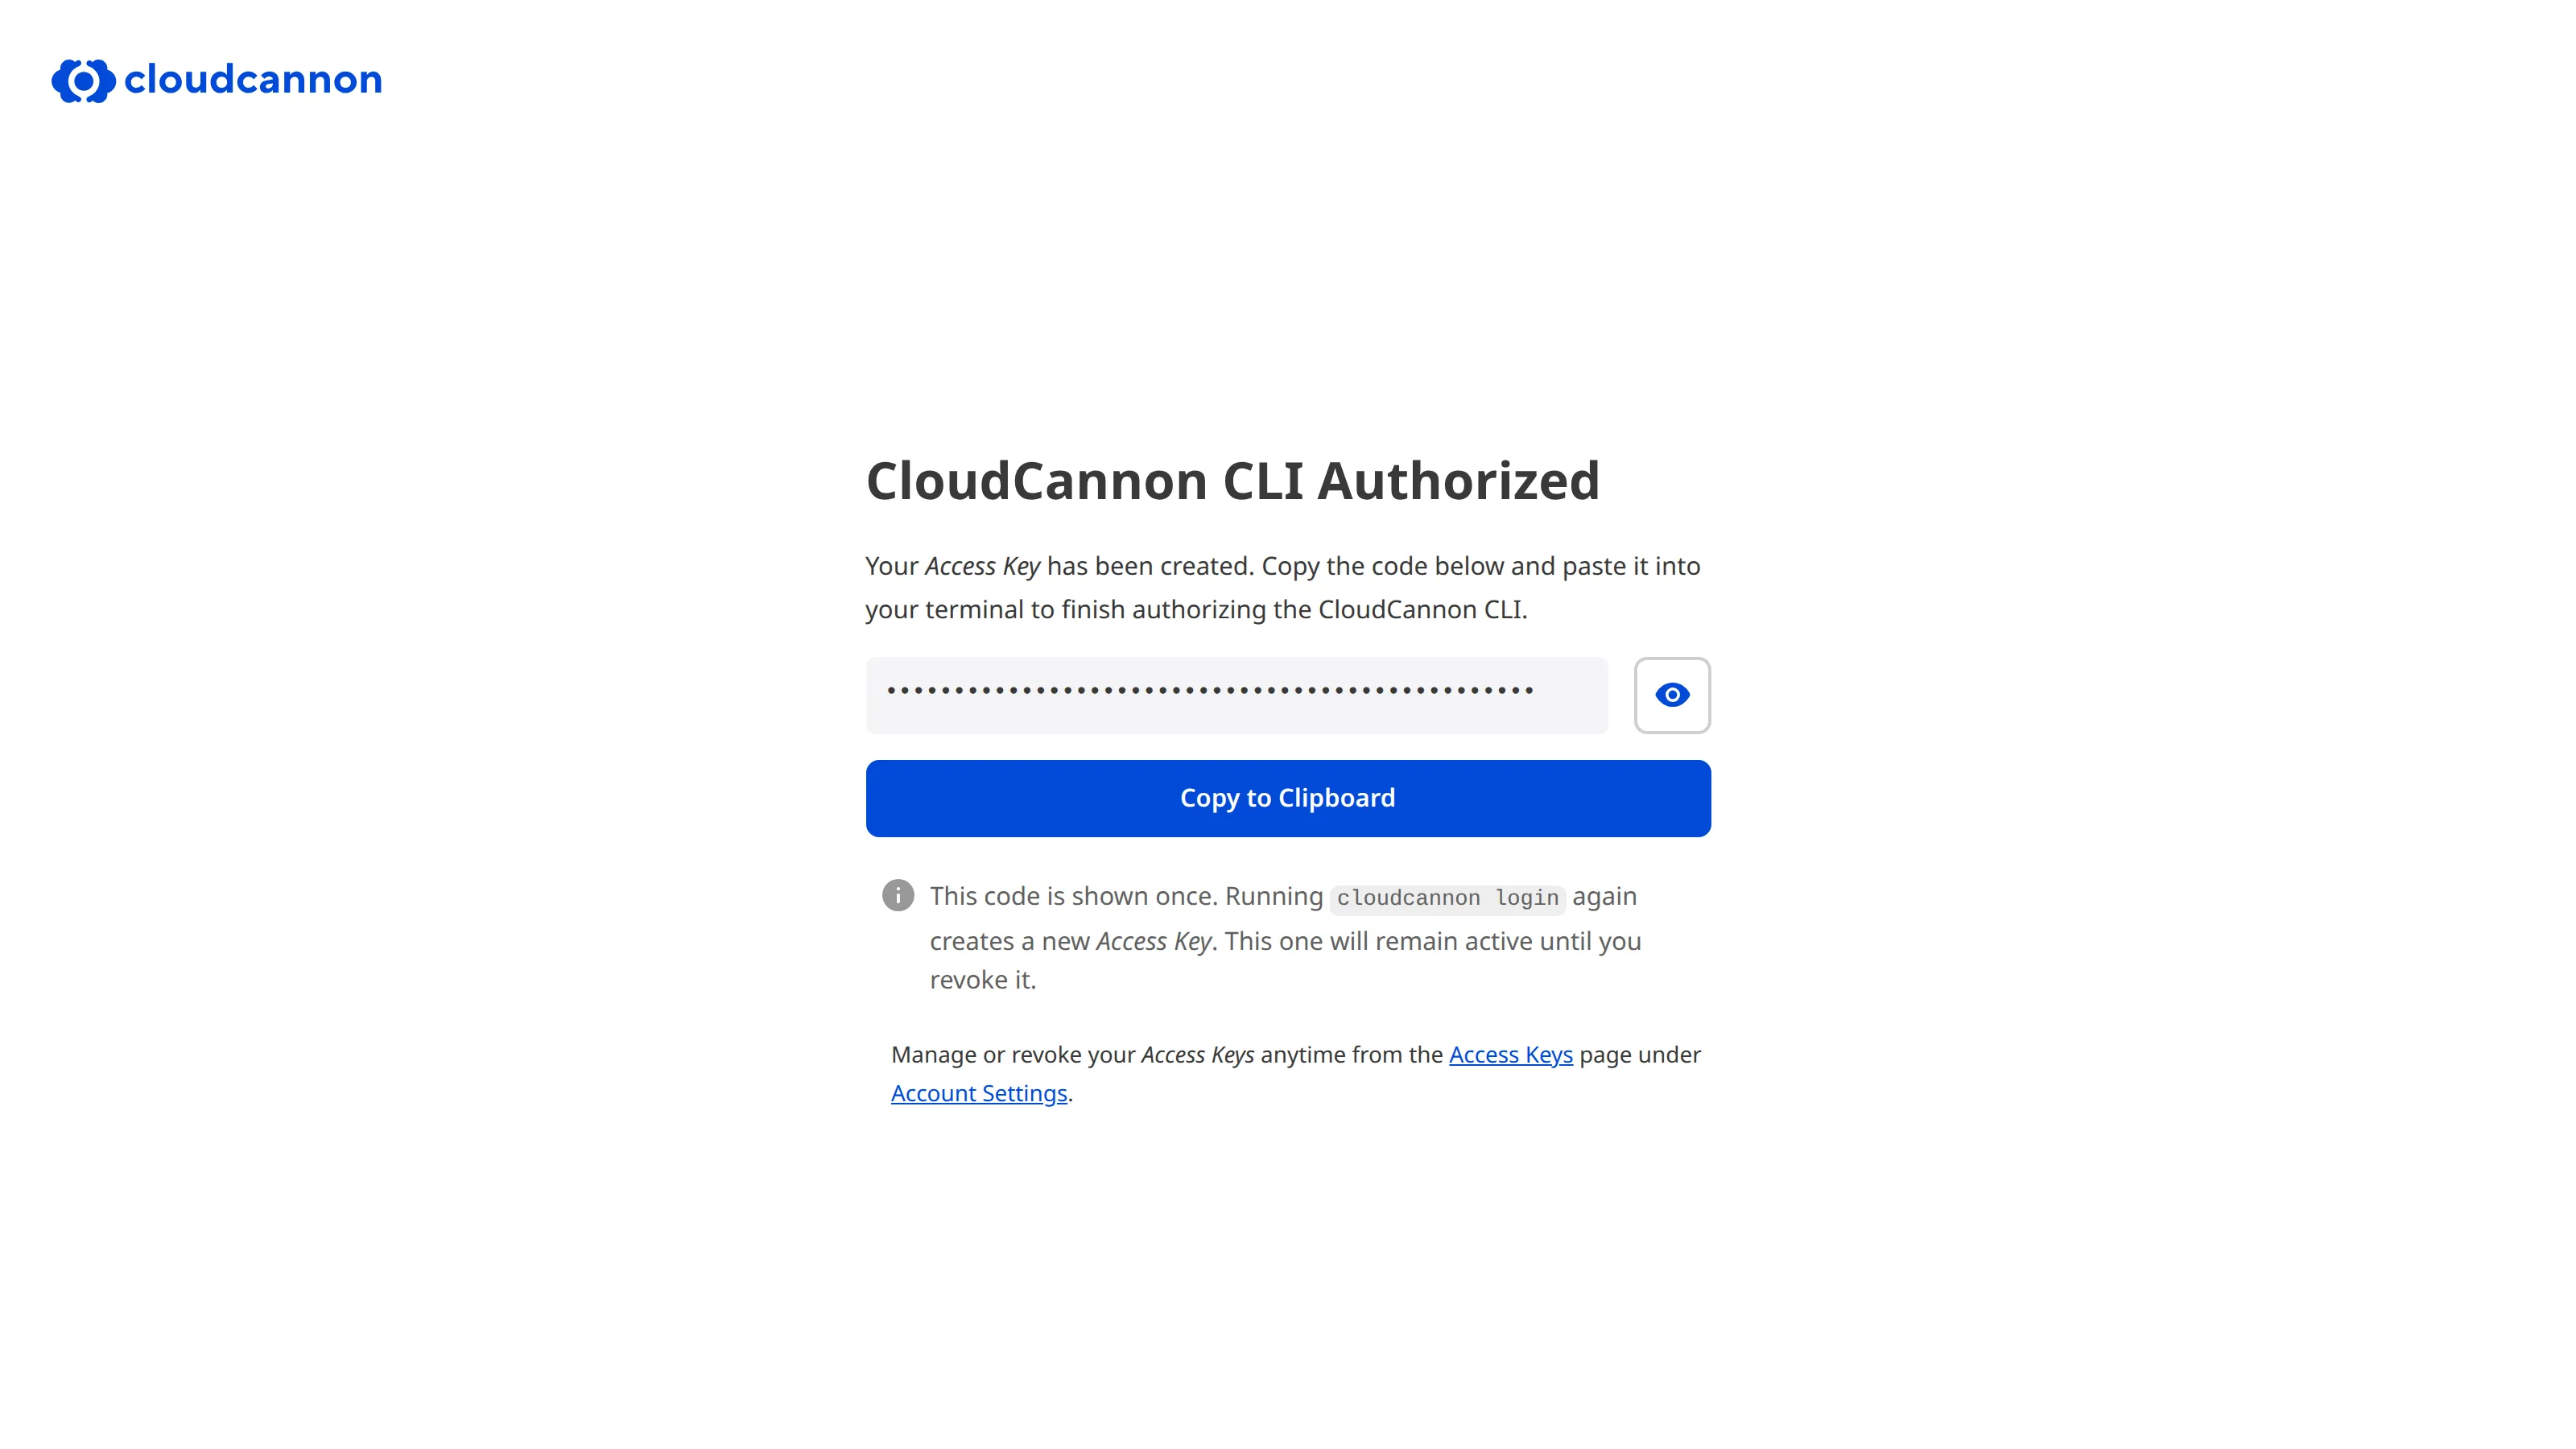
Each time you log in with the CLI, CloudCannon creates a new Access Key. In general, you will only need to log in once per machine. However, if you log in repeatedly, you will see several CloudCannon CLI entries in your Active Access Keys list, and you can revoke any you no longer need.
Revoke an Access Key#
When a program no longer needs access, or when you suspect the Access Key Secret has been exposed, you can revoke the key. CloudCannon will reject any request signed with a revoked key.
To revoke an Access Key:
- Click on your Avatar at the bottom of the App Sidebar and select Account Settings from the Account Menu.
- Navigate to the Access Keys page.
- Identify the key you want to remove in the Active Access Keys list and click the Context Menu.
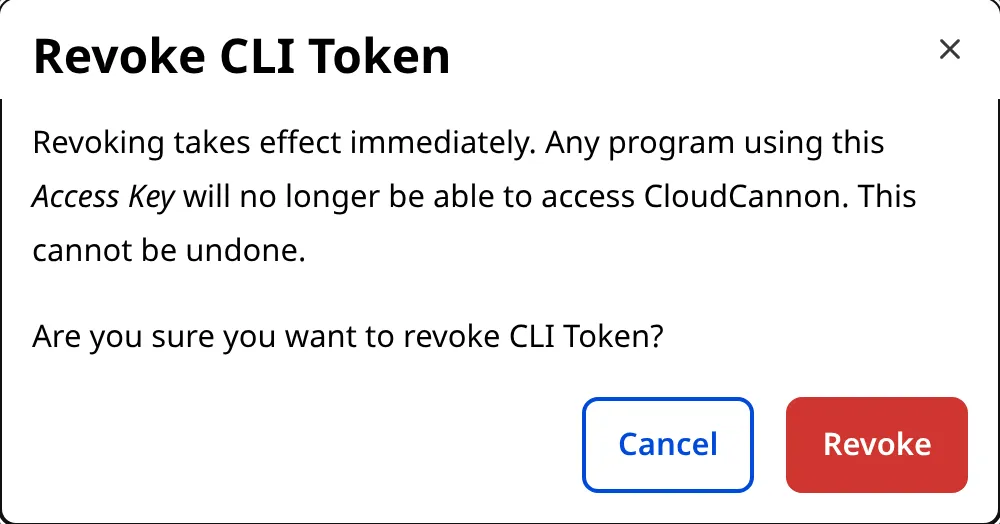
- Select the Revoke option from the Context Menu. CloudCannon will open a confirmation modal.
- Click the Revoke button in the confirmation modal.
The Access Key moves to the Revoked Access Keys list immediately, and CloudCannon rejects any further requests signed with it. CloudCannon deletes revoked keys permanently 30 days after revocation.