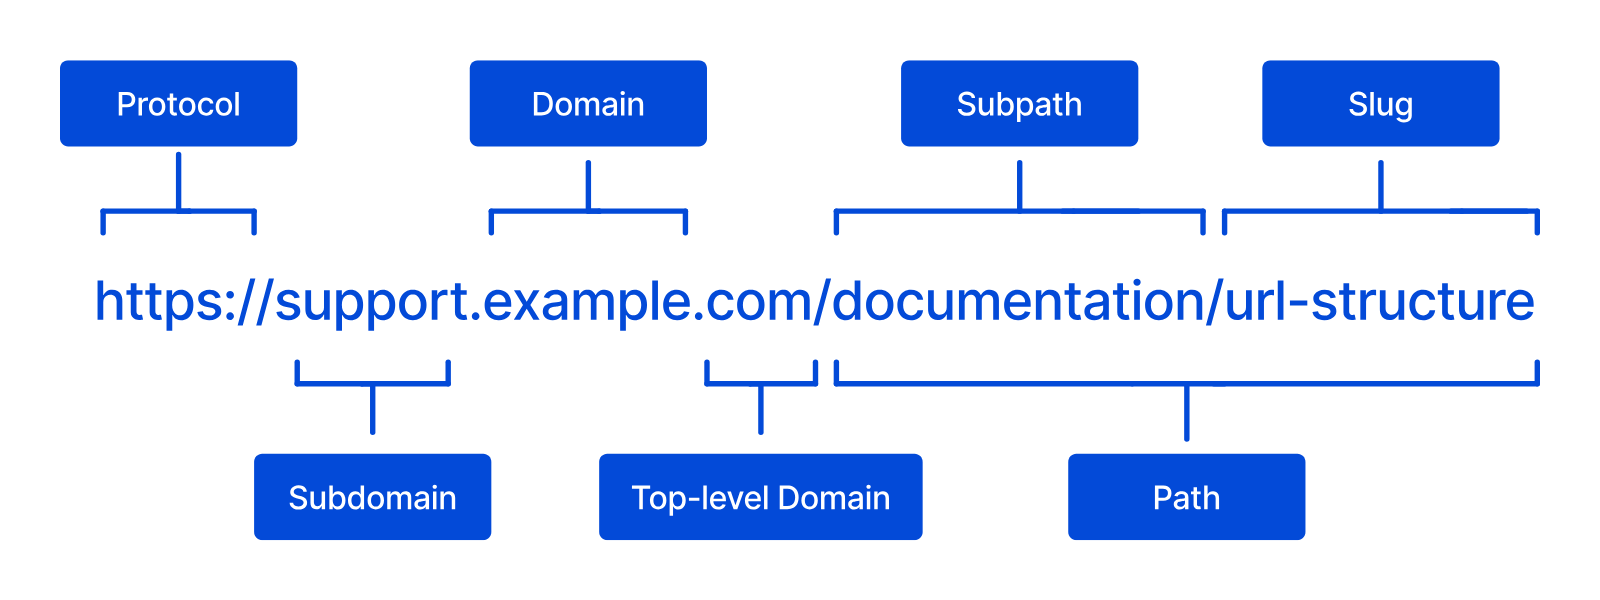
A Custom Domain is a unique address used to identify a website (e.g., cloudcannon.com). If you have connected a Custom Domain to your Organization, you can host your website content at that web address by adding the Custom Domain to your Site.
You can host a CloudCannon Site on the base domain (e.g., example.com), a subdomain (e.g., docs.example.com), or a subpath (e.g., example.com/staff/).

You can configure both a subdomain and a subpath for each Site on CloudCannon, if your configuration requires them.
These instructions assume you have connected a Custom Domain to your Organization and, if you want to host on a subdomain or subpath, that you already have a Site hosted on your base domain.
To add a Custom Domain to your Site:
- Click the Sites button in the App Sidebar. CloudCannon will open the Sites browser.
- Identify the Site to which you want to add a Custom Domain and click on the Site card. CloudCannon will open the Dashboard for that Site.
- Navigate to the Custom Domain page under Site Settings.
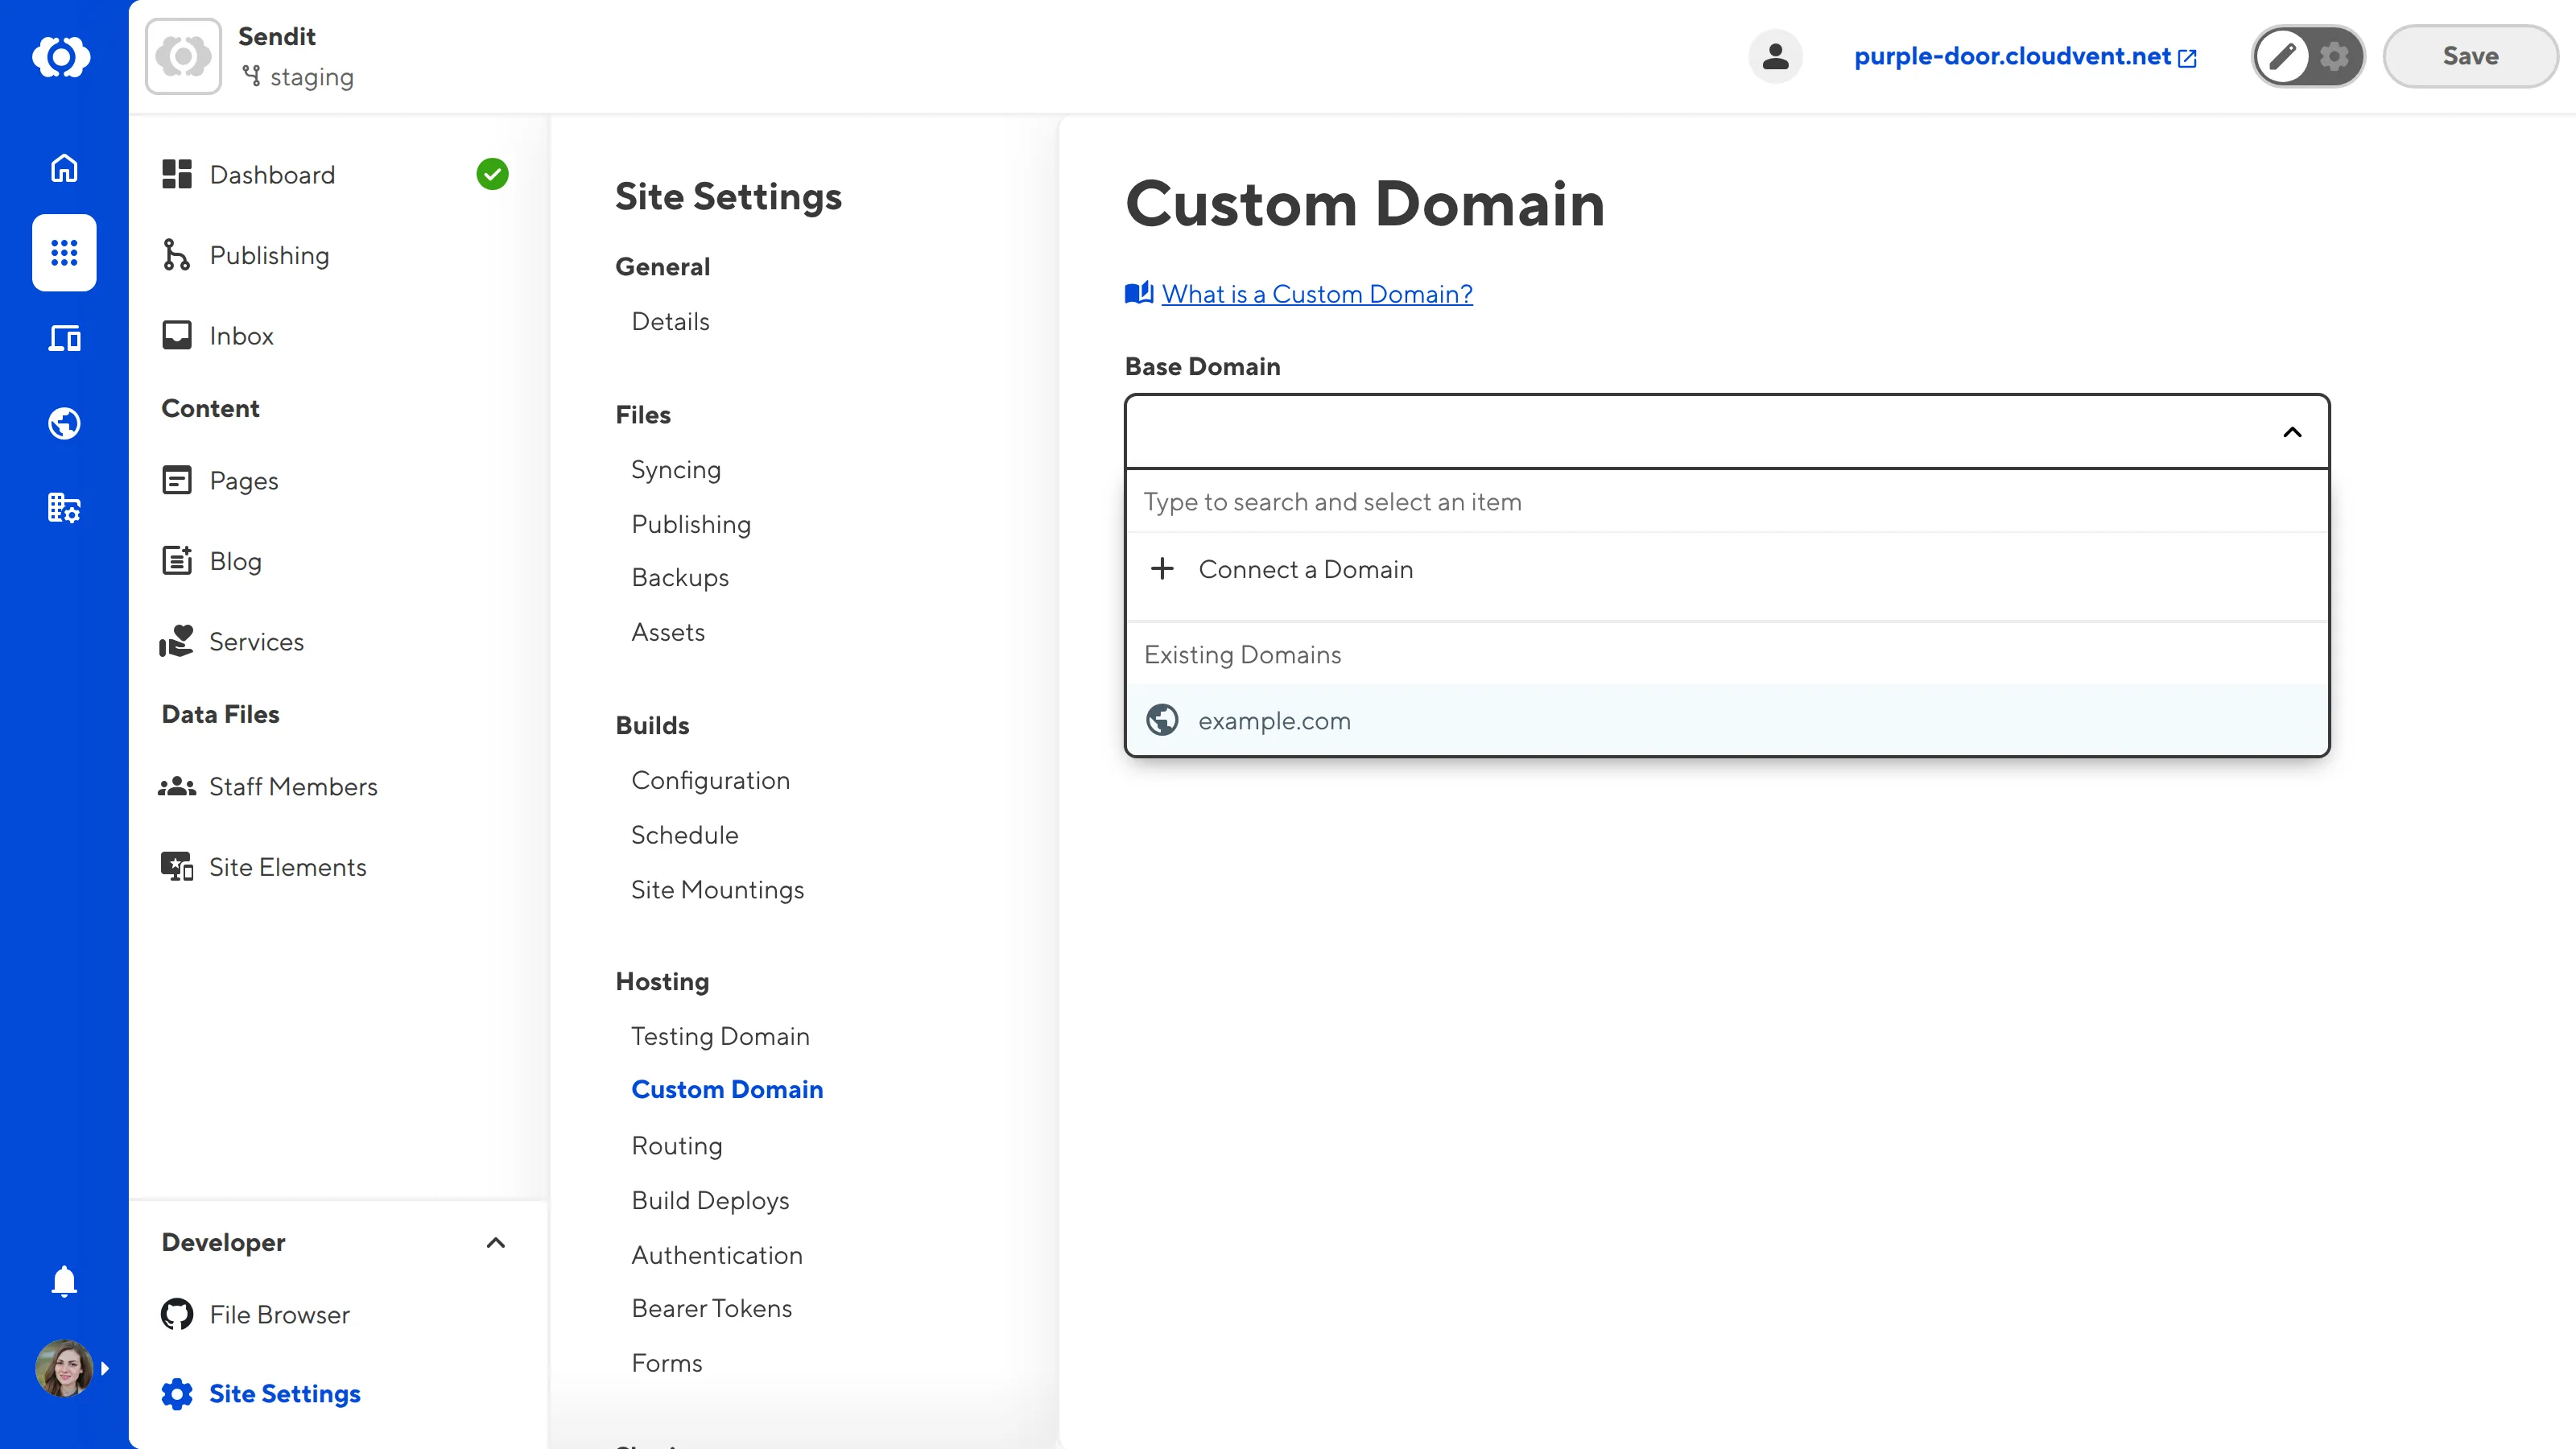
- Select the Custom Domain you want to add using the Base Domain dropdown.
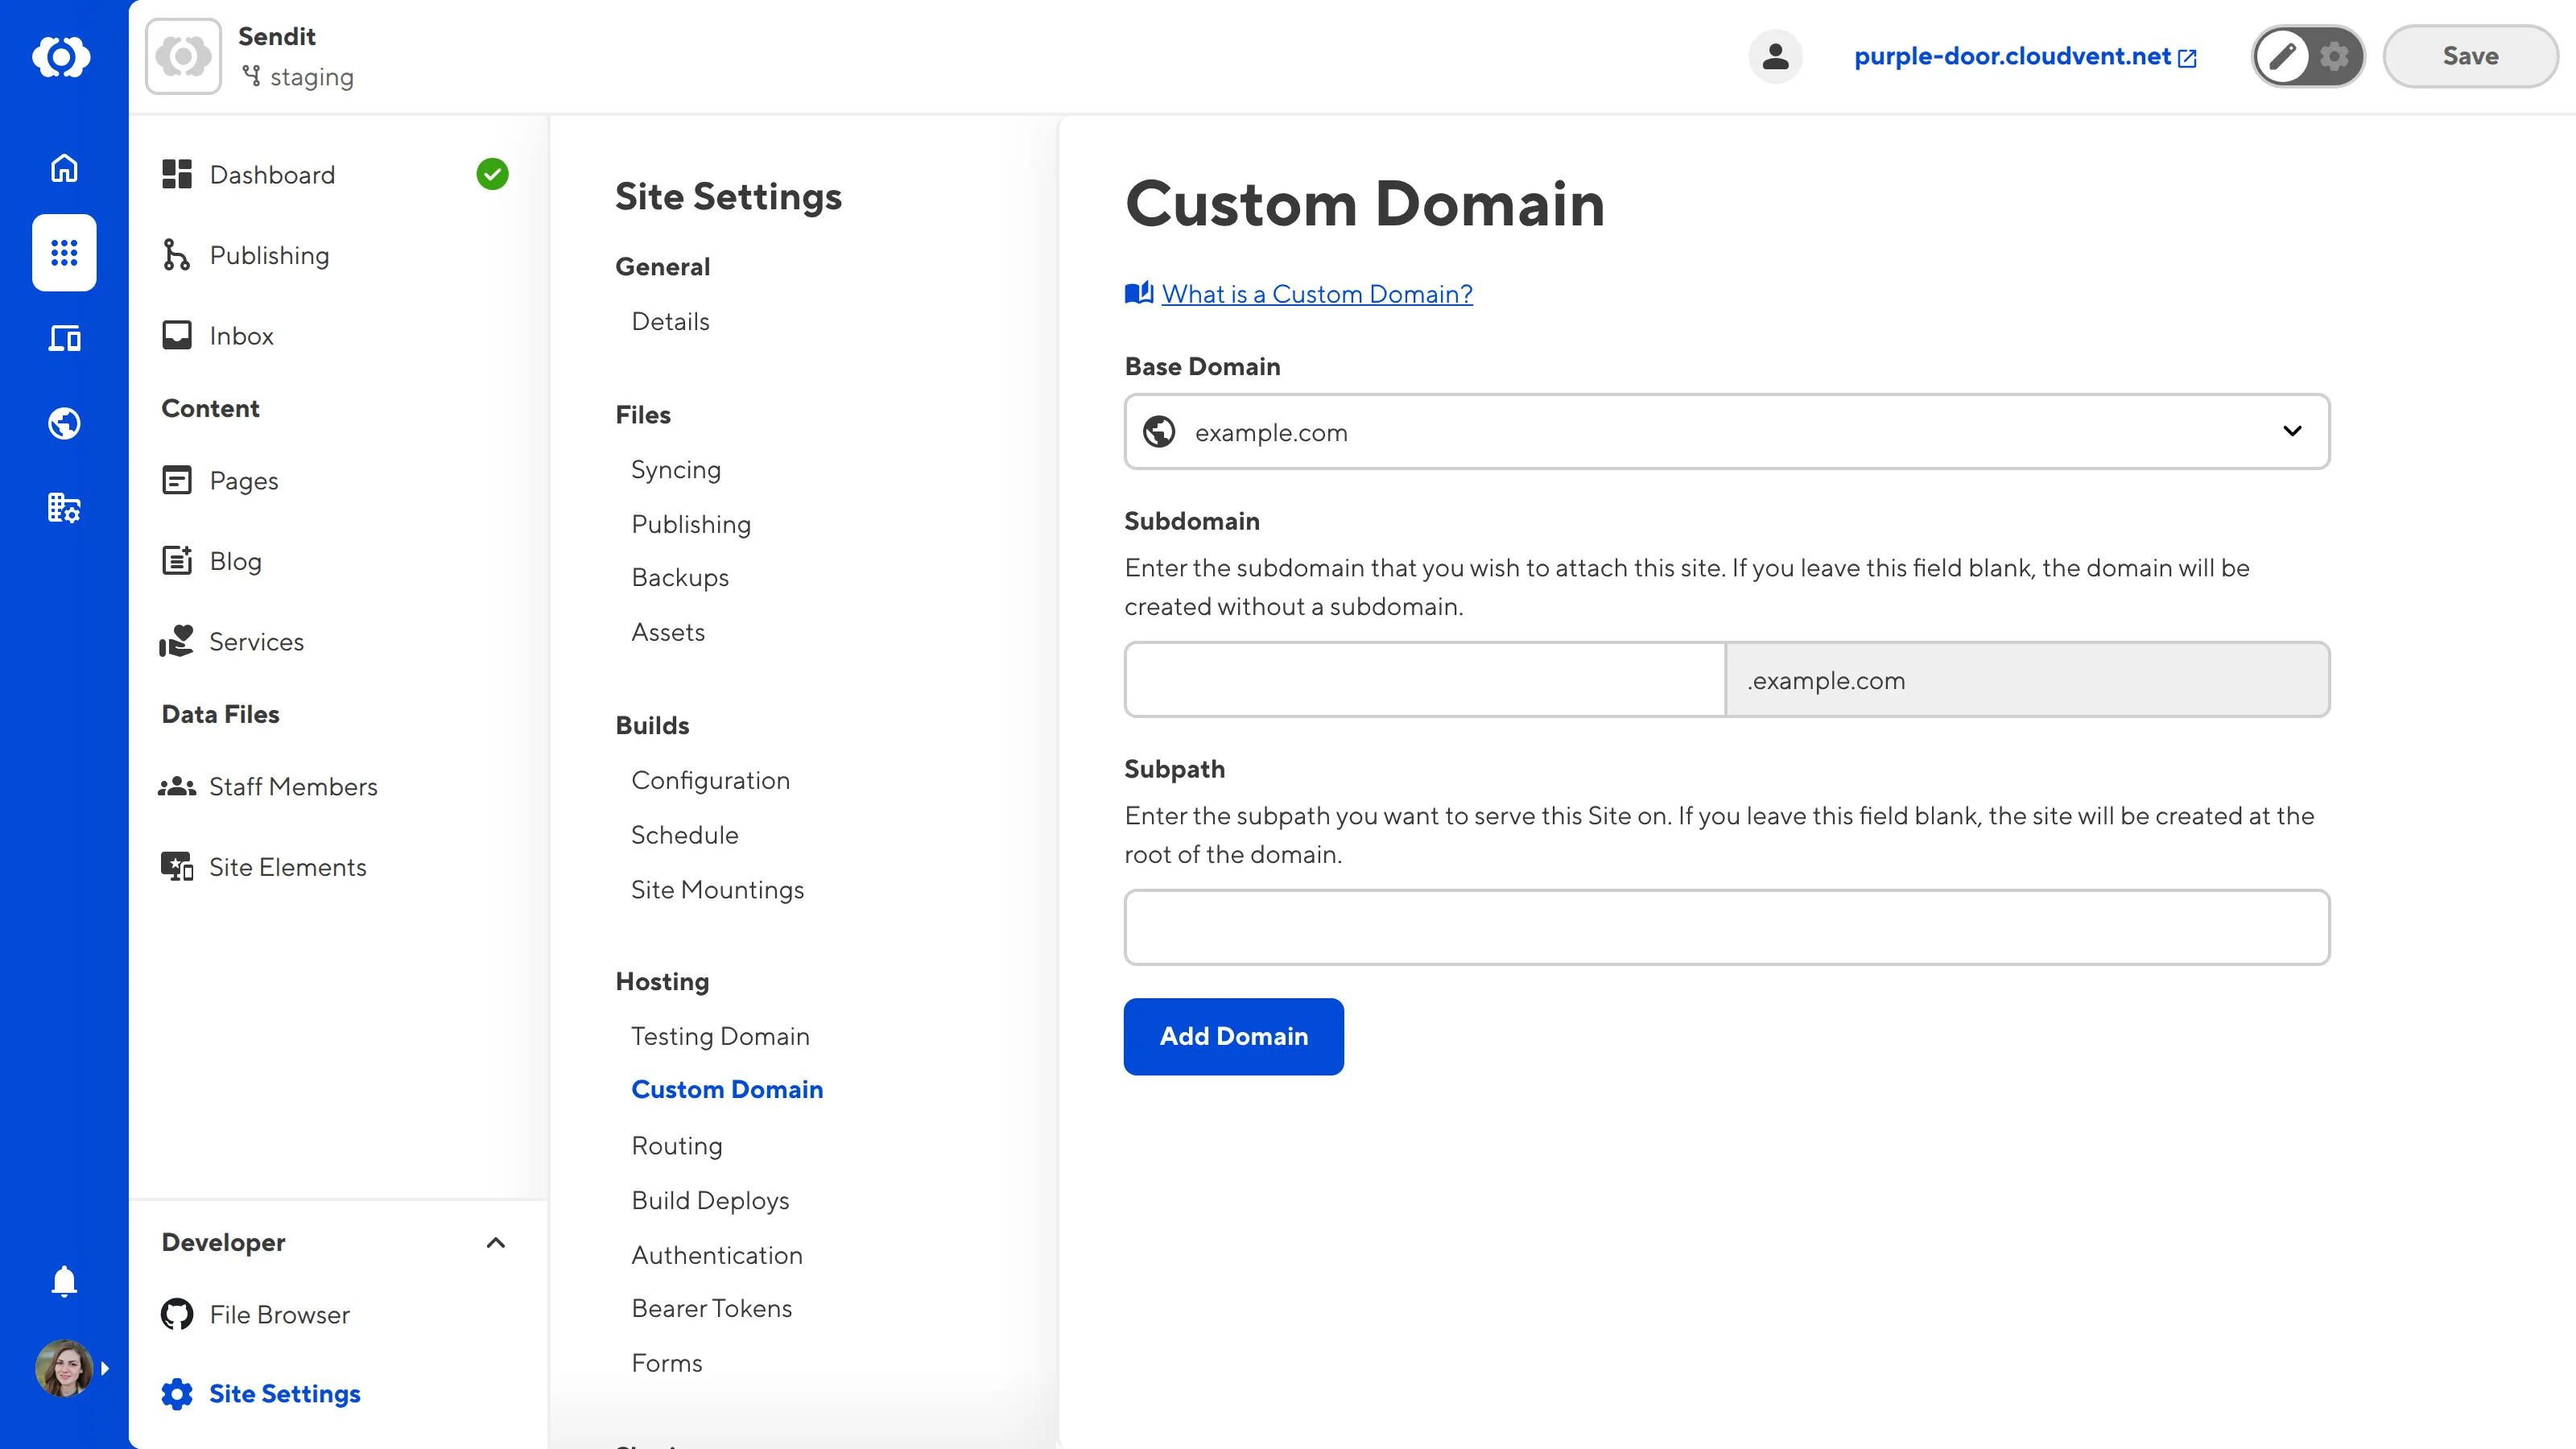
- (Optional.) If you want to host your Site on a subdomain or subpath of your Custom Domain, enter the subdomain in the Subdomain text field, or the subpath in the Subpath text field. Leave these fields blank if you do not want to configure a subdomain or subpath for your Site.
- Click the Add a Domain button.
CloudCannon will begin hosting your website content on your Custom Domain.


You can manage your Custom Domain settings, including subdomains and subpaths, on your Custom Domain's dedicated Domain page. To see you Custom Domain's Domain page, click on the card for your Custom Domain in the Domains browser.
To stop hosting your Site on a Custom Domain, please read our documentation on removing a Custom Domain from your Site.
We also recommend adding an SSL certificate to your Site. For more information, please read our documentation on adding an auto-generated SSL certificate or adding a custom SSL certificate.