CloudCannon DNS allows you to manage your DNS records within CloudCannon for each Custom Domain added to your Organization. If you use CloudCannon DNS, you can also use a free auto-generated SSL certificate for your Sites.
Before configuring your Site's DNS, you must add a Custom Domain.
Enable CloudCannon DNS#
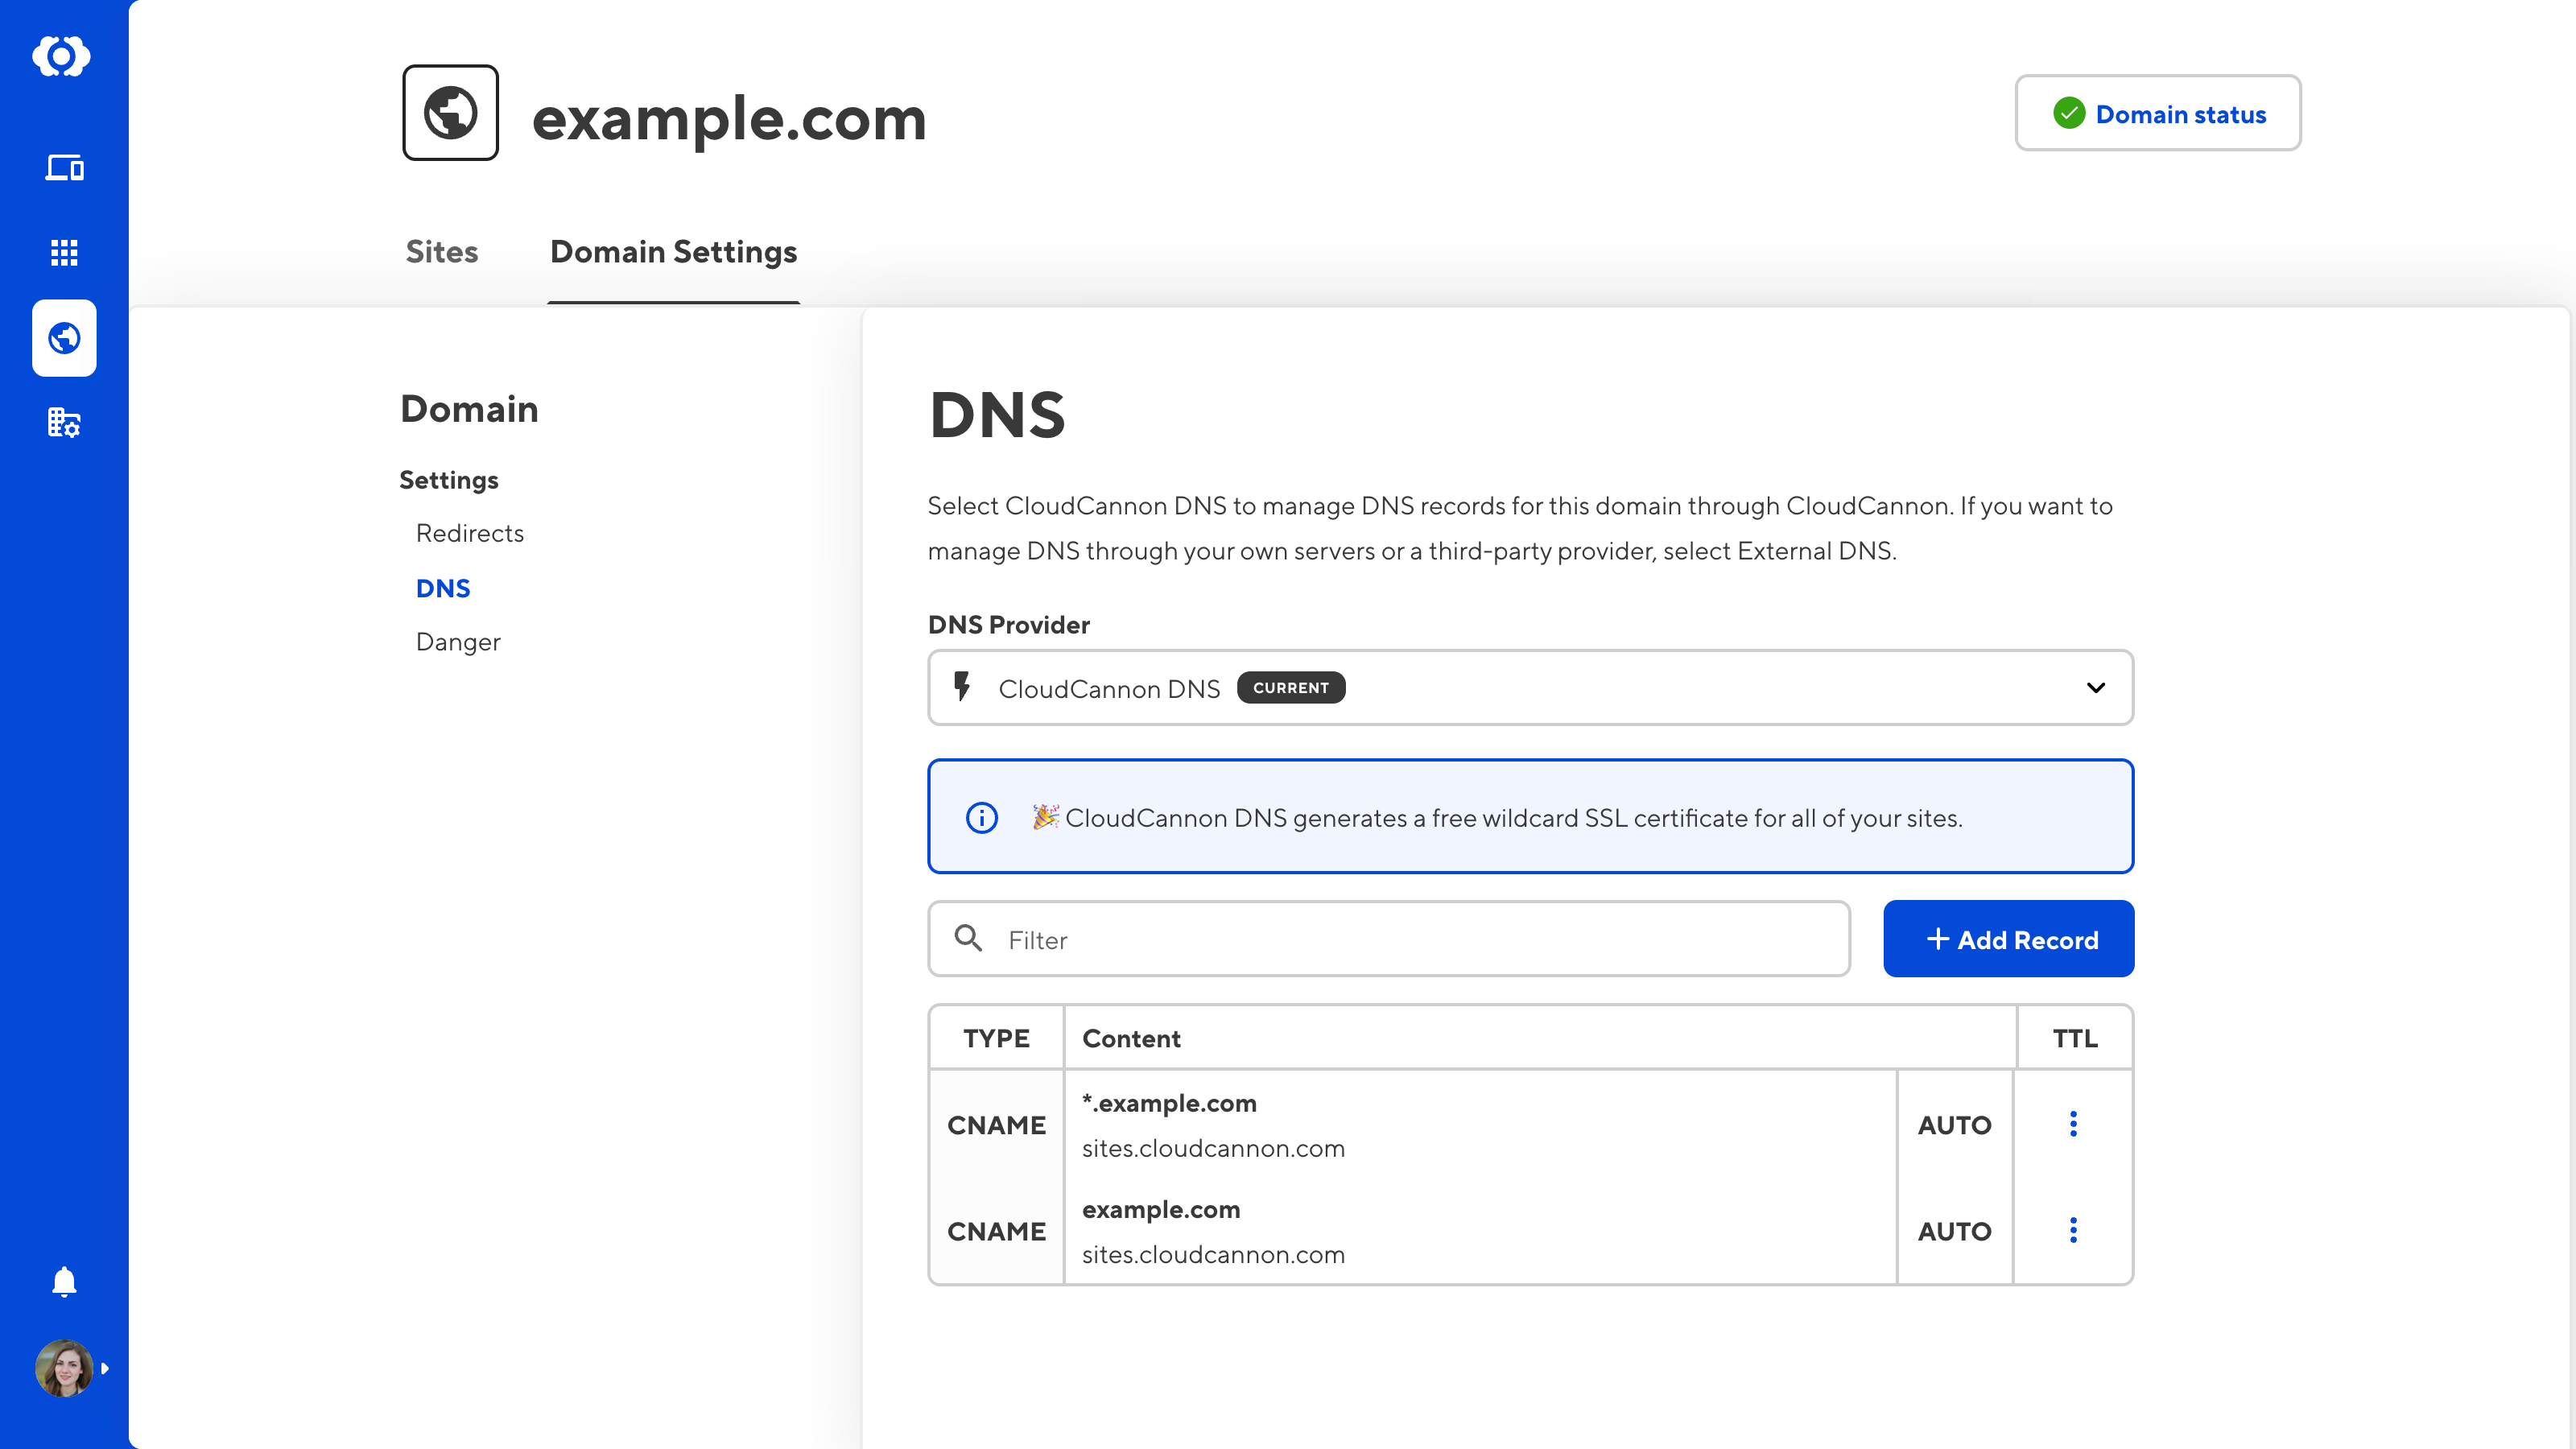
CloudCannon will enable CloudCannon DNS for your Site by default. If you want to switch back to CloudCannon DNS from an external DNS service or confirm that you have CloudCannon DNS enabled, you can check the Domain Settings page.
Updating your DNS provider can cause downtime for anything connected to your domain, such as your website or custom email address. Please make sure you have a copy of your existing DNS records before you change providers.
If you need help updating your DNS, please contact our friendly support team.
To switch to CloudCannon DNS:
- Navigate to the Domain browser by clicking the globe icon in your App Navigation.
- Select the domain for which you want to configure DNS.
- Under the Domain Settings tab, open the DNS section.
- Select the CloudCannon DNS option in the DNS Provider dropdown.
- Click the Update DNS Provider button.
CloudCannon will now manage your DNS records.

Configure your Nameservers#
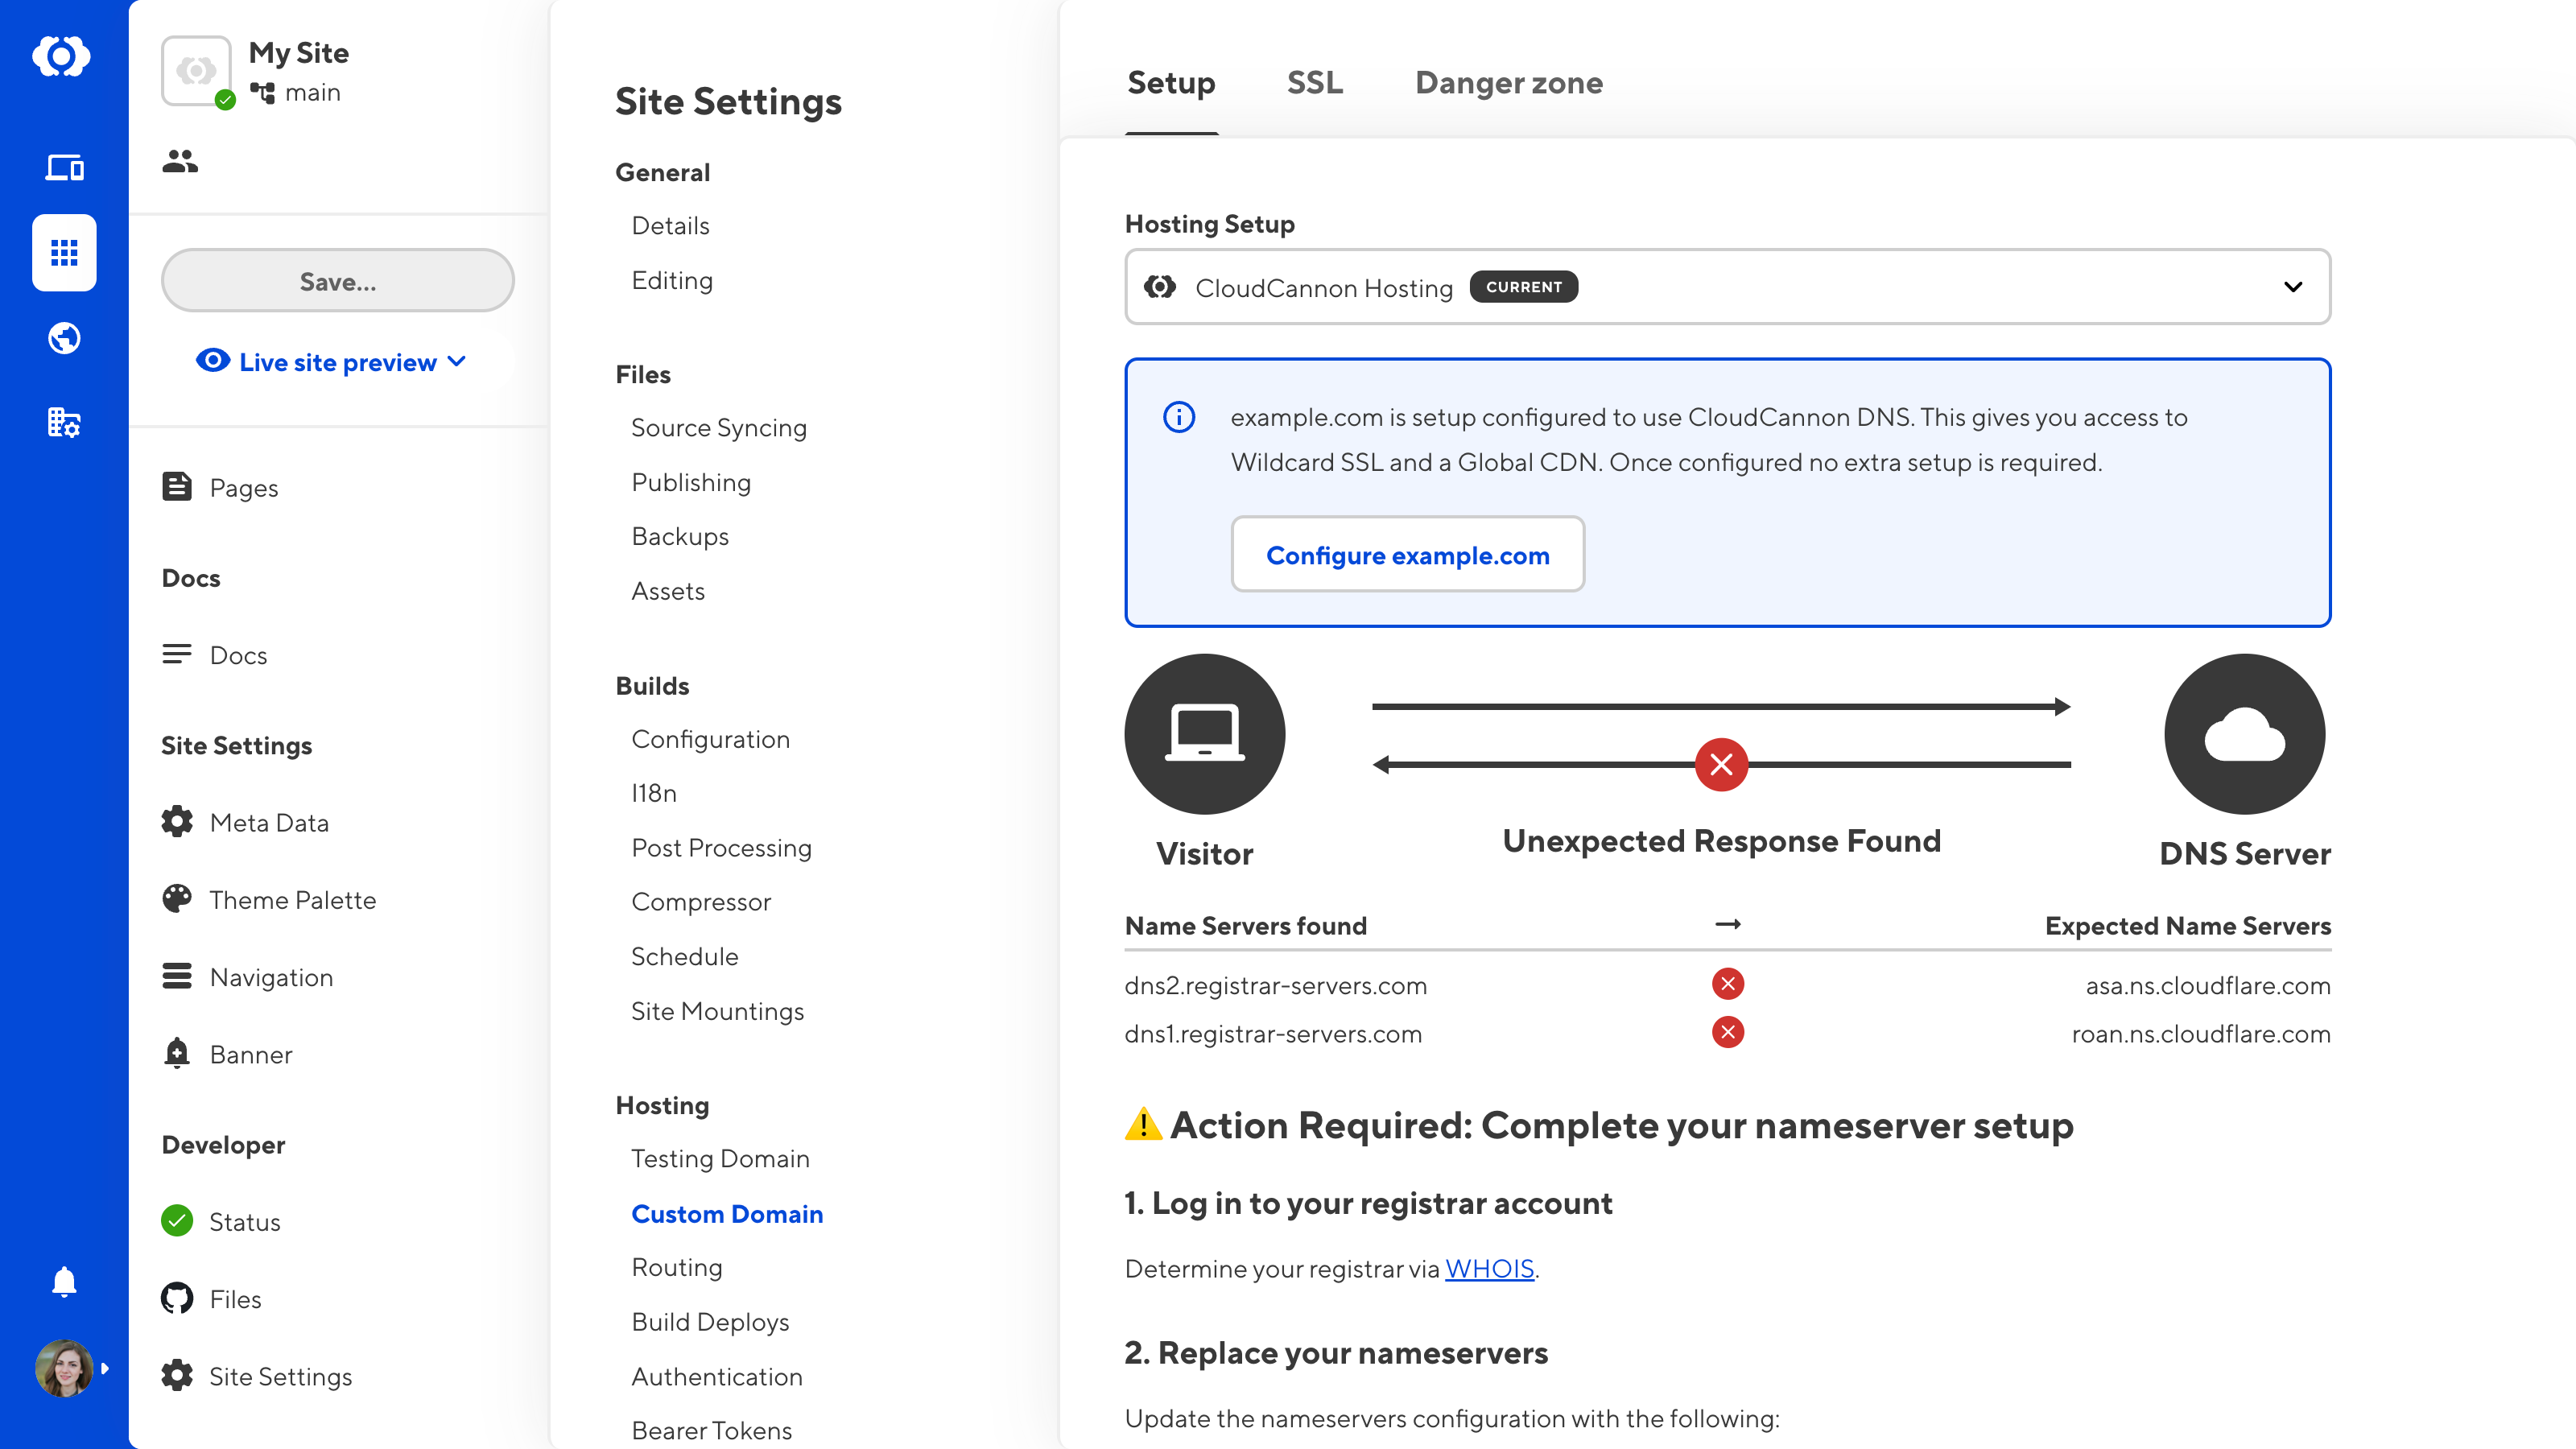
If you have yet to configure your Nameservers or have done so incorrectly, CloudCannon will warn you on the Custom Domain page under Site Settings that this action is required.

Configuring your Nameservers requires you to use the services provided by your Domain Registrar. For support, please contact your Domain Registrar.
To configure your Nameservers:
- Log in to your third-party Domain Registrar with the account details used when you purchased your Domain Name. If you don't know who your Domain Registrar is, you can enter the Domain Name into the ICANN website and scroll down to Registrar Information.
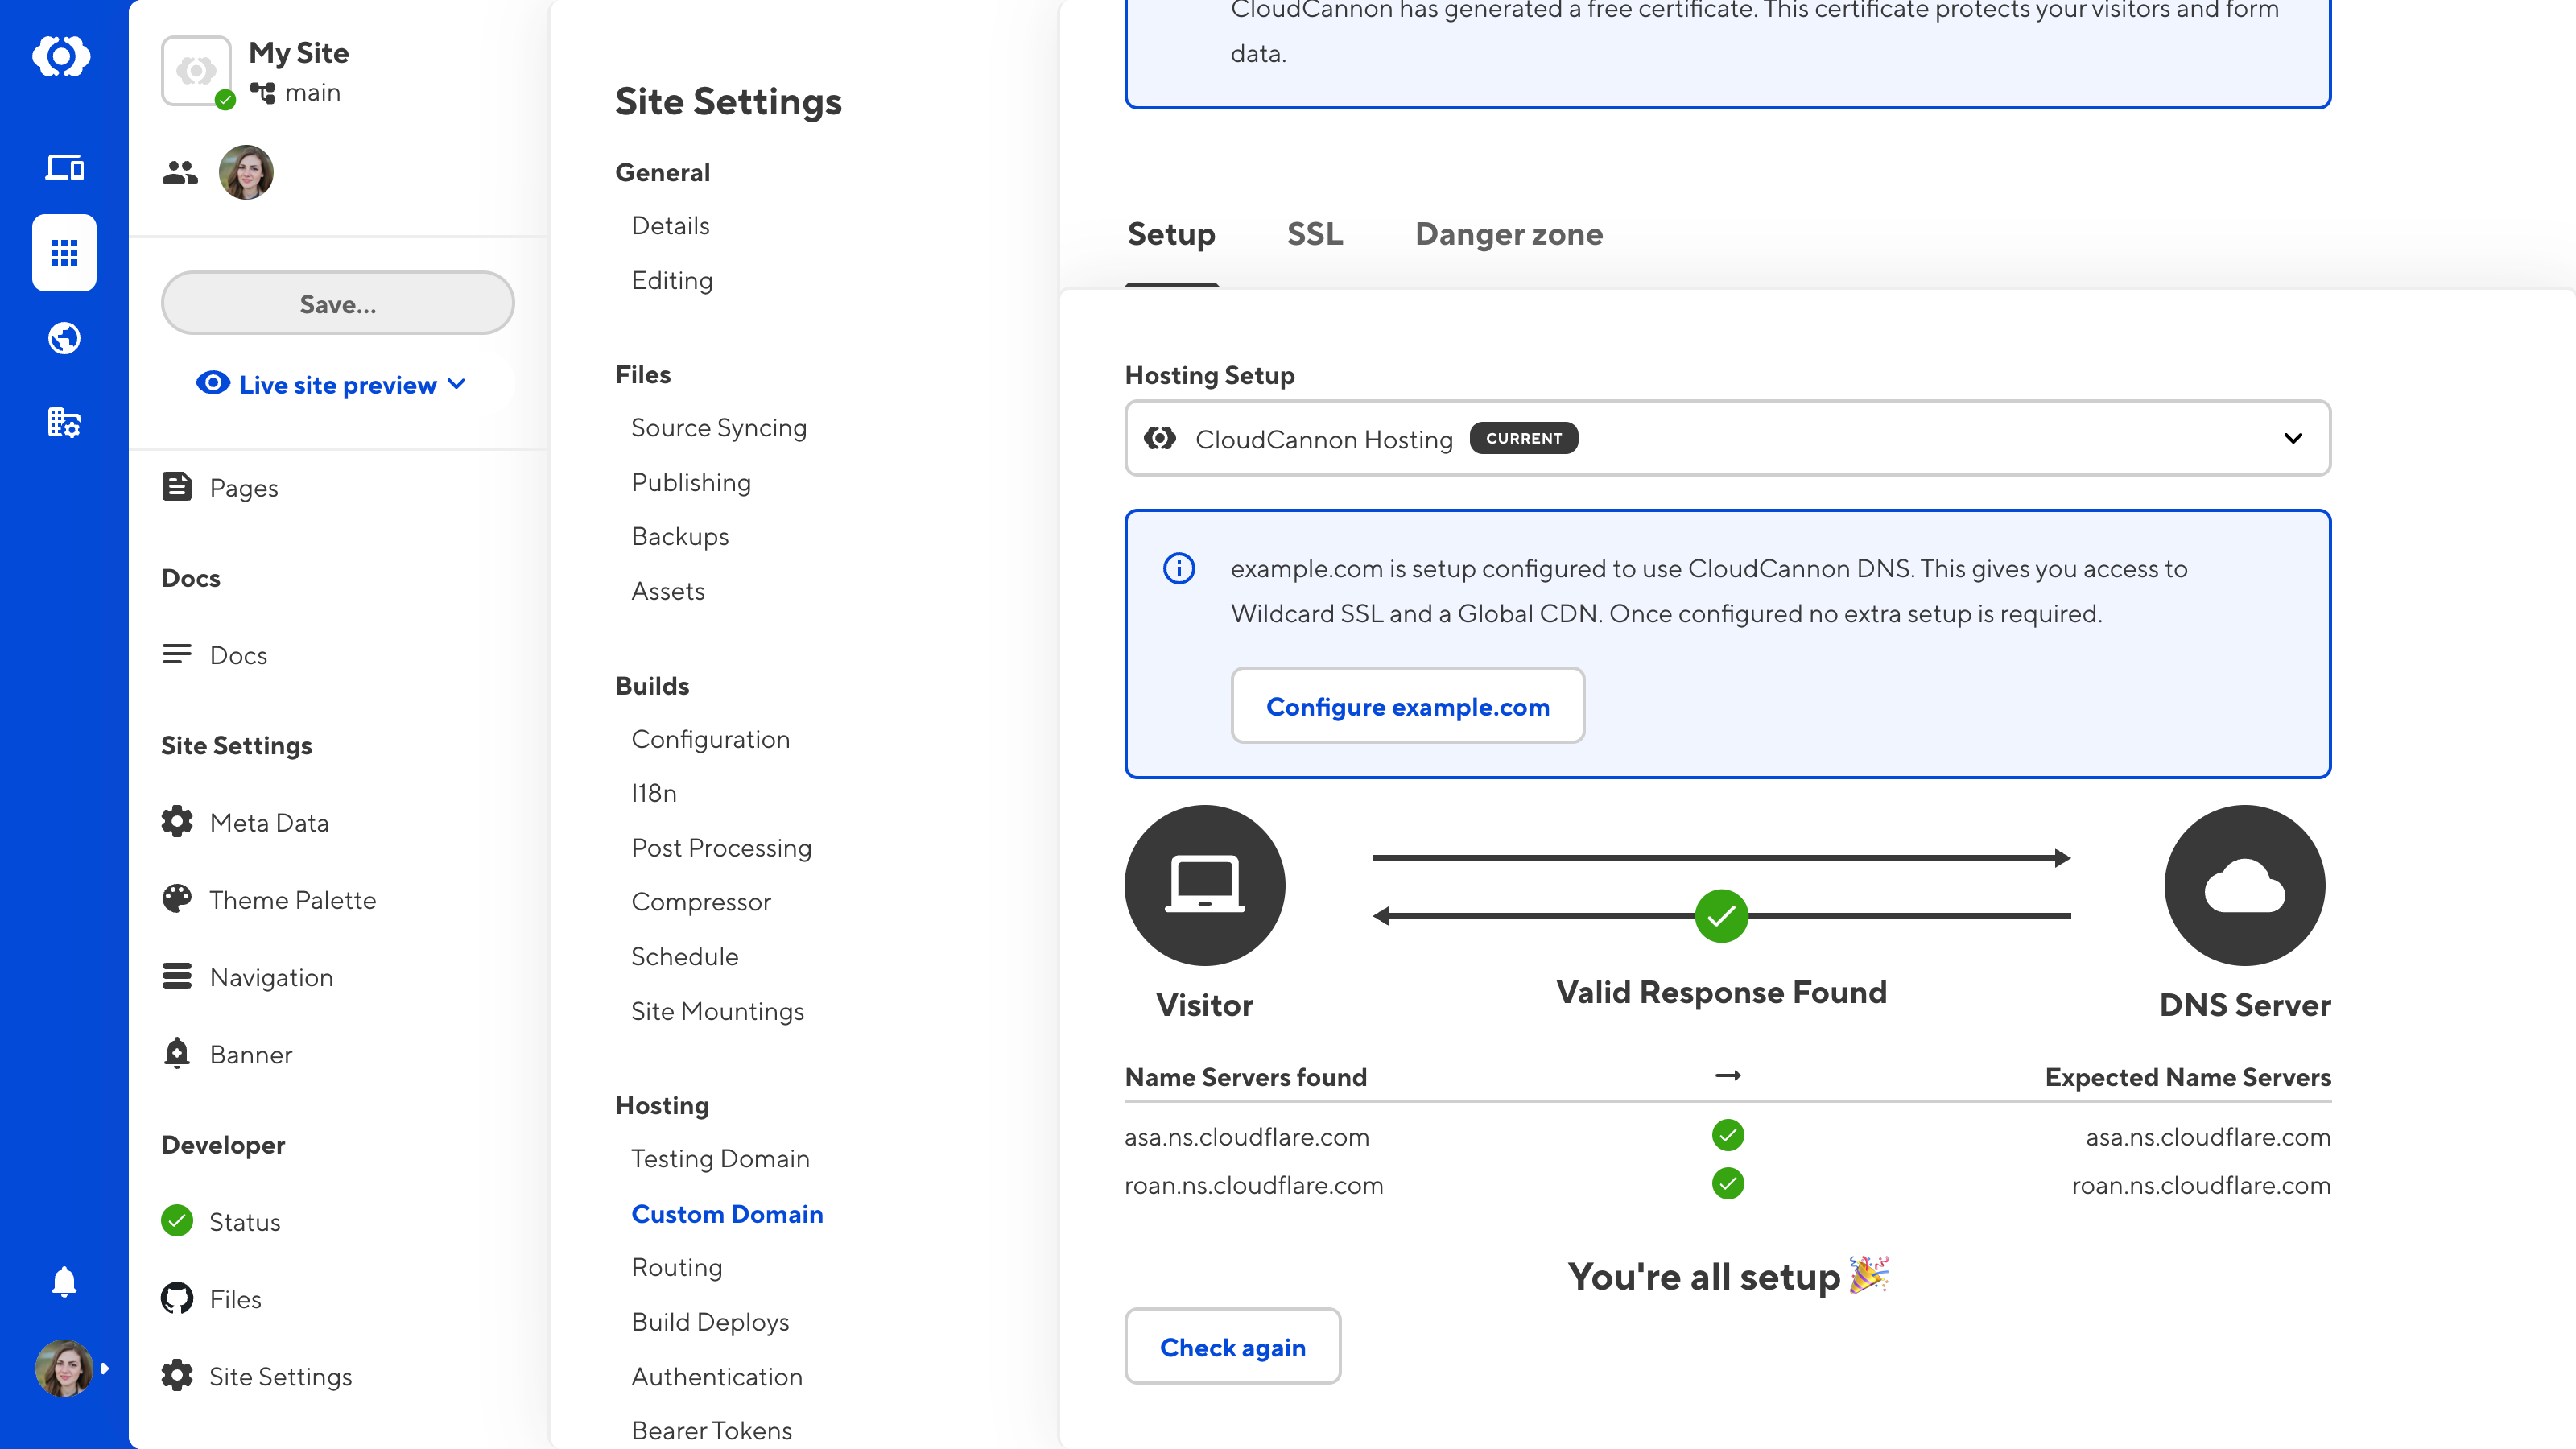
- Update the Nameserver configuration on your Domain Registrar to the Expected Nameservers listed on the Custom Domain page. Normally, these are asa.ns.cloudflare.com and roan.ns.cloudflare.com.
CloudCannon will update the Custom Domain page once your Registrar has propagated the updated Nameservers. To refresh the page, click the Check again button at the bottom.
Domain Registrars typically process Nameserver updates within 24 hours.

Add DNS records#
DNS records are instructions for a Domain Name managed by an authoritative nameserver. By enabling CloudCannon DNS, you allow CloudCannon's servers to manage your DNS records.
To add a DNS record:
- Navigate to the Domain browser by clicking the globe icon in your App Navigation.
- Select the domain for which you want to configure DNS.
- Under the Domain Settings tab, open the DNS section.
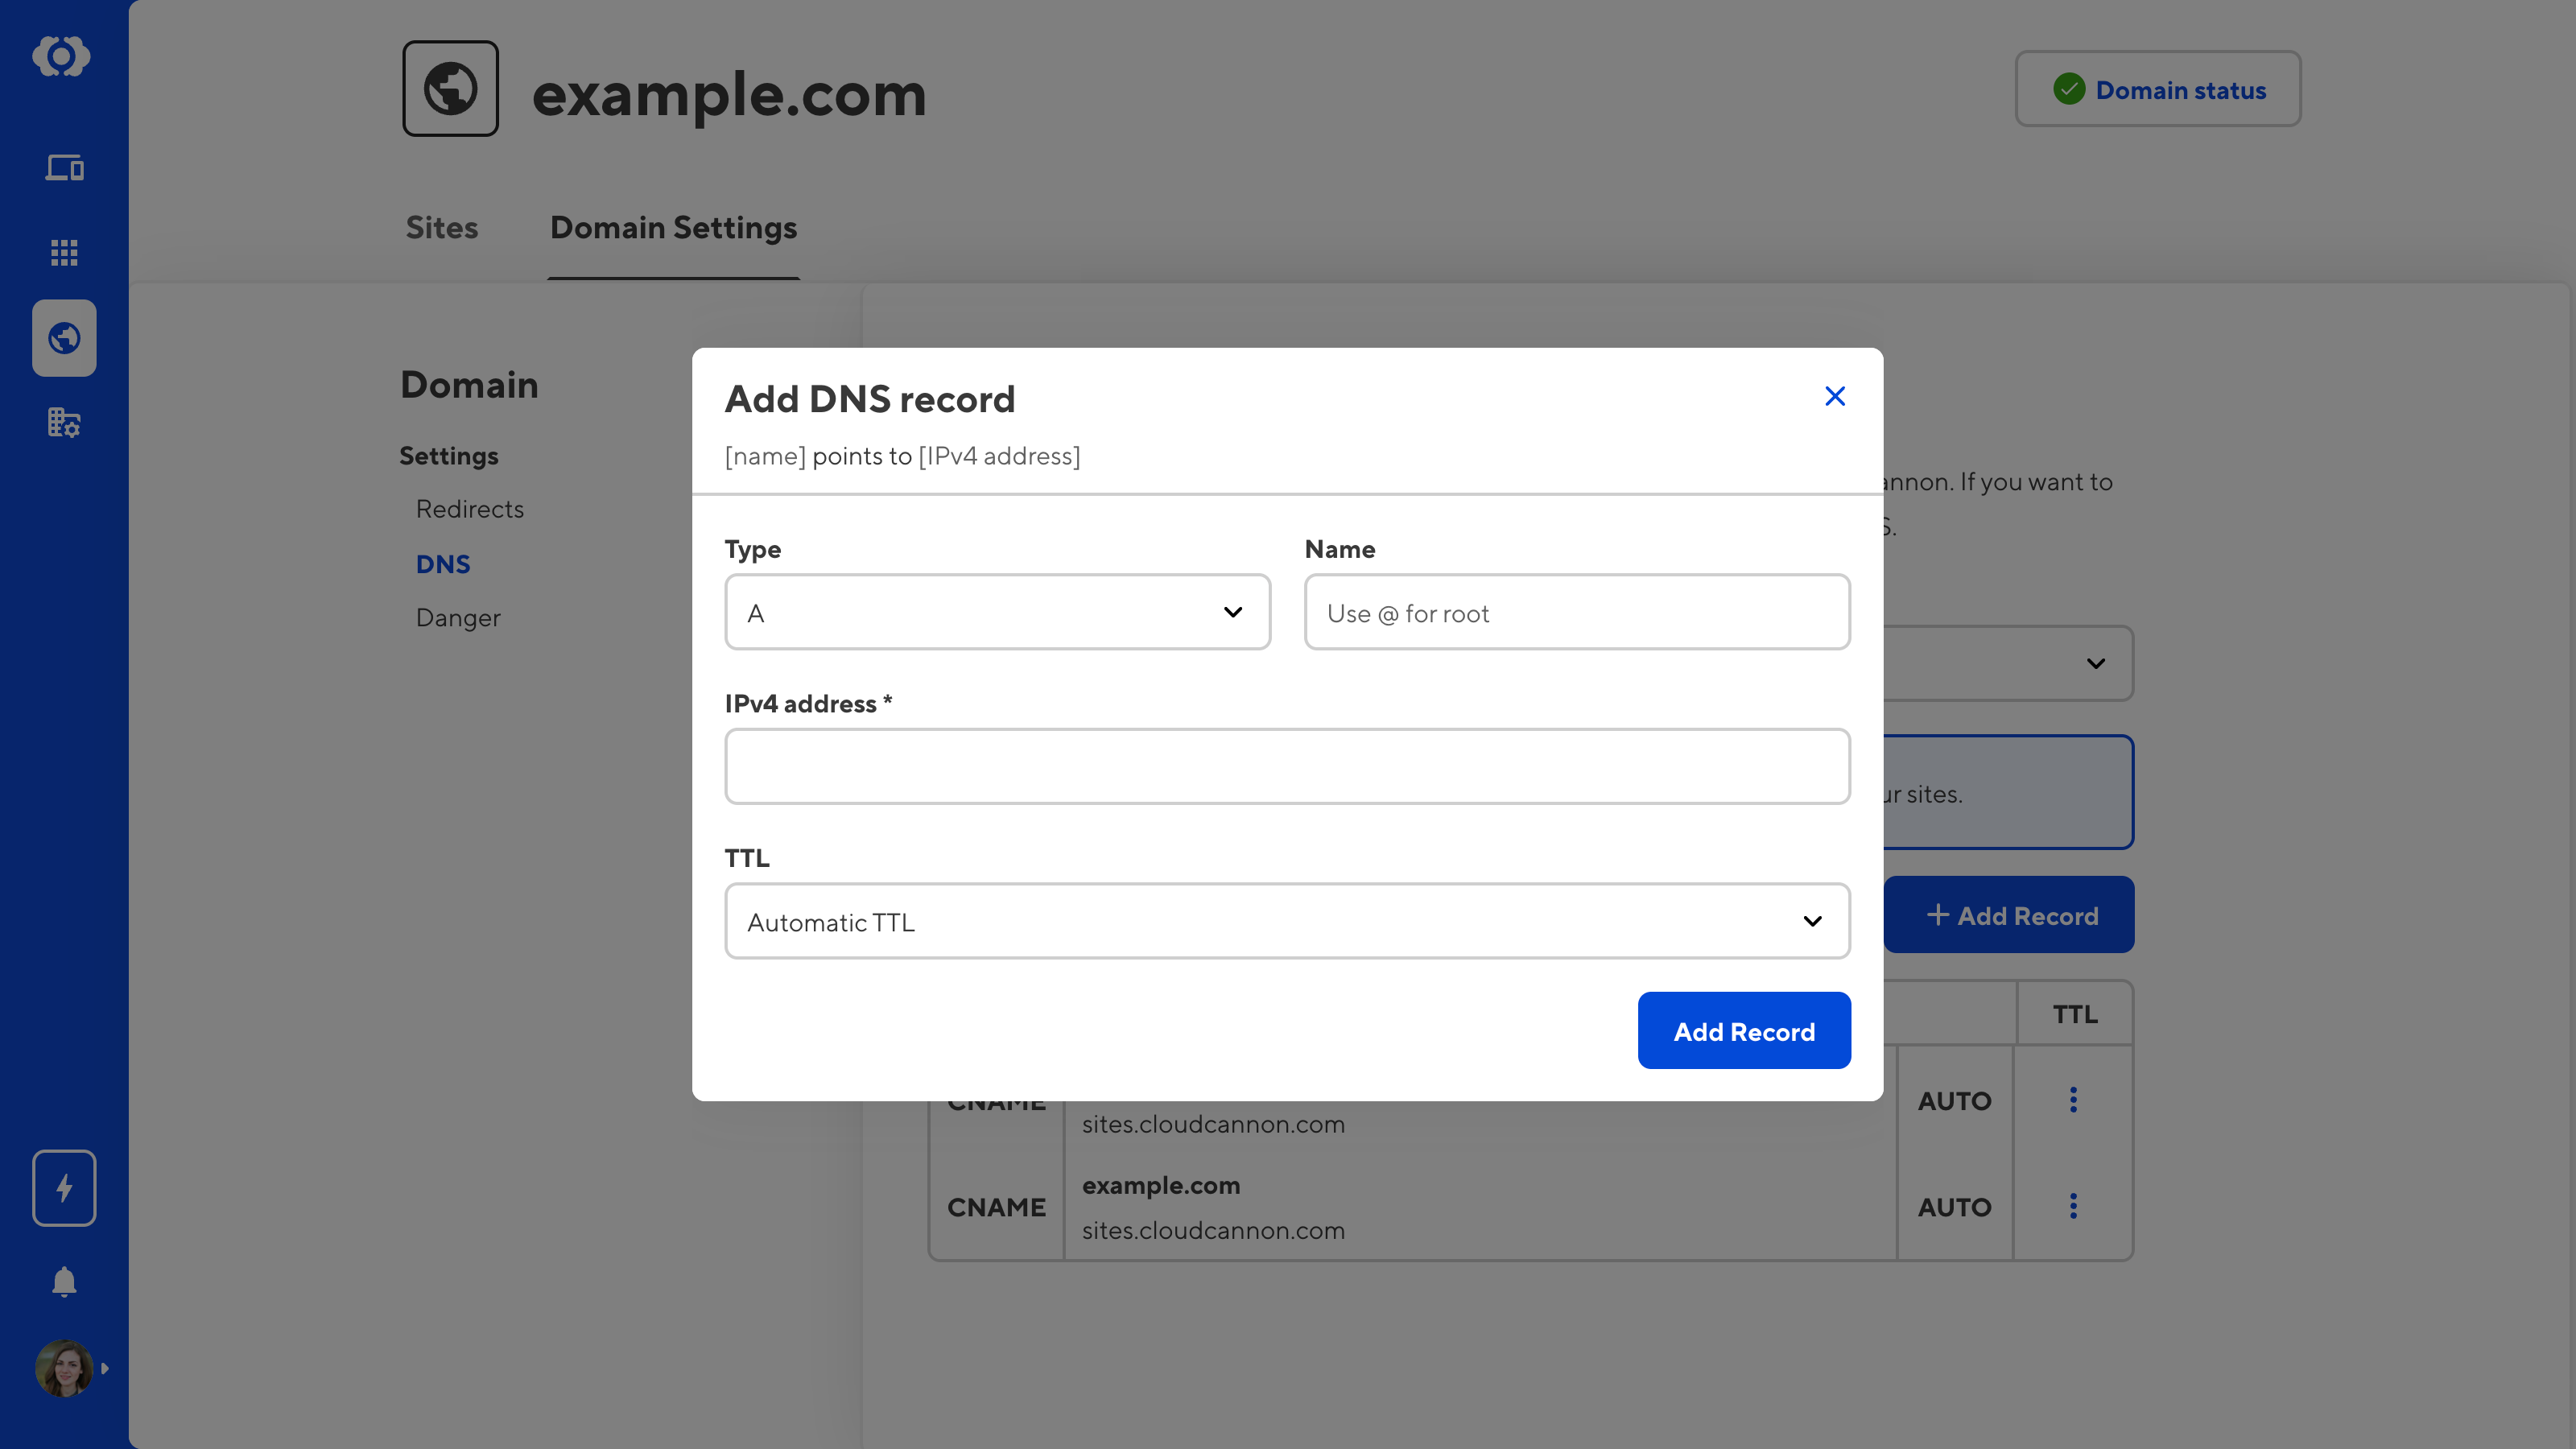
- Click the + Add Record button.
- In the Add DNS record modal, use the Type dropdown to select the type of record. Valid options include A, AAAA, CNAME, MX, SPF, SRV, and TXT.
- CloudCannon will update the fields in the Add DNS record modal depending on the record type. Enter the details for your DNS record.
- When you are happy with your record details, click the Add Record button.
CloudCannon will add the DNS record to your DNS settings.

You can edit or delete existing DNS records by clicking the Context Menu button for a record and selecting the Update or Remove option.
CloudCannon CNAME records#
When you enable CloudCannon DNS, CloudCannon will add two CNAME records to your DNS records.
- *.example.com is an alias for sites.cloudcannon.com
- example.com is an alias for sites.cloudcannon.com
These records instruct servers completing a DNS lookup for your Site's base domain (and all its subdomains) to search for the IP address of sites.cloudcannon.com. This allows users looking for your website to find the IP address of the CloudCannon server hosting your Site.