This feature is available on our Enterprise plan.
Want to chat about whether this feature is right for you? Our support team is always happy to hear from you.
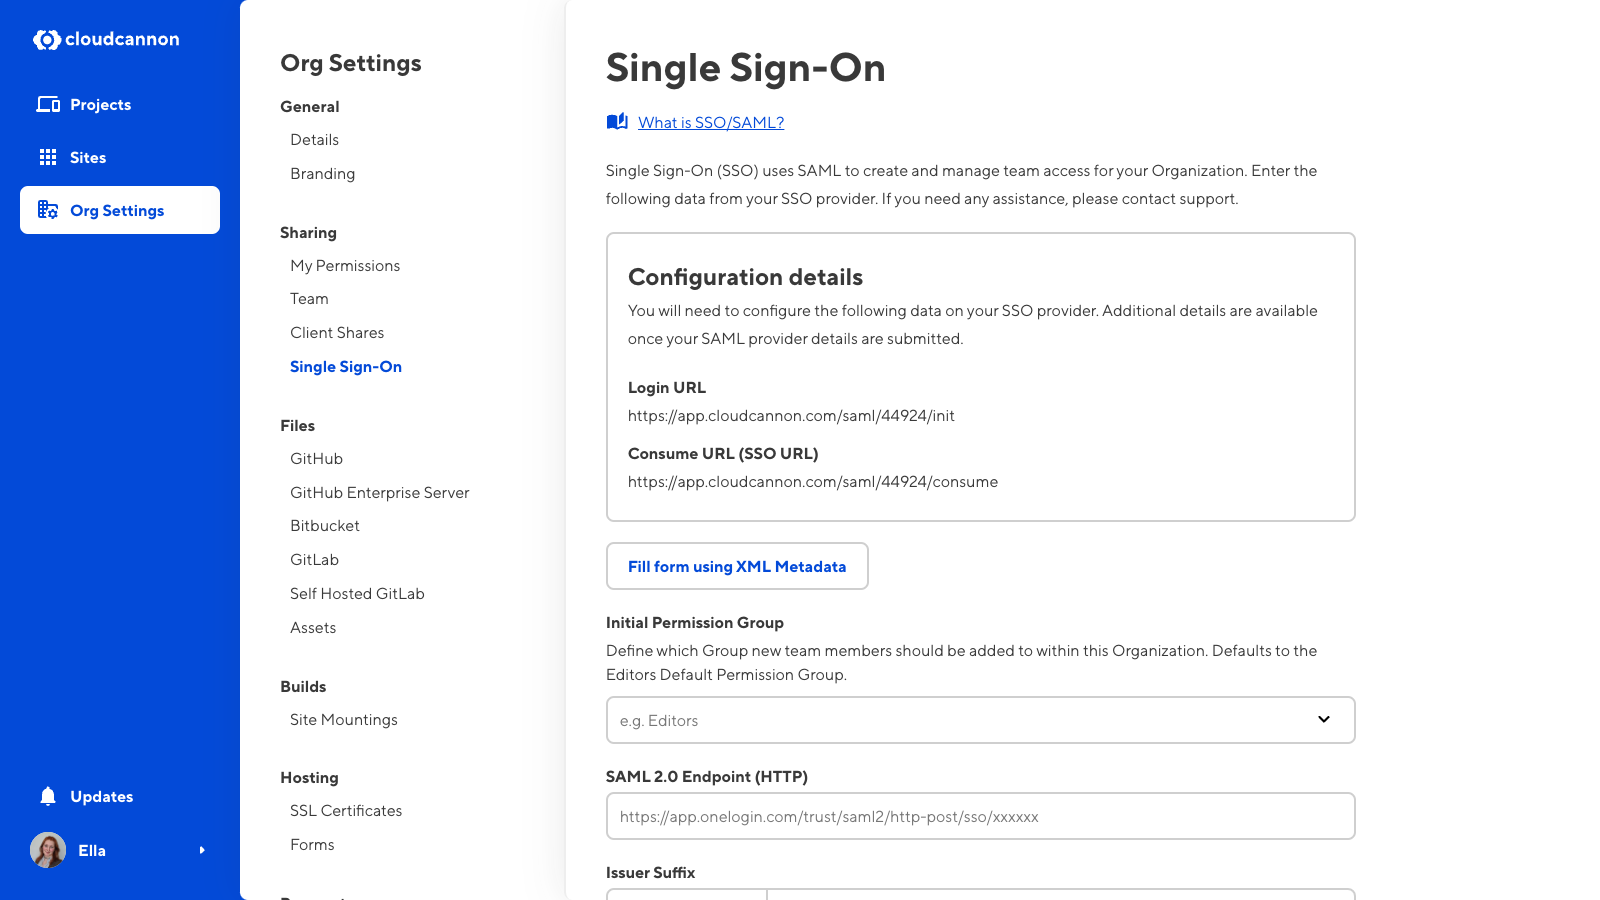
To set up SSO/SAML, you will need to copy data from CloudCannon to your Identity Provider and vice versa.
You must also identify which Permission Group for new team members should be added to. This can be a default or Custom Permission Group. CloudCannon will add new team members to this Permission Group if they join your Organization through SSO login rather than the CloudCannon email invitation link.
SAML can be tricky to configure. If you need assistance setting-up SSO/SAML, please don’t hesitate to contact our support team.
Configure your Identity Provider#
To configure your Identity Provider software:
- Navigate to the Single Sign-On page under Org settings.
- Copy the Login URL and Consume URL (SSO URL) links from CloudCannon and enter them into your Identity Provider.
- Your Identity Provider will provide you with the details for SAML 2.0 Endpoint (HTTP), Issuer Suffix (must begin with “cloudcannon.com/”), Name ID Format, Authn Context, and X.509 Certificate. Copy these details or download the XML file provided.

Configure SAML#
To configure SAML:
- Navigate to the Single Sign-On page under Org settings.
- Select the initial Permission Group for team members joining your Organization through SSO.
- Enter the details for SAML 2.0 Endpoint (HTTP), Issuer Suffix (must begin with “cloudcannon.com/”), Name ID Format, Authn Context, and X.509 Certificate. Alternatively, click the Fill form using XML Metadata button and upload your XML file.
- Click the Add Single Sign-On button.
CloudCannon will provide additional details once you have set up SAML. Your identity provider may require these details.