Editing in CloudCannon is as easy as opening a file in one of our in-browser editing interfaces.
CloudCannon supports four editing interfaces:
- The Visual Editor — This interface offers an interactive preview of your site for editing directly onto the page.
- The Content Editor — This interface offers a rich text editor useful for clean, distraction-free editing of content-heavy files.
- The Data Editor — This interface offers a simple way to manage structured data and doubles as the sidebar in the Visual and Content Editors.
- The Source Editor — This interface offers an in-browser code editor for minor changes.
Depending on your SSG and site configuration, you may only have access to a subset of these editing interfaces. An editing interface may not be available because:
- Some SSGs are incompatible with the Visual Editor (e.g., Docusaurus, MkDocs).
- Some permission levels cannot access the Source Editor (e.g., unavailable to the Editors Default Permission Group or Clients).
- A Developer on your team has specified which editing interfaces are enabled for a particular collection or schema.
In CloudCannon, you can edit your files in editing sessions. An editing session is the period of time between the first change someone makes to any file and when someone clicks the Save button. Editing sessions can contain any number of changes to any number of files, with any number of team members contributing to those changes.
To edit your files:
- Open any file in an editing interface by clicking on that file in the CloudCannon collection or file browser.
- Make changes to as many files as you want.
- When you are done with your editing session, save your changes by clicking the Save button in the top right of an editing interface or in the Site navigation.
Every change you make is remembered by CloudCannon, so you are safe to take a break, close the editing interface, refresh the tab, change the editing interface, or switch who is editing the file any time.
Editing interface navigation#
The Editing interface navigation has a number of tools to help you edit your files.

From left to right, the navigation items are:
- The Update status indicator — This shows you the last time this file was last updated.
- Avatars — These appear when a team member opens a file in an editing interface. One avatar is highlighted as the file editor with a green circle and pencil icon.
- The Editing/Viewing dropdown — This dropdown allows you to switch between Editing and Viewing a file.
- The Interface buttons — This allows you to easily switch between CloudCannon’s four editing interfaces: the Visual, Content, Data, and Source Editors. You will see between two and four options depending on how your site is configured.
- The File menu — Sometimes called the Context menu, this menu contains all your file actions.
- The Information button — This opens the Editing help modal, which provides a helpful walkthrough for the features of your editing interface.
- The Save button — When you are ready to save the changes to your site, the Save button will open the Review changes modal. Saving your changes allows you to see them live on your Testing Domain or Custom Domain.
On smaller screen sizes, some of these options will collapse into the File menu.
Context menu#
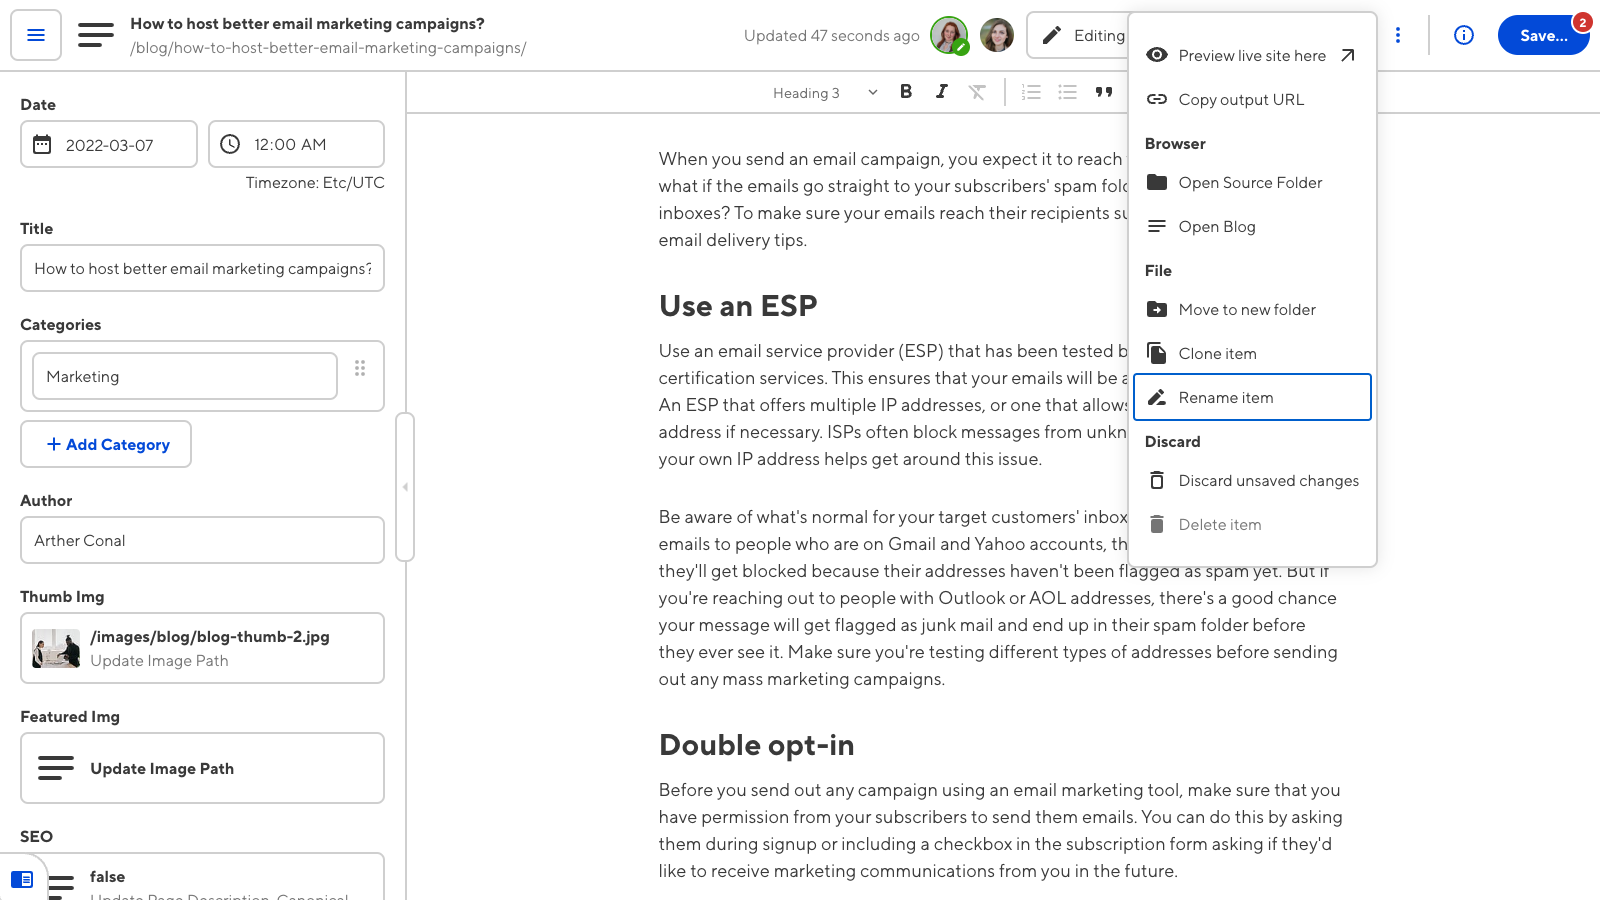
The Context menu in the top right of the editing interface contains your file actions.

These actions include:
- Preview live site — Open this file’s webpage in another tab, using your Testing Domain or Custom Domain. This will only show your saved changes.
- Copy output URL — Copies the output URL for this file to your clipboard.
- Open Source Folder — Open the source folder for this file (not available to the Editors Default Permission Group or Clients).
- Open Collection — Open the collection folder for this file. The word "collection" will be replaced with the name of your collection.
- Move to new folder — Create a new folder inside your current folder, and move this file to that new folder.
- Clone item — Create a duplicate copy of this file with "-copy" added to the filename.
- Rename item — Opens a pop-up window to edit the name of your file. Renamed files will appear in your browser twice. The file with the new name will have a New badge, and the file with the old name will have a Deleted badge.
- Publish to posts — Moves your current file to the Posts folder (Jekyll only).
- Discard unsaved changes — Discard any unsaved changes made to this file.
- Delete item — Mark this file for deletion next time you save your changes. You cannot delete a file until you have discarded any unsaved changes.
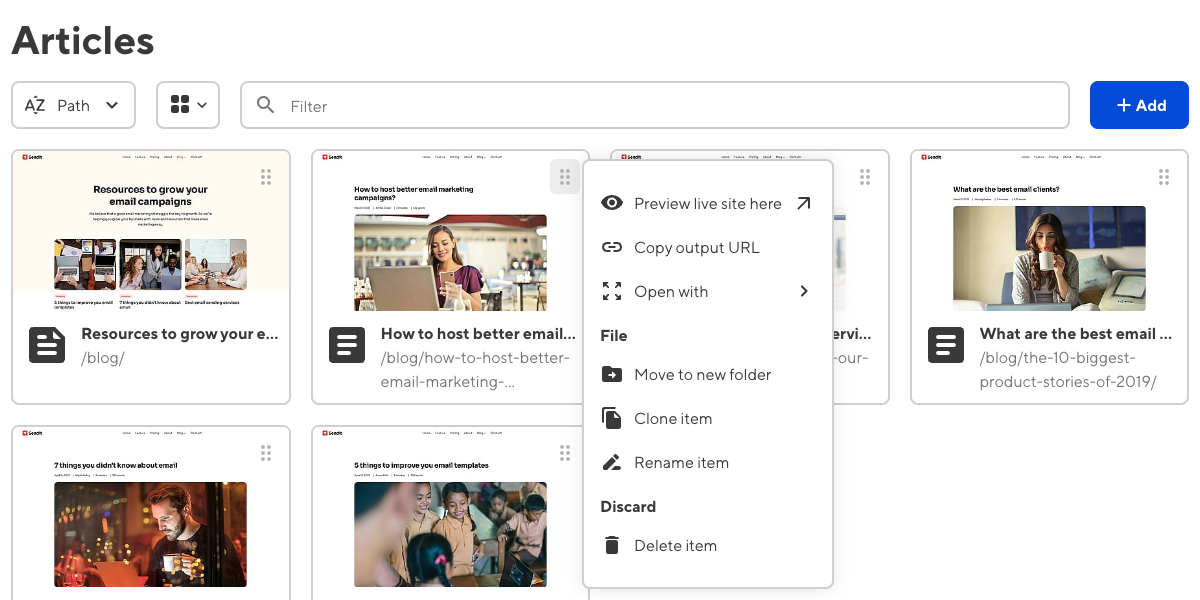
You can also access some of these file actions in the collection browser using the Context menu at the top right of a file card.

Collaborate with your team#
Editing in CloudCannon is collaborative, enabling you to create content together with your team. You and your team can edit multiple files across your site concurrently.
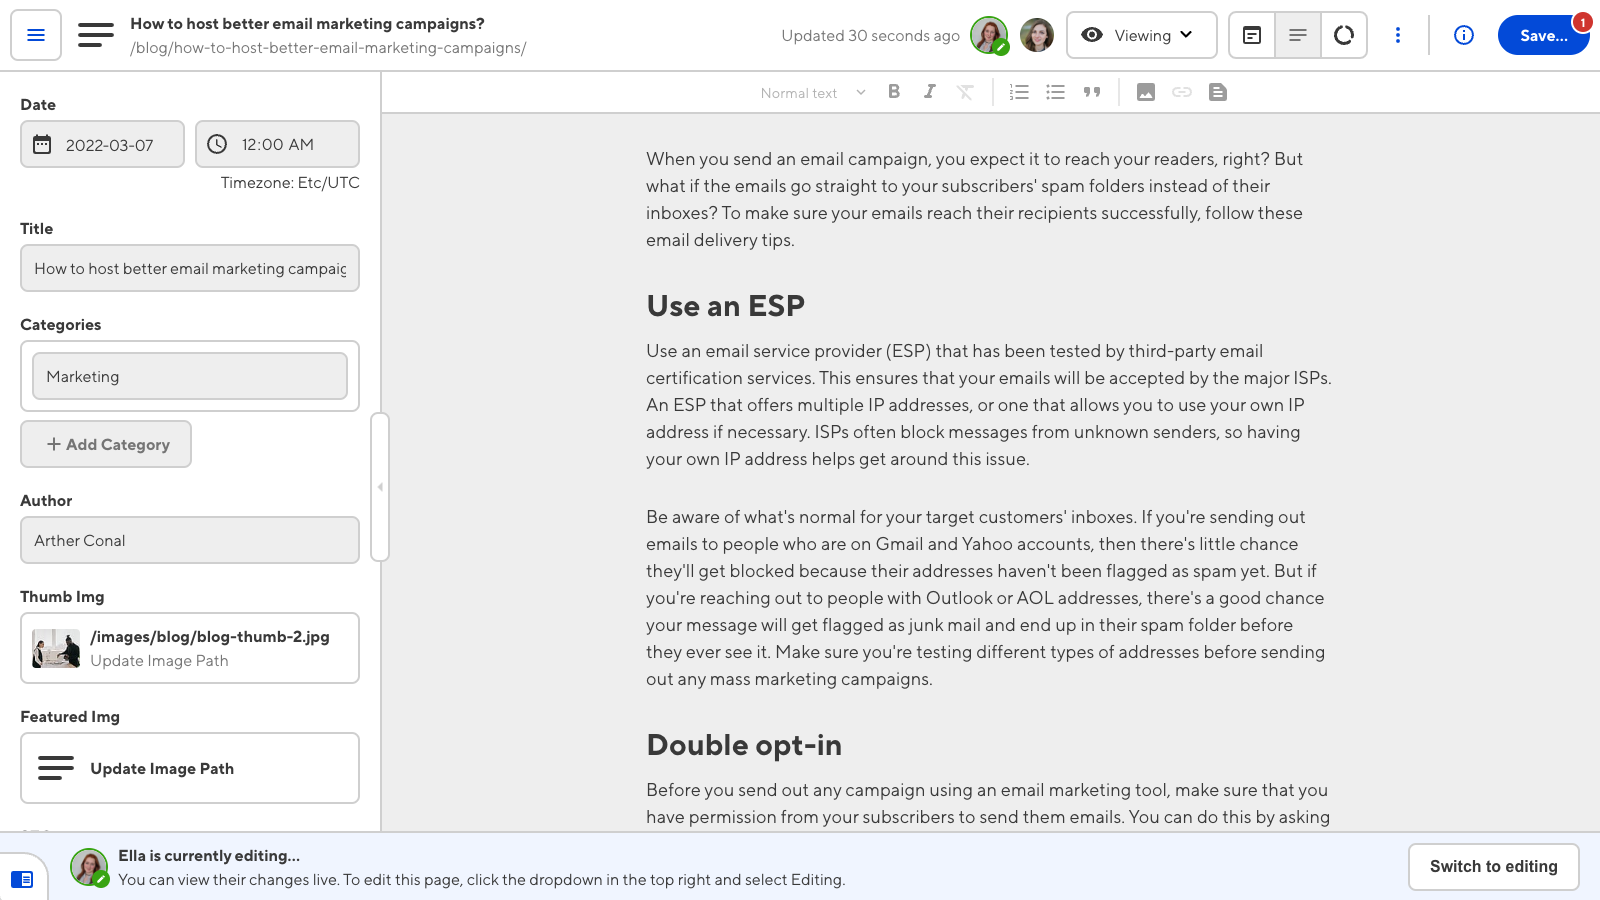
For each file, one person can edit the file while any number of people view their edits live. You can switch which team member is Editing a file at any time, using the Editing/Viewing dropdown or the Switch to editing button in the banner at the bottom of the editing interface.

While Editing, all the changes you make to your file are visible to the rest of your team. While Viewing, you can interact with the file in read-only mode. You can switch between Editing and Viewing as many times as necessary.
CloudCannon will remember any updates you make in-app — your content is safe if you need to switch the editing interface or which team member is editing a file.
Need to find the file a team member is working on? Click on their avatar to see a list of their open files.
Split-screen#
If you want to see your editing interface and collection browser simultaneously, you can use CloudCannon split-screen. Toggle split-screen using the Toggle Split-screen button in the bottom left of the editing interface. Split-screen is only available on screens 1600px or wider.

To close split-screen, click the Close Split-screen button in the top left of your editing interface.
Close editing interface#
When you are ready to leave the editing interface, you can click the Return to Site button in the top left of the editing interface.
File badges in the collection browser#
As you make changes, CloudCannon will add a file badge to each file card to summarize the type of changes. These badges are useful for understanding what type of unsaved changes your site has, particularly in the collection or file browser or the Review changes modal when you save your changes.
Changed files will receive a New, Edited, or Deleted badge to indicate the type of unsaved changes.

- The New badge indicates that this file was recently uploaded or created.
- The Edited badge indicates that this file’s content has been updated.
- The Deleted badge indicates that you or a team member have marked this file for deletion. Saving your site will delete this file. You can restore deleted files any time before you save your changes using the context menu in the top right of the file card.
Renamed files will appear twice; the file with the new name will have a New badge, and the file with the old name will have a Deleted badge.