DigitalOcean Spaces is a scalable, performant data storage service, built to be compatible with Amazon's S3 interface.
Below is a step-by-step guide for getting set up with DigitalOcean Spaces and connecting it to CloudCannon. Note that one step in this guide requires the use of a command-line interface.
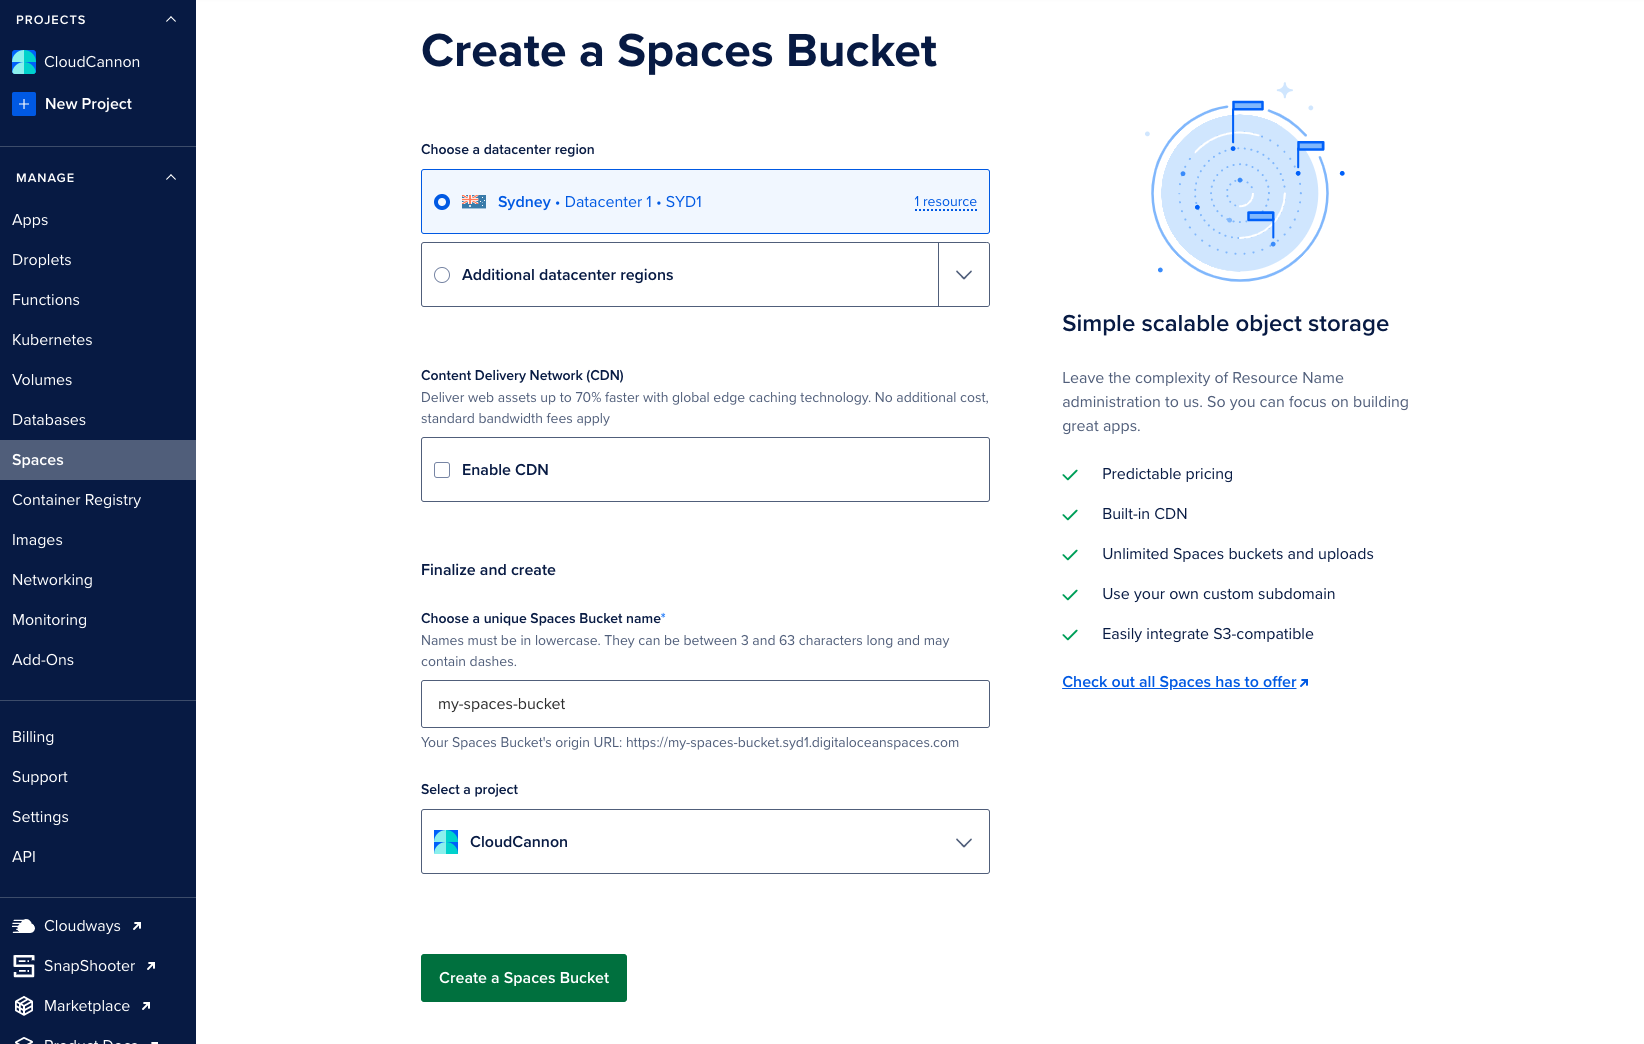
Create your Spaces bucket
Sign in to your DigitalOcean account, and navigate to "Spaces" using the sidebar.
Click the "Create Spaces Bucket" button. Choose a datacenter region close to your users and enter a unique name for your bucket. Finally, click "Create a Spaces Bucket" to finish.
Configure CORS policies
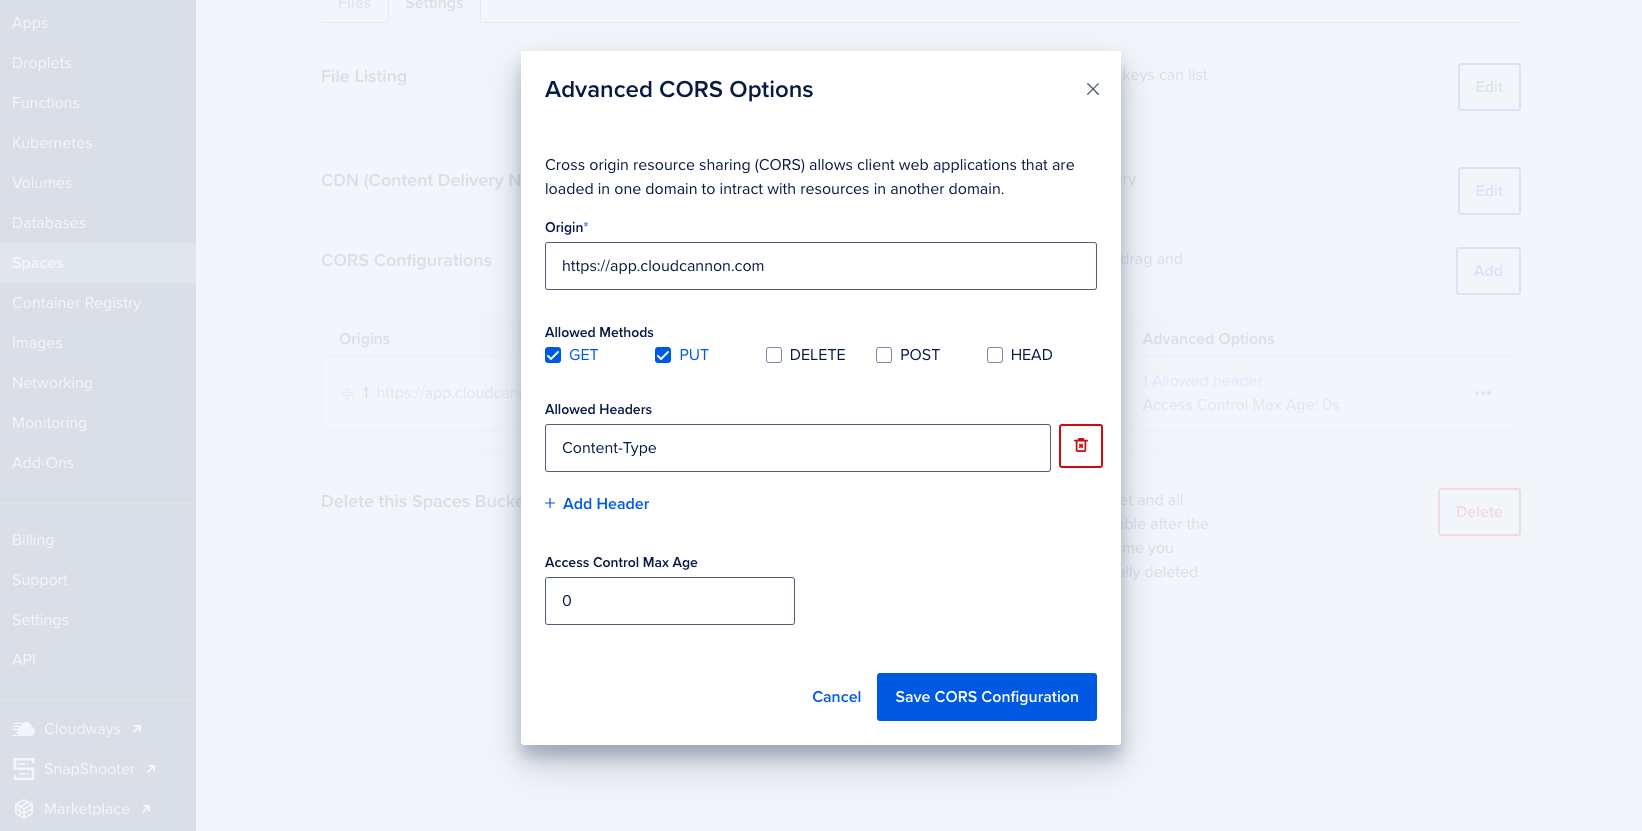
You will need to configure your CORS policies to allow CloudCannon to interact with your bucket. In the Settings tab for your bucket in DigitalOcean, click the Add button next to "CORS Configurations" to add a new policy.
Minimally, you need to allow the GET and PUT methods, and the Content-Type header for https://app.cloudcannon.com.
Create an API token
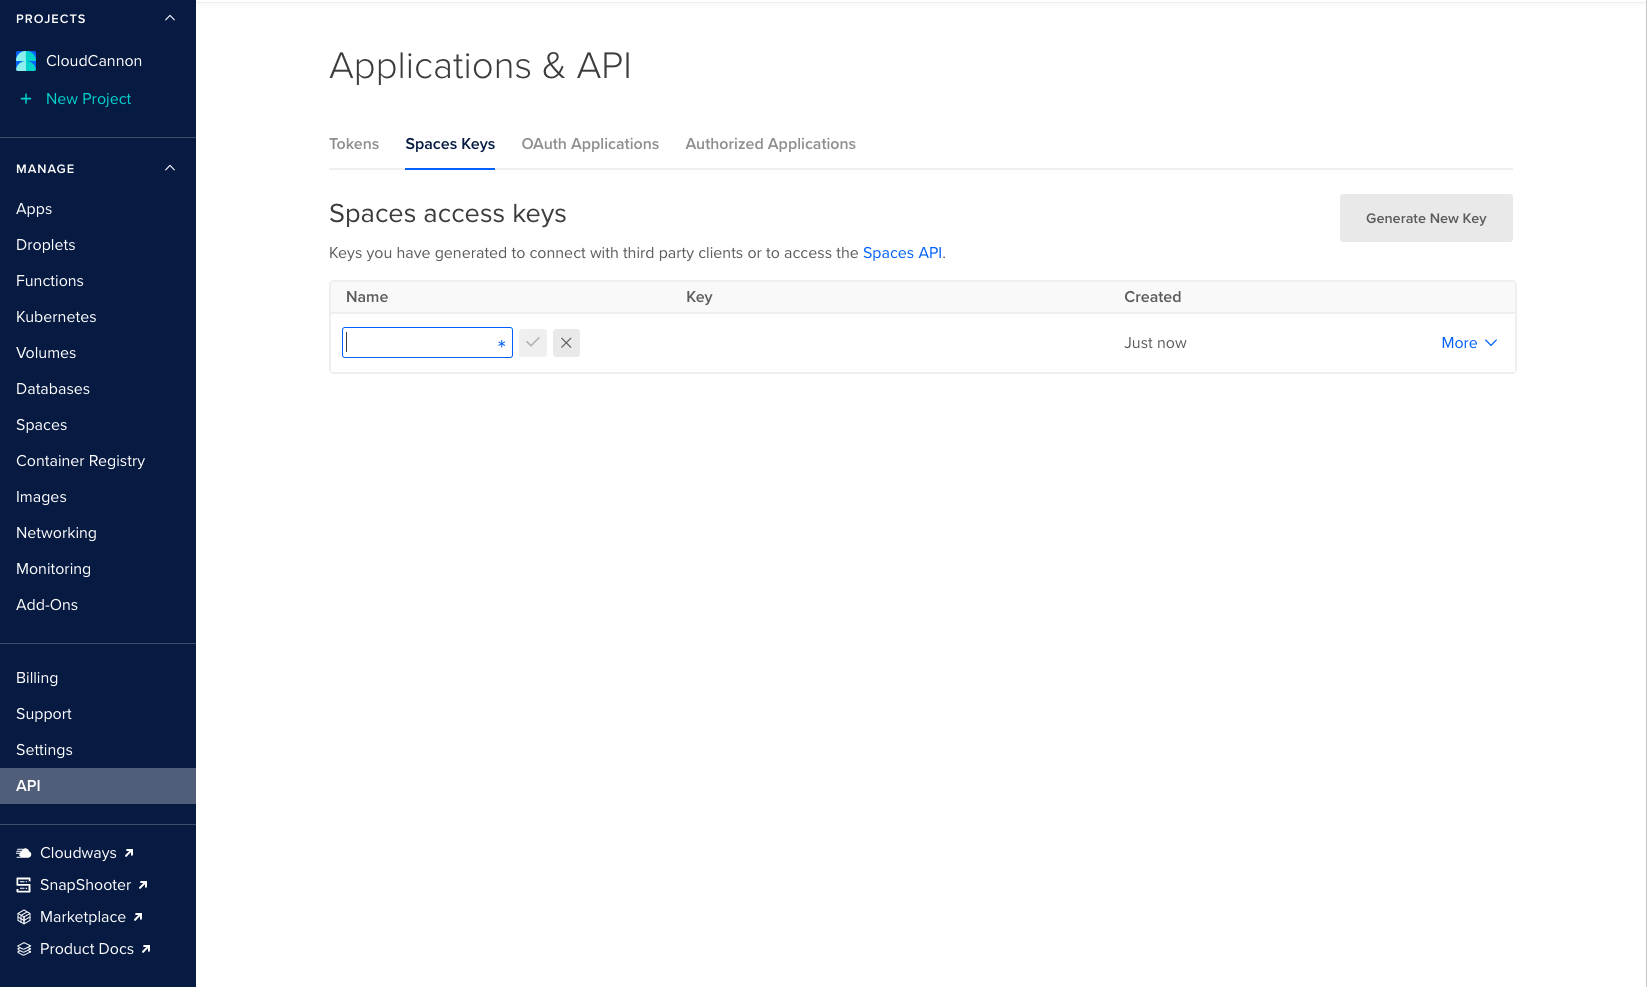
You will also need to create an API token to allow CloudCannon to access your bucket. Click on "API" in the sidebar in DigitalOcean, and open the "Spaces Keys" tab.
Click "Generate New Key" and type any name to create the key. Save the secret token somewhere safe, and note down the Key for later.
Make your bucket items public
By default, all the objects in your DigitalOcean Spaces bucket are private, and cannot be viewed without authentication. You will need to make them public, so that they can be viewed on your site and within CloudCannon. You can configure the permissions on each object separately within DigitalOcean, but ideally we want to make all objects in the bucket public by default.
DigitalOcean Spaces is compatible with Amazon's S3 API, so you can use the AWS CLI to make changes to your bucket policy. See the AWS guide for installing the CLI here.
First, make a file called policy.json with the following contents, substituting <YOUR-BUCKET-NAME> with the name of your bucket. This policy will allow public read access for all objects within your bucket.
{
    "Version": "2012-10-17",
    "Statement": [
        {
            "Sid": "PublicReadGetObject",
            "Effect": "Allow",
            "Principal": "*",
            "Action": [
                "s3:GetObject"
            ],
            "Resource": [
                "arn:aws:s3:::<YOUR-BUCKET-NAME>/*"
            ]
        }
    ]
}Now run this command in your terminal, using the aws command line tool. Again, you will need to substitute the angle-bracketed placeholders with data from DigitalOcean.
AWS_ACCESS_KEY_ID=<YOUR-API-TOKEN-KEY> \
AWS_SECRET_ACCESS_KEY=<YOUR-API-TOKEN-SECRET> \
aws s3api put-bucket-policy \
    --bucket=<YOUR-BUCKET-NAME> \
    --policy=file://./policy.json \
    --endpoint-url=<YOUR-BUCKET-ENDPOINT>
Connect your DAM to CloudCannon
You should now have everything you need to connect CloudCannon with DigitalOcean Spaces.
Navigate to the Assets section of your Organization settings, and use the menu to authenticate a new DigitalOcean Spaces DAM.

Fill out the form as follows, then click "Authenticate" to finish.
- DAM Provider: DigitalOcean Spaces
- Name: This is the name you will see for your DAM in CloudCannon.
- Base URL: copy the "origin endpoint" in the bucket's settings in DigitalOcean. This should look something like
https://bucket-name.reg1.digitaloceanspaces.com - Region: a 4-character code representing the your bucket's region. You can find this in the middle of the bucket's origin endpoint.
- Endpoint: this is the same as Base URL, but with the bucket name removed from the front (e.g.
https://reg1.digitaloceanspaces.com) - Access Key: the key name for the secret you generated earlier.
- Access Secret: the secret token you generated earlier.
Extra options
In your site settings, you can click the context menu on your linked DAM and select Settings to configure some extra site-level options.
The Extra Prefix option prepends a specified string to all asset paths when browsing and uploading assets. This is useful if you want to ensure that your site can only ever touch a specific folder in your DAM.