External DNS allows you to host your Site on CloudCannon but manage your DNS records elsewhere. You can set up external DNS through a different provider (e.g., Cloudflare) or your own servers.
Before configuring your Site's DNS, you must add a Custom Domain.
If you are using Cloudflare as your DNS provider, you will need to configure your DNS records differently. For more information, please read the section on configuring Cloudflare proxy.
Enable external DNS#
By default, CloudCannon will enable CloudCannon DNS for your Site.
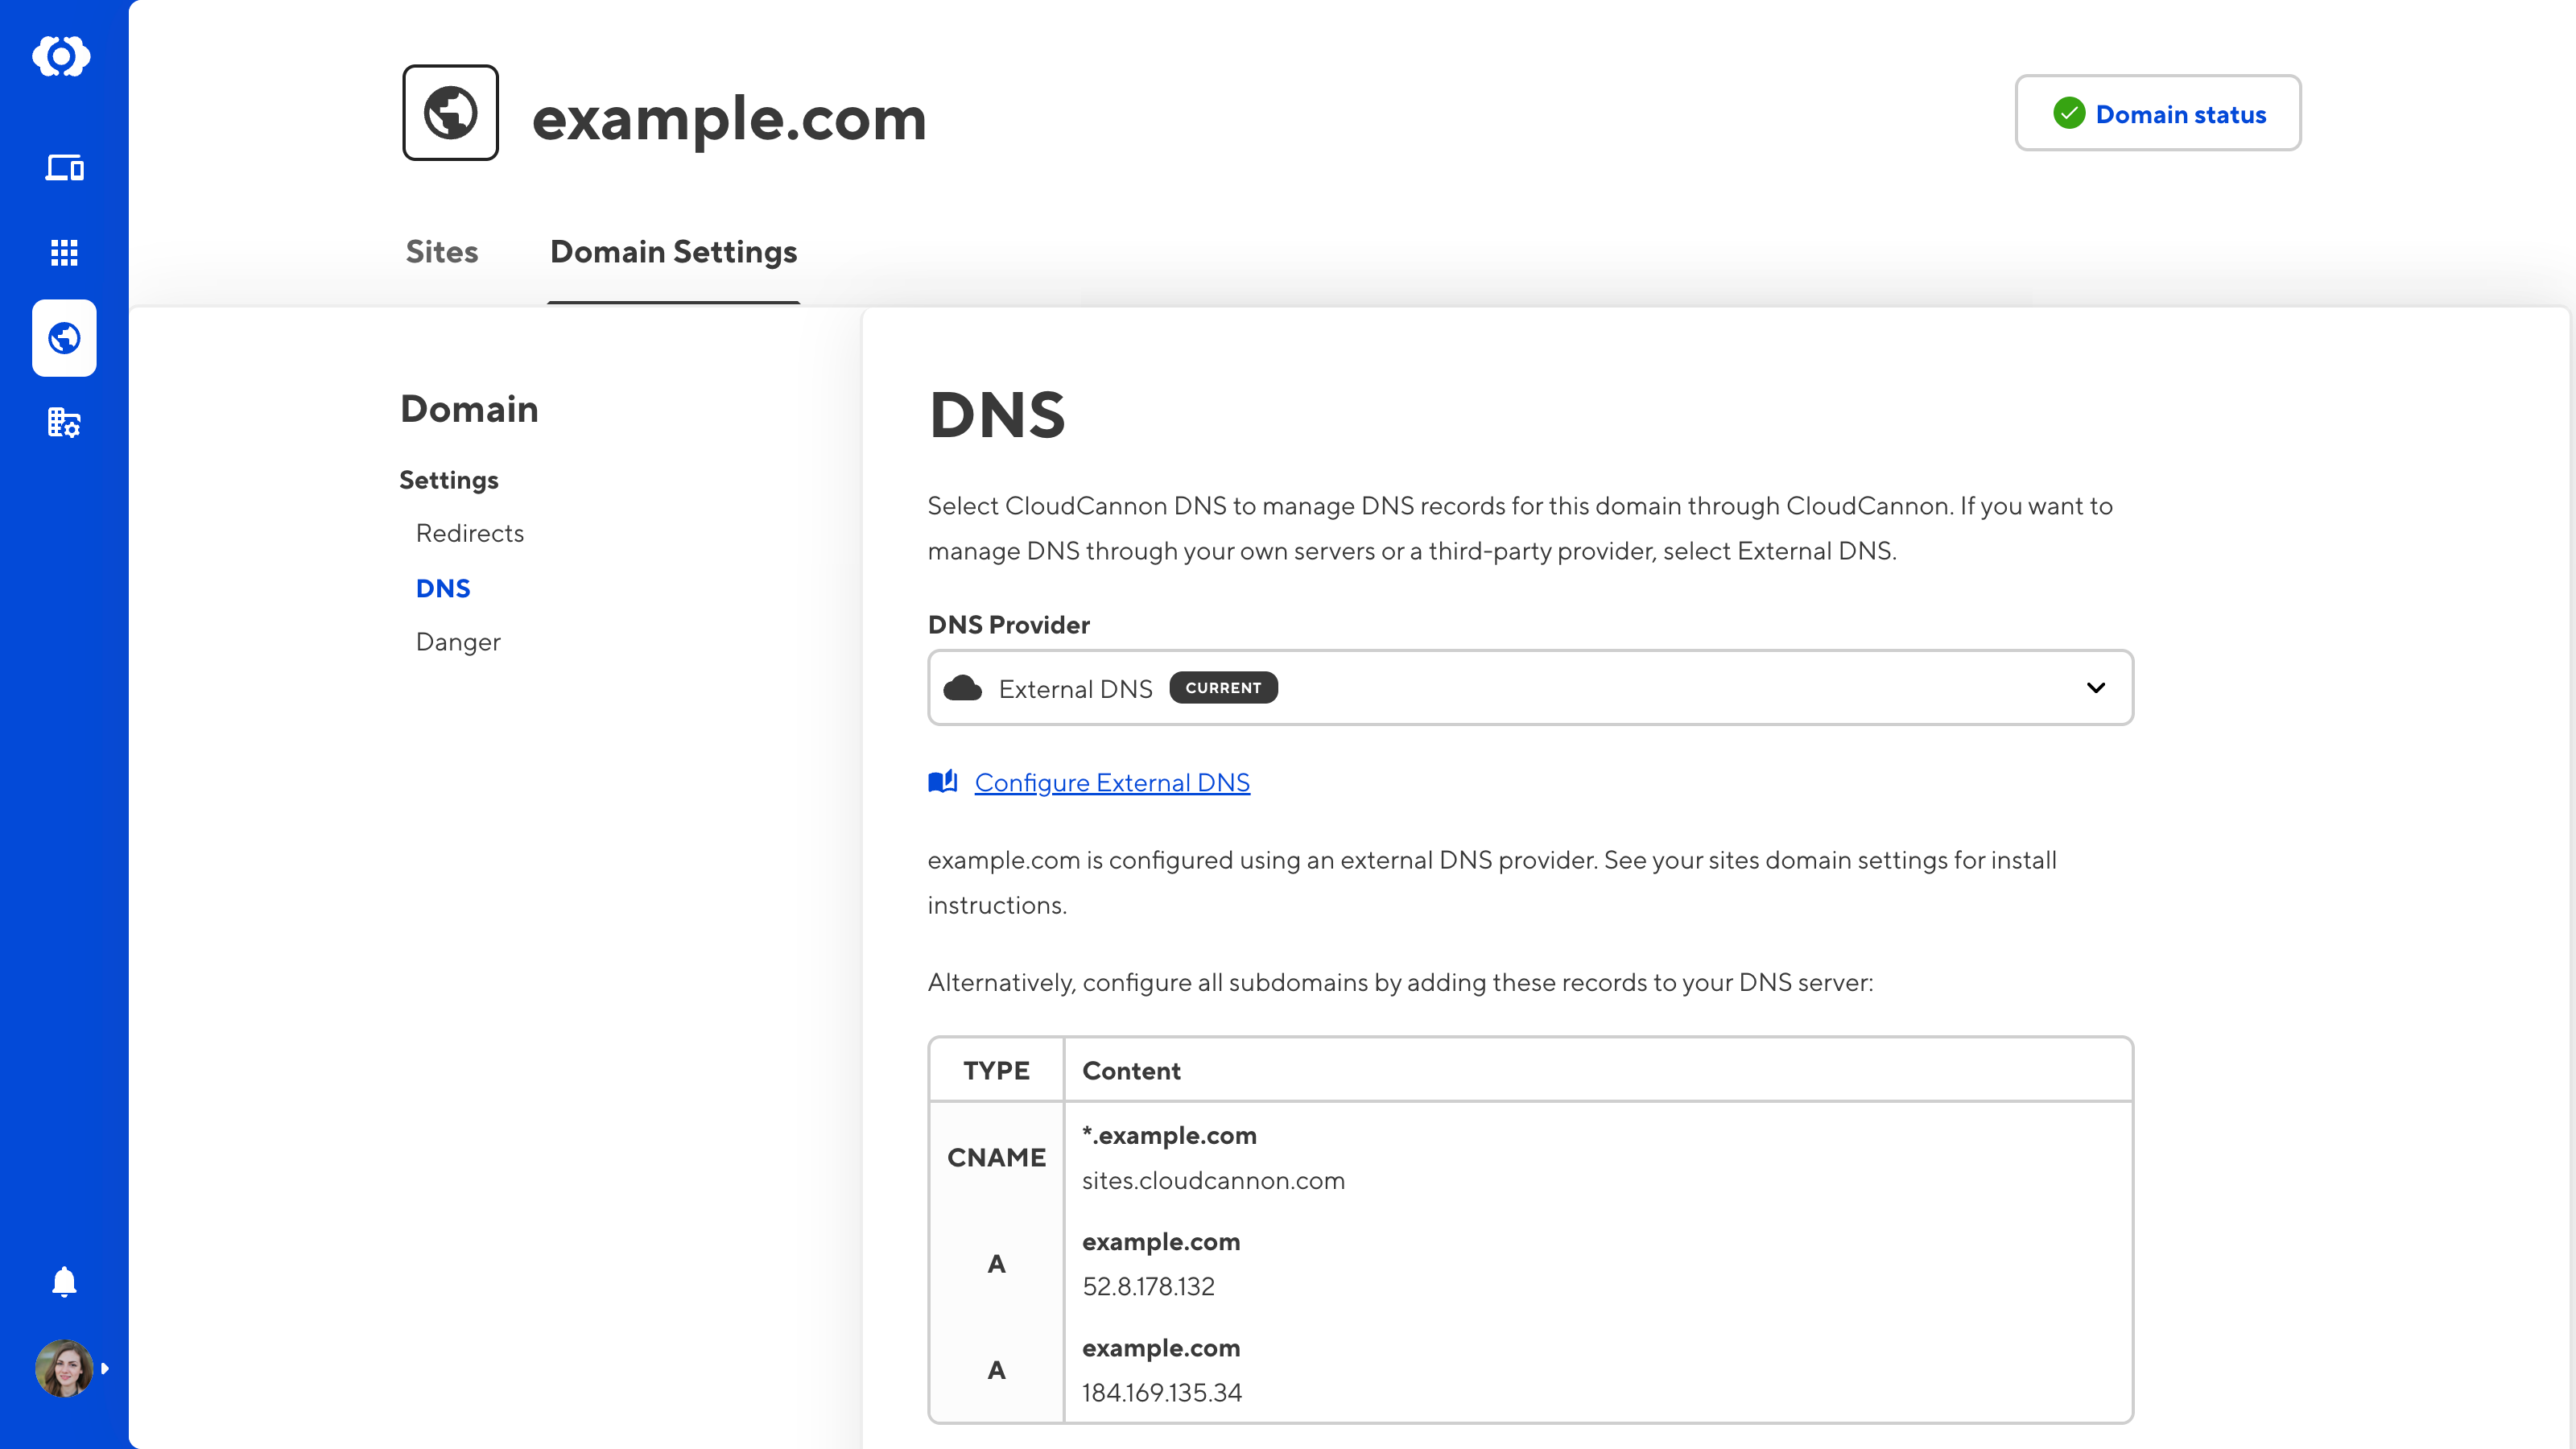
Edit the settings on the Domain Settings page to switch to external DNS for a site hosted on CloudCannon.
Updating your DNS provider can cause downtime for anything connected to your domain, such as your website or custom email address. Please make sure you have a copy of your existing DNS records before you change providers.
If you need help updating your DNS, please contact our friendly support team.
To switch to External DNS:
- Navigate to the Domain browser by clicking the globe icon in your App Navigation.
- Select the domain for which you want to configure DNS.
- Under the Domain Settings tab, open the DNS section.
- Select the External DNS option in the DNS Provider dropdown.
- Click the Update DNS Provider button.
You can now manage your DNS records through an external provider.

Load balancing on external DNS#
Load balancing is a method of distributing incoming traffic requests across multiple servers, providing redundancy in case one or more servers are offline. This reduces the potential downtime risk for your Site.
If you use an external DNS provider, CloudCannon will not be able to dynamically load balance incoming traffic to your Site. We recommend using CloudCannon DNS, particularly for Sites on your base domain, or investigating if your third-party DNS service provides load balancing.
CloudCannon DNS records#
When you enable external DNS for a Site hosted on CloudCannon, CloudCannon will ask you to add three DNS records to your DNS provider: two A Records and a CNAME Record.
The two A Records specify the IP addresses of the appropriate CloudCannon hosting servers for the your base domain. The CNAME Record will direct queries for any subdomains to CloudCannon's hosting servers.
If you use a Cloudflare, setting up a CNAME Record for your base domain while using external DNS will result in a 1001 DNS Error.
Configure Cloudflare Proxy#
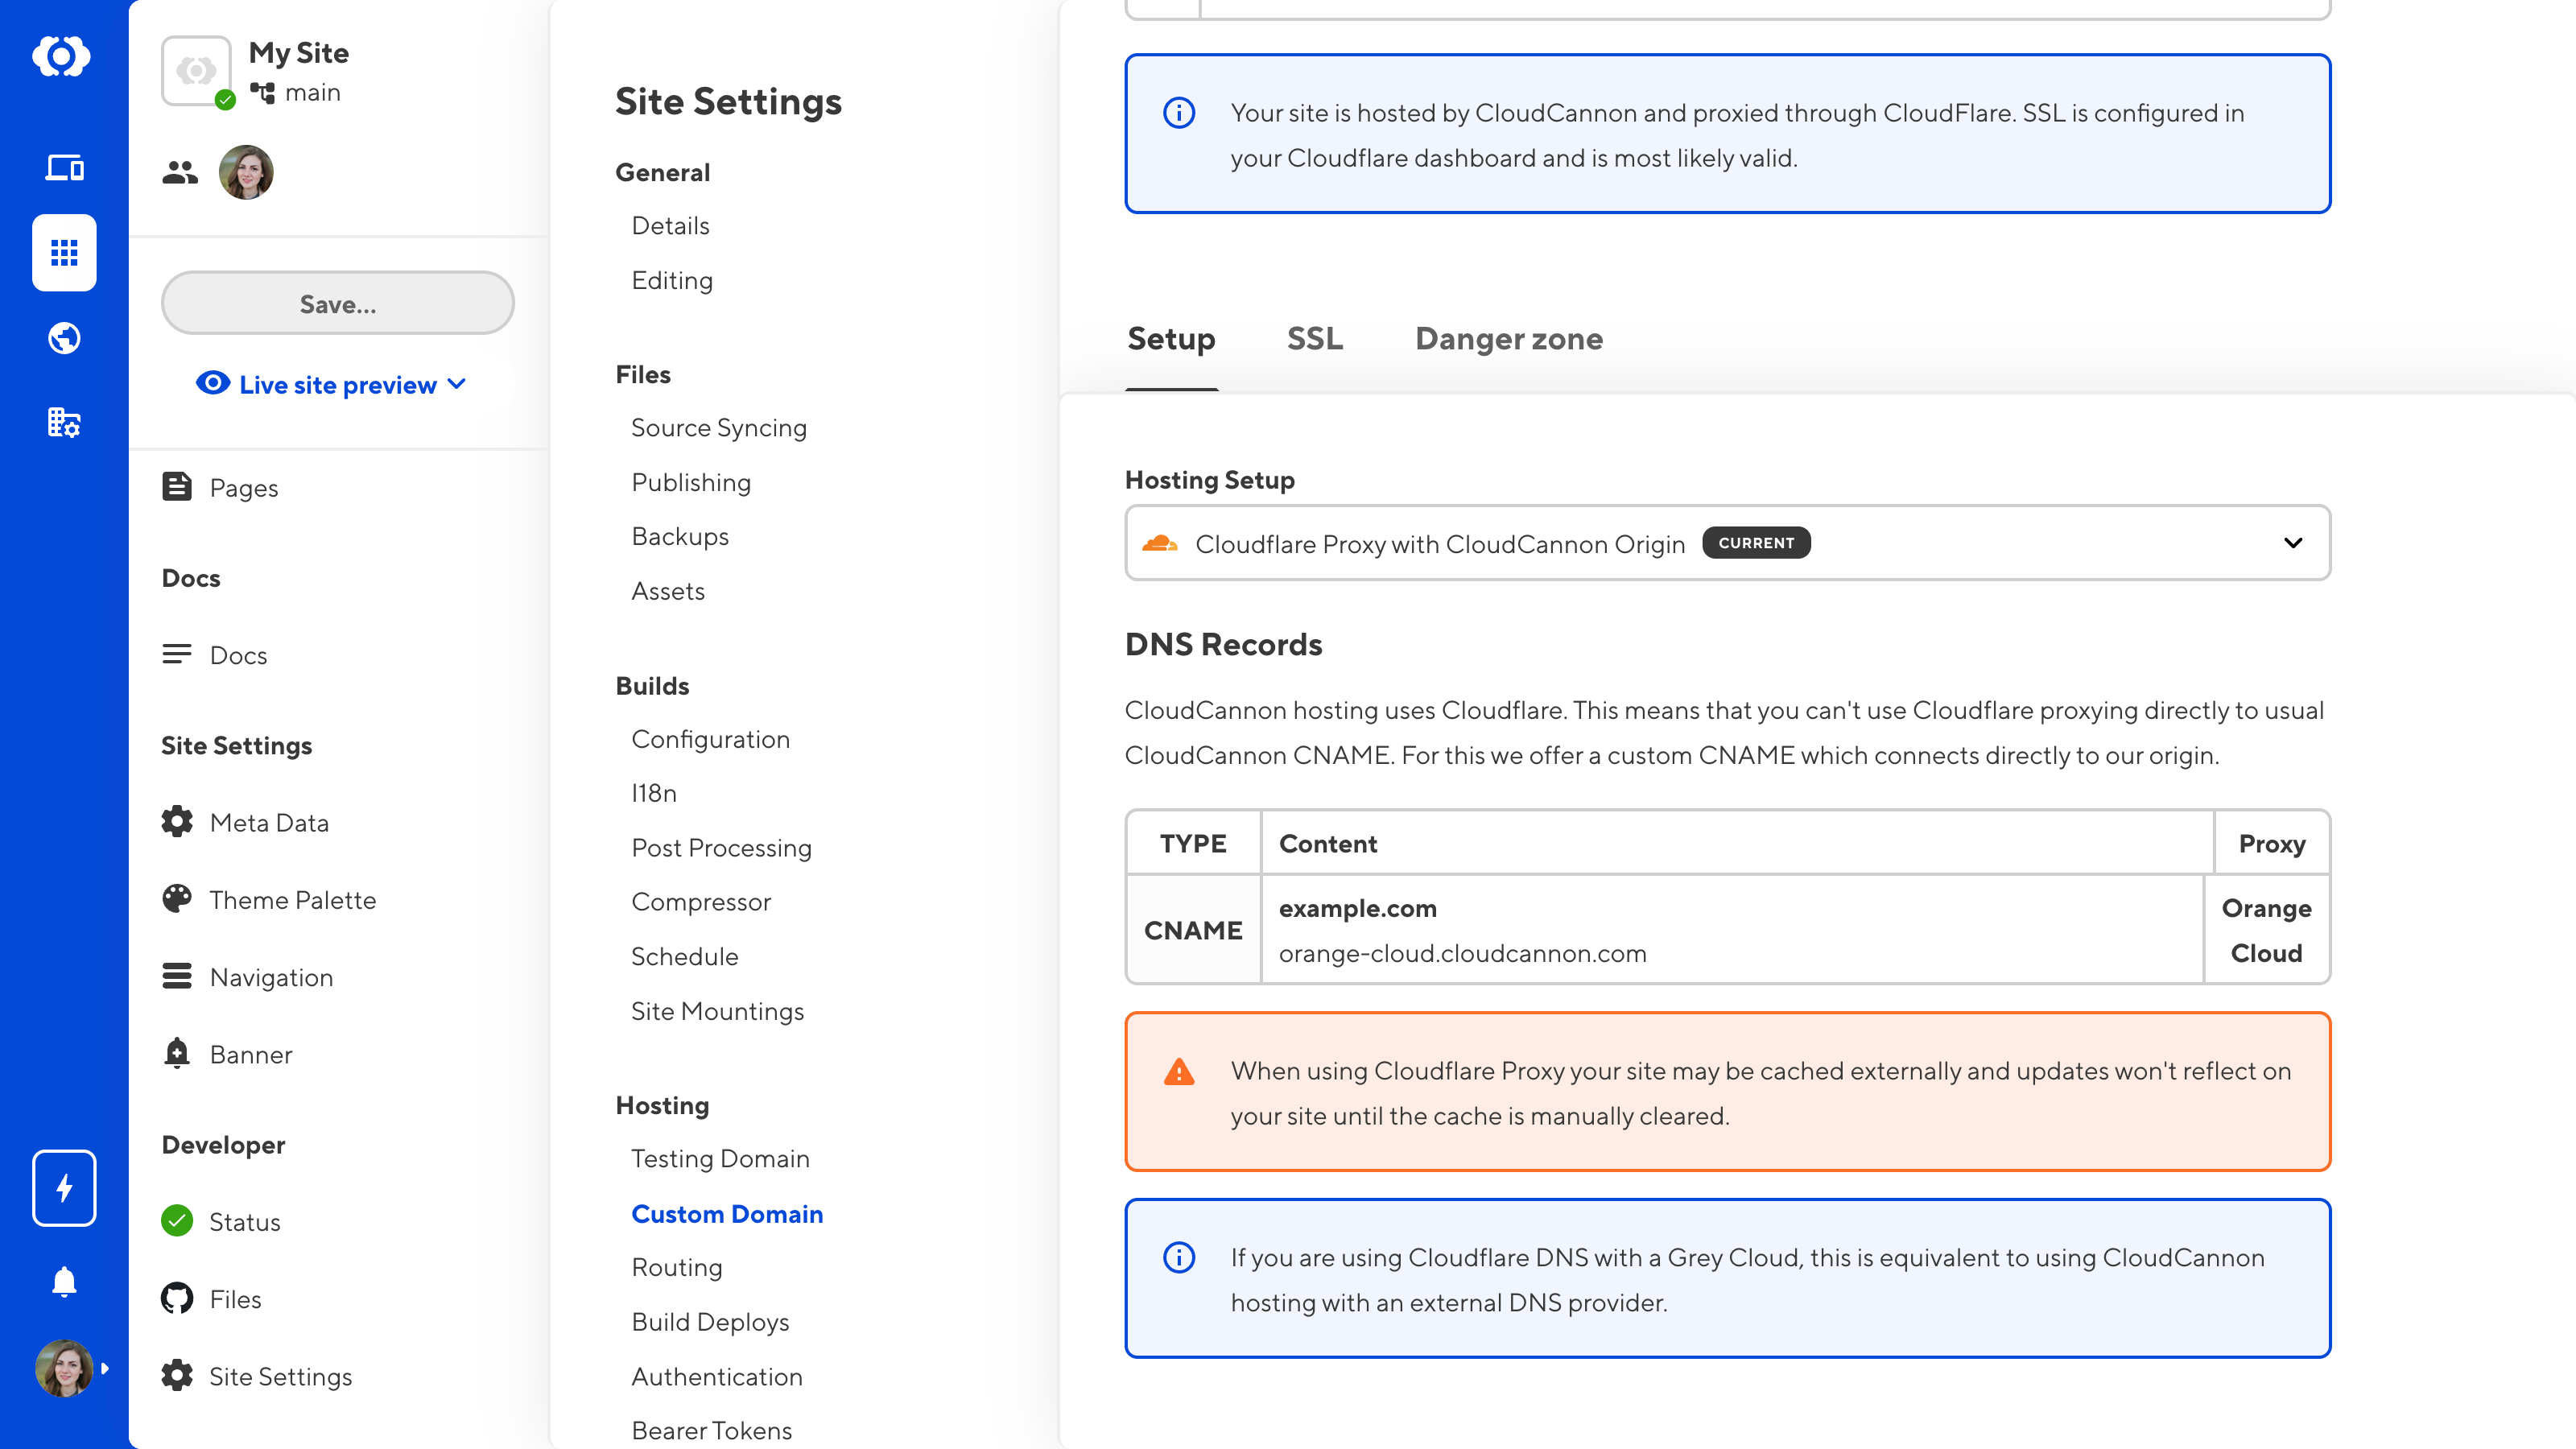
CloudCannon hosting uses Cloudflare. If you are using Cloudflare as your DNS provider and have Cloudflare's Proxy feature enabled for your DNS records, you will not be able to proxy directly to the normal CloudCannon CNAME (i.e., sites.cloudcannon.com).
To resolve this issue, you can either turn off Orange Cloud or set up Cloudflare Proxy with CloudCannon Origin and add a CNAME record to your DNS provider.
To set up Cloudflare Proxy with CloudCannon Origin:
- Navigate to the Custom Domain page under Site Settings.
- Under the Setup tab, select the Cloudflare Proxy with CloudCannon Origin option in the Hosting Setup dropdown.
- Click the Switch to Cloudflare Proxy with CloudCannon Origin to confirm.
To add a CNAME record:
- Log in to Cloudflare and navigate to your DNS settings.
- Add a CNAME record pointing to your Domain Name (e.g., example.com) at orange-cloud.cloudcannon.com.
Your Site might be cached externally if you use Cloudflare Proxy. In this case, your Site won't show any updates until you manually clear your cache.

Single Origin#
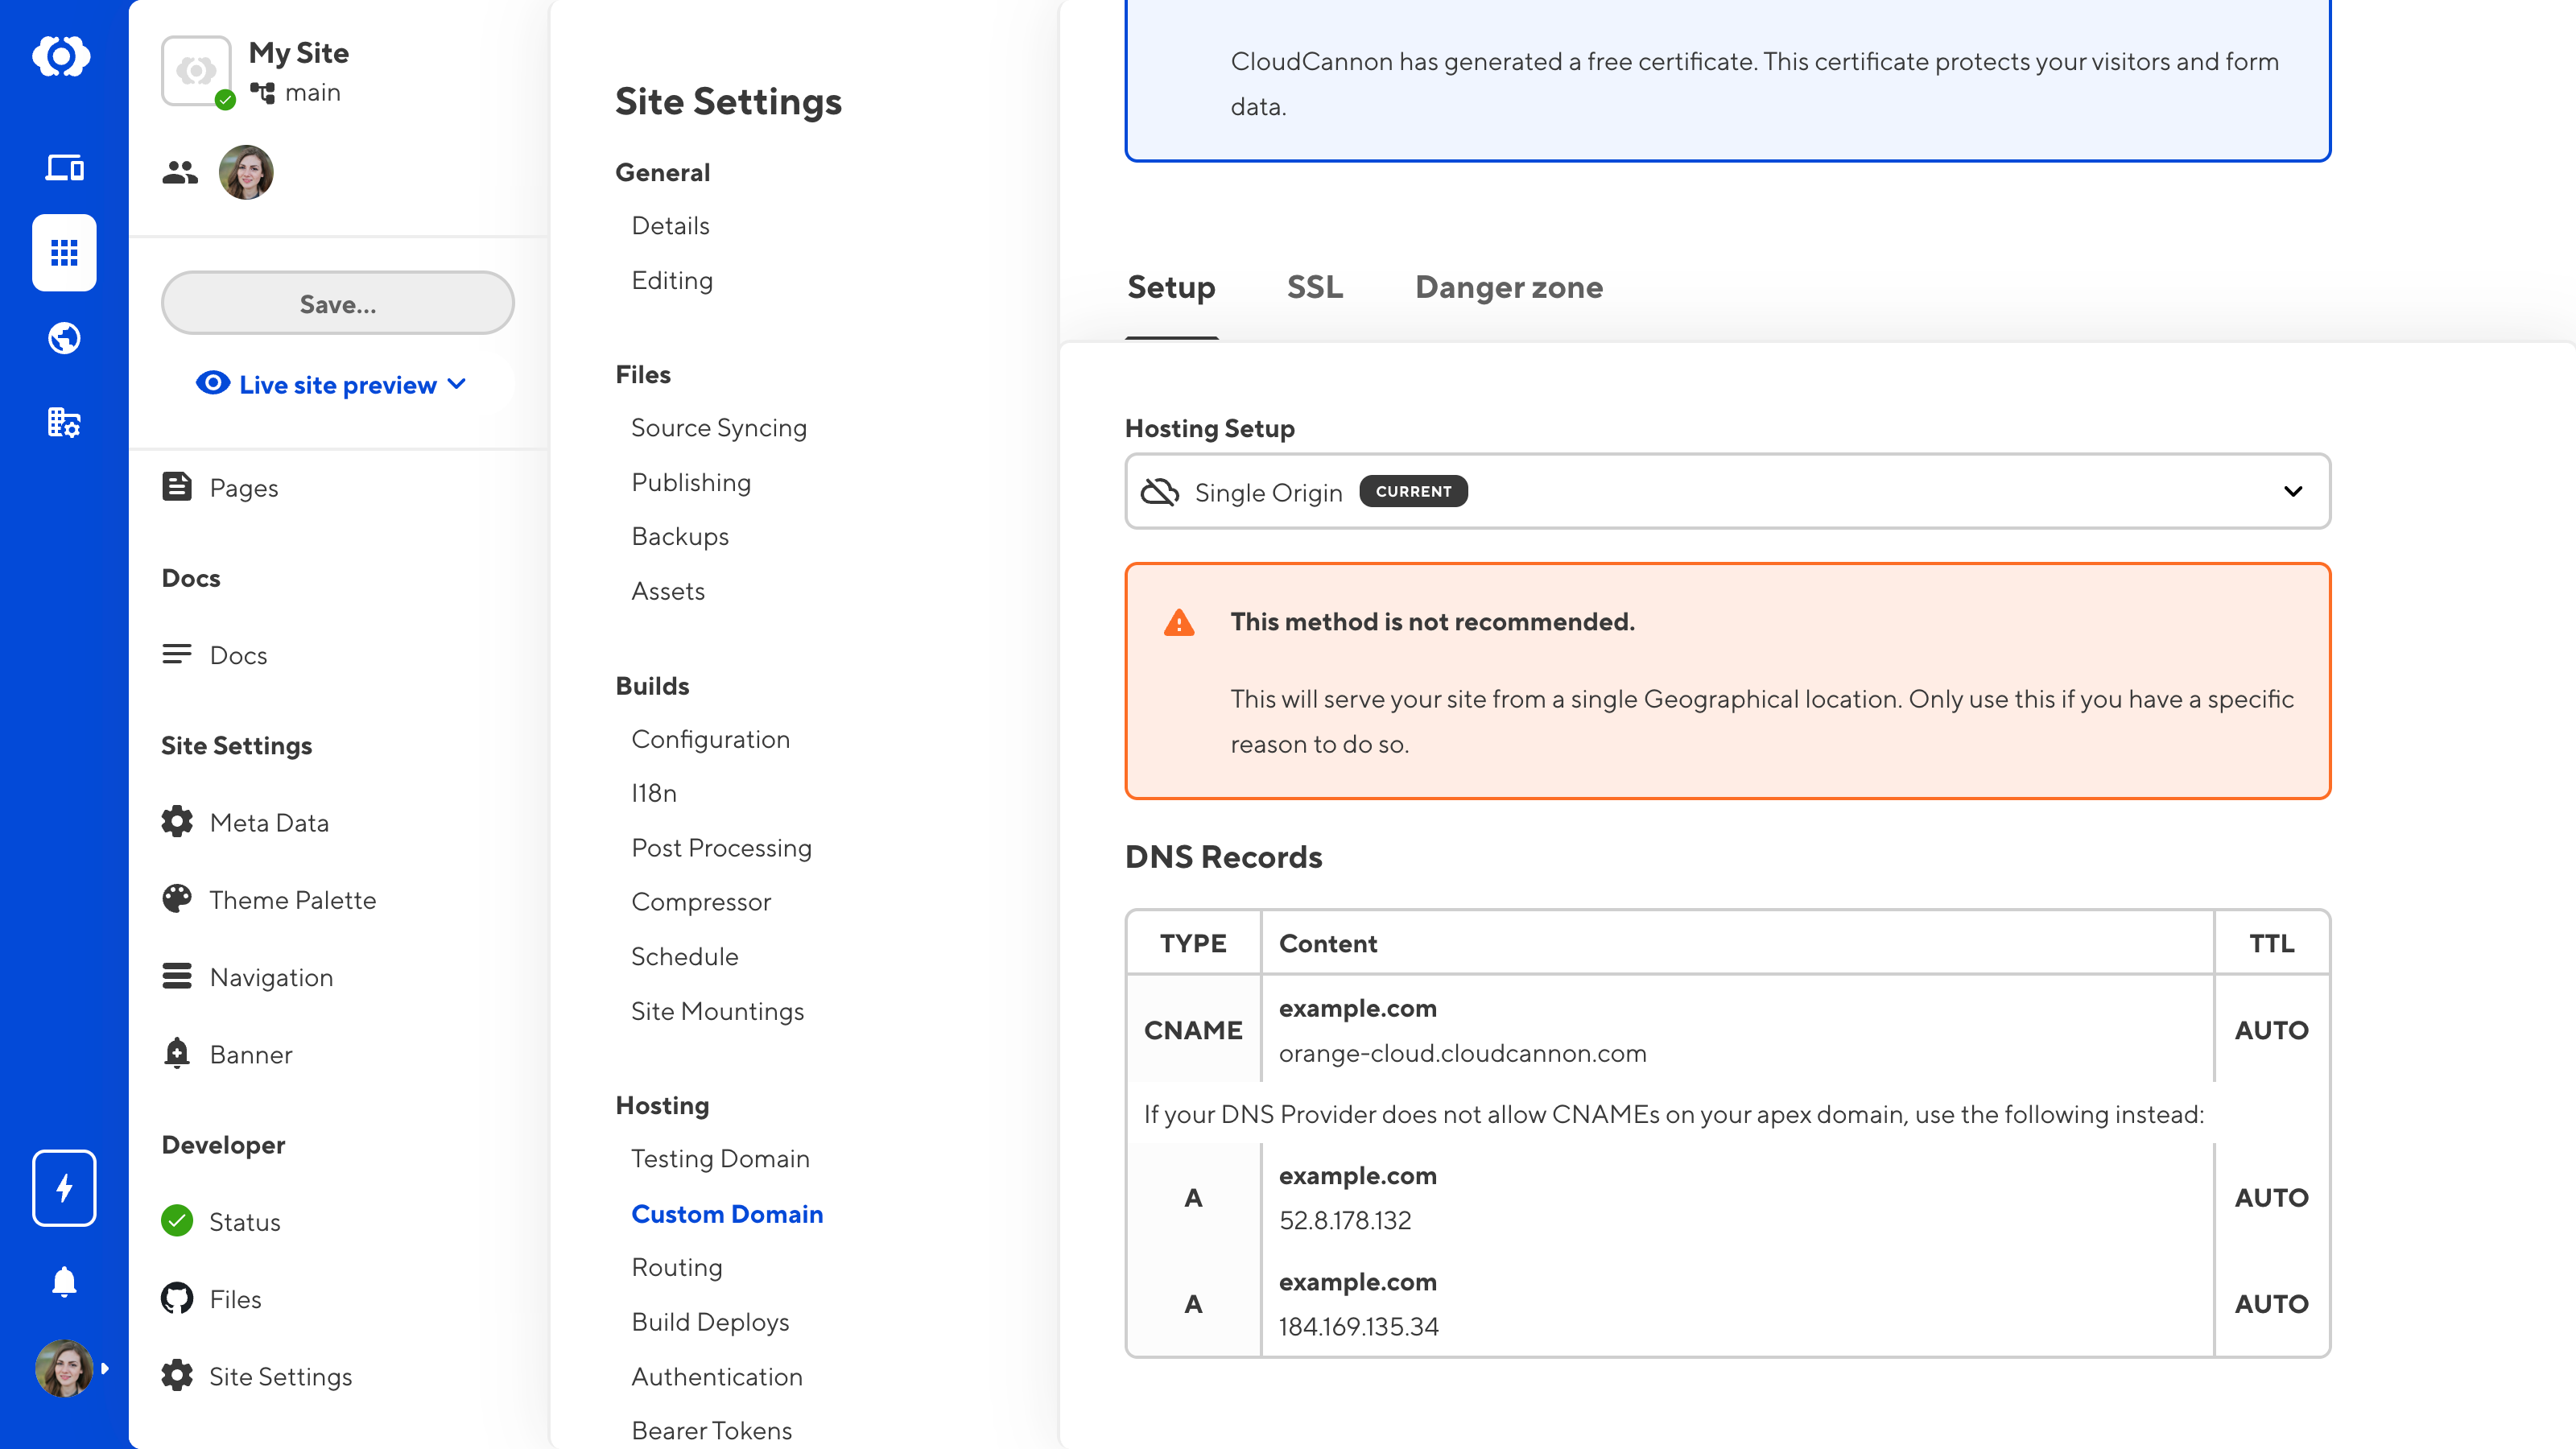
We do not recommend this option unless you have specific set up requirements. For assistance setting up your DNS, please contact our friendly support team.
In some cases, you may need to configure your DNS records to point directly at CloudCannon's host origin rather than sites.cloudcannon.com. This bypasses the normal benefits of hosting on CloudCannon:
- The ability for CloudCannon to auto-generate a wildcard SSL certificate for your domain and its subdomains.
- Faster DNS lookup speed due to a globally distributed edge caching network.
Most commonly, you might use this setup if you need to point your base domain at CloudCannon while also using an external DNS.
To achieve this, you can set up Single Origin hosting and add DNS records to your DNS provider.
To set up Single Origin hosting:
- Navigate to the Custom Domain page under Site Settings.
- Under the Setup tab, select the Single Origin option in the Hosting Setup dropdown.
- Click the Switch to Single Origin to confirm.
To add a DNS records:
- Log in to your third-party DNS provider.
- Add the CNAME record displayed on the Setup tab of the Custom Domain page. If your DNS provider does not allow CNAME records on a base domain, add the two A records instead.
