Connecting GitLab allows you to work on your websites locally and have the changes sync to CloudCannon. File changes made on CloudCannon also get synced back to GitLab.
To connect to a self-hosted GitLab repository instead, follow the instructions listed for Self-Hosted GitLab.
To connect a GitLab repository and start syncing files, follow these instructions:
- Go to Site Settings / Syncing
- Select GitLab repository
- Click Authenticate
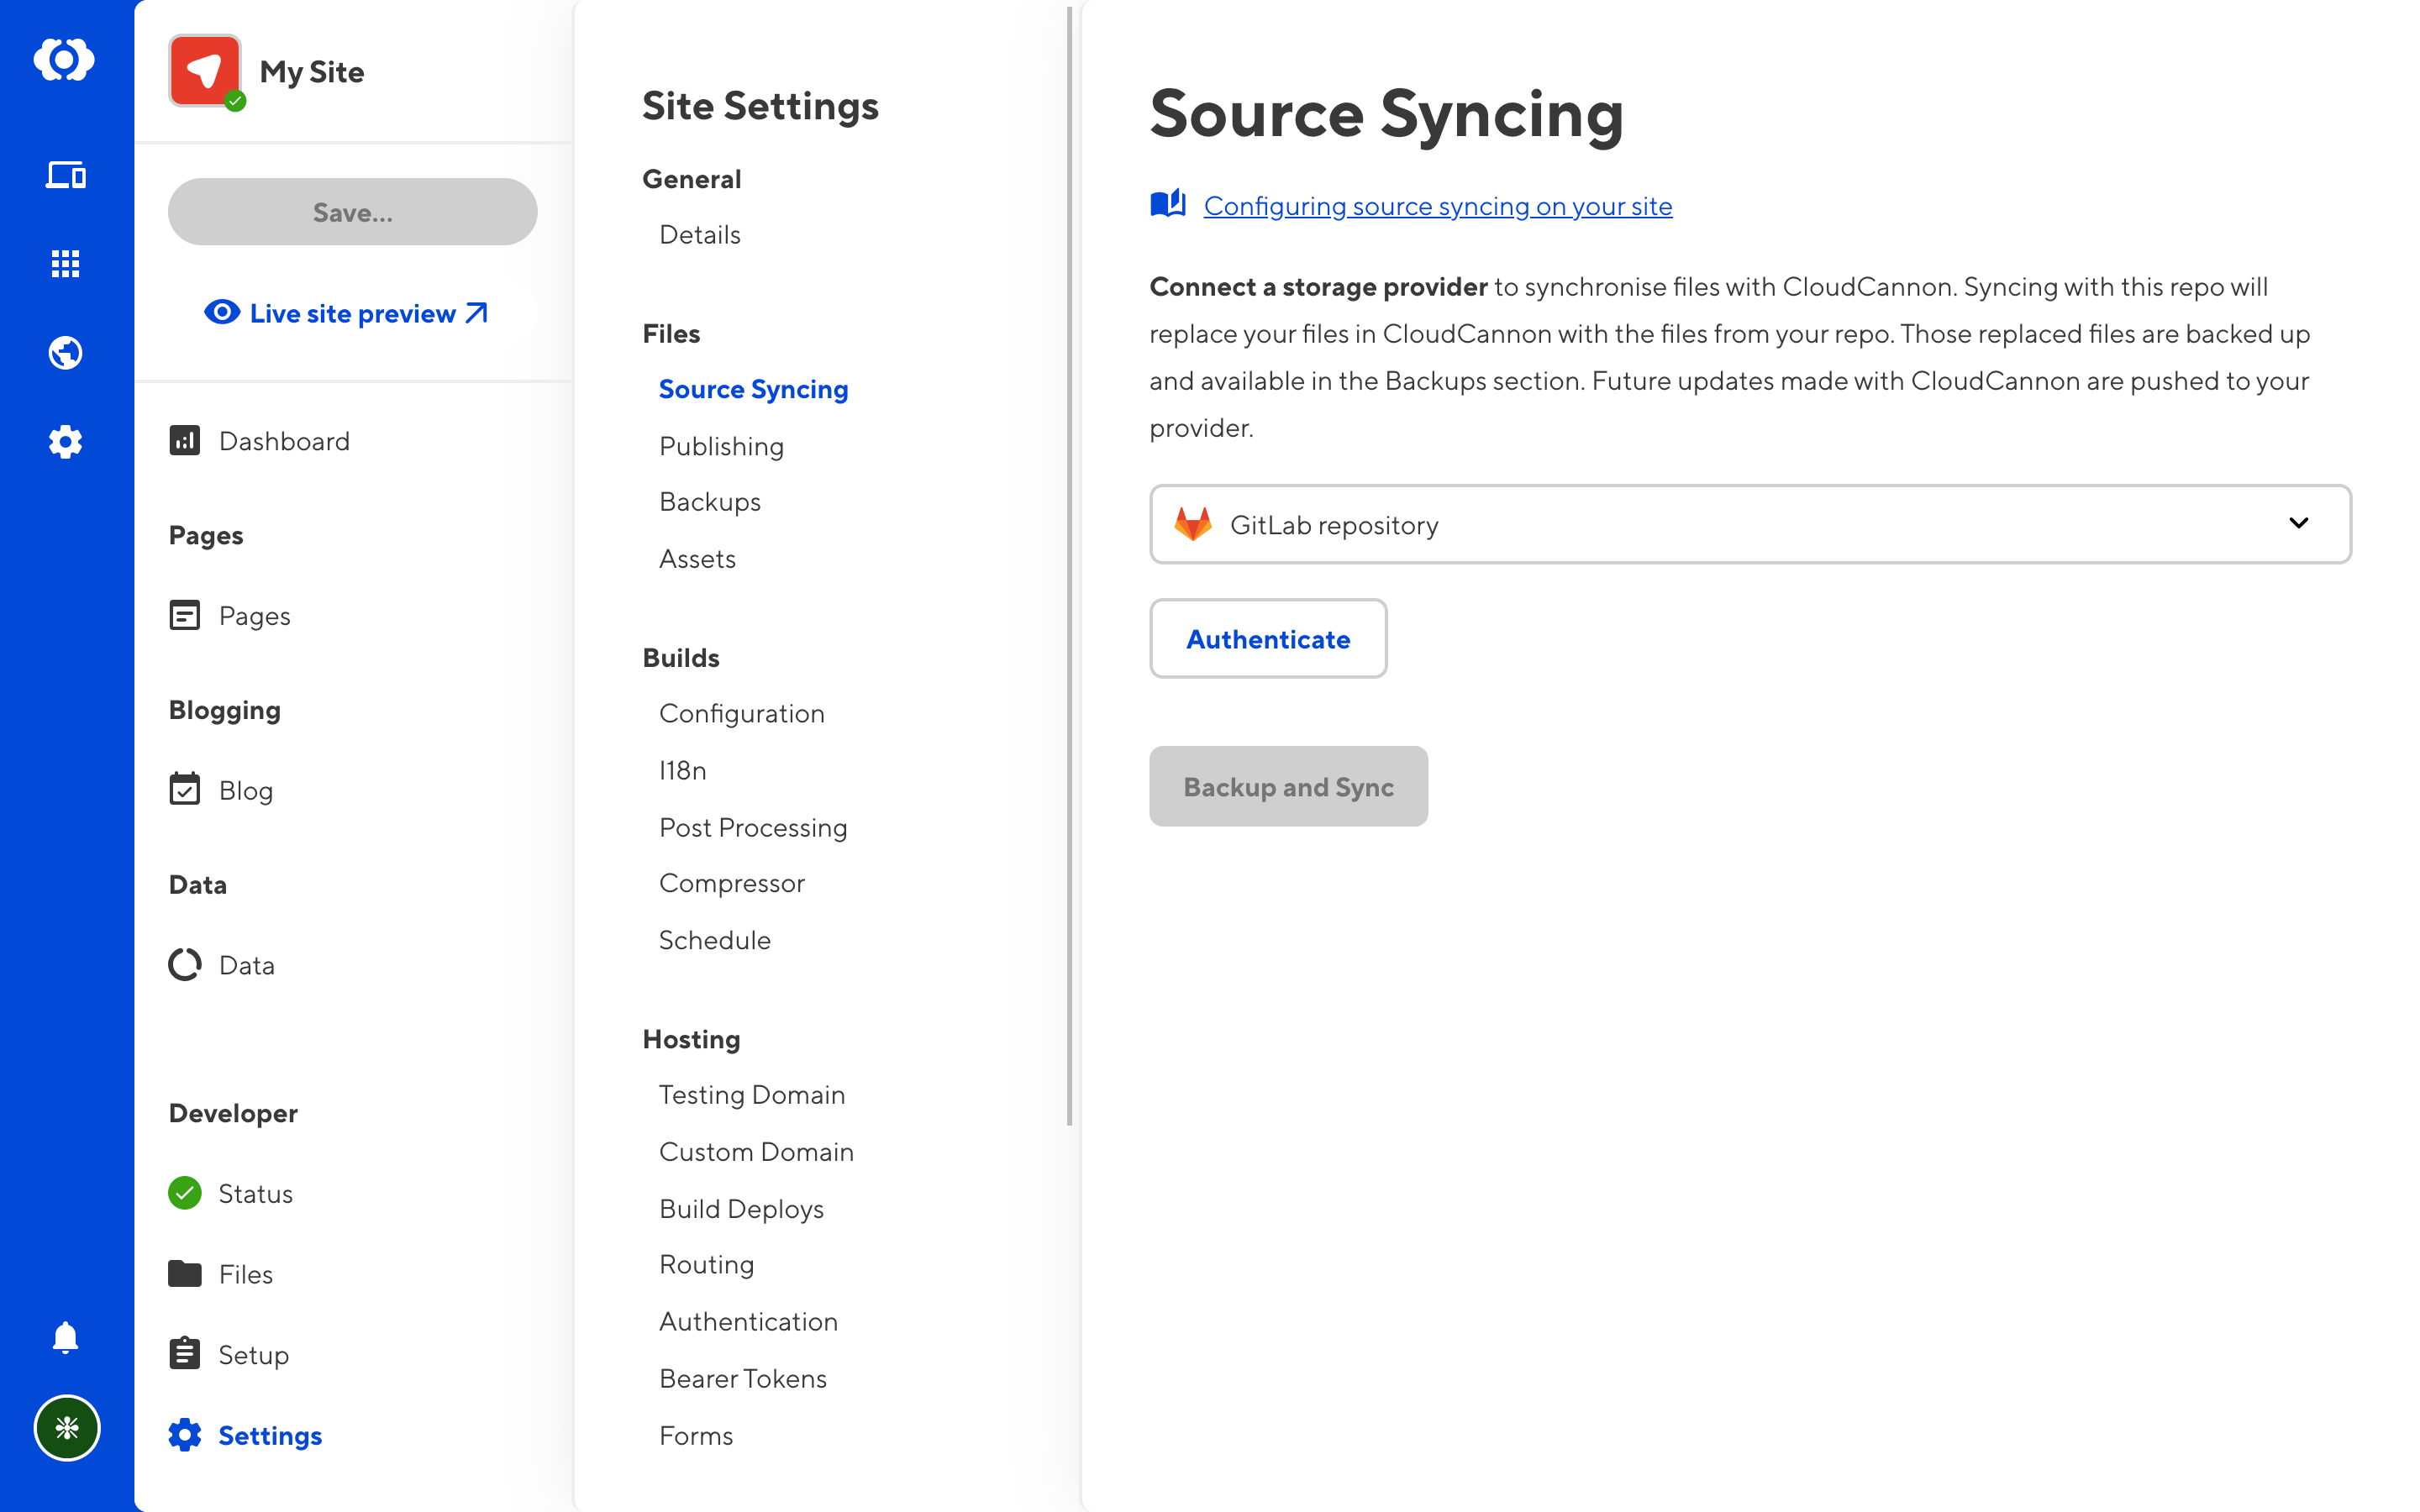
This will open a menu where you can connect to GitLab, via one of two methods.
Connecting with your user account#
You can connect to GitLab by authenticating with your user account. This will give your CloudCannon organization access to the same GitLab repositories you have access to.
This option will redirect you to GitLab. Log in and authorize CloudCannon access to your GitLab account, after which you will be redirected back to CloudCannon to pick a repository to connect.
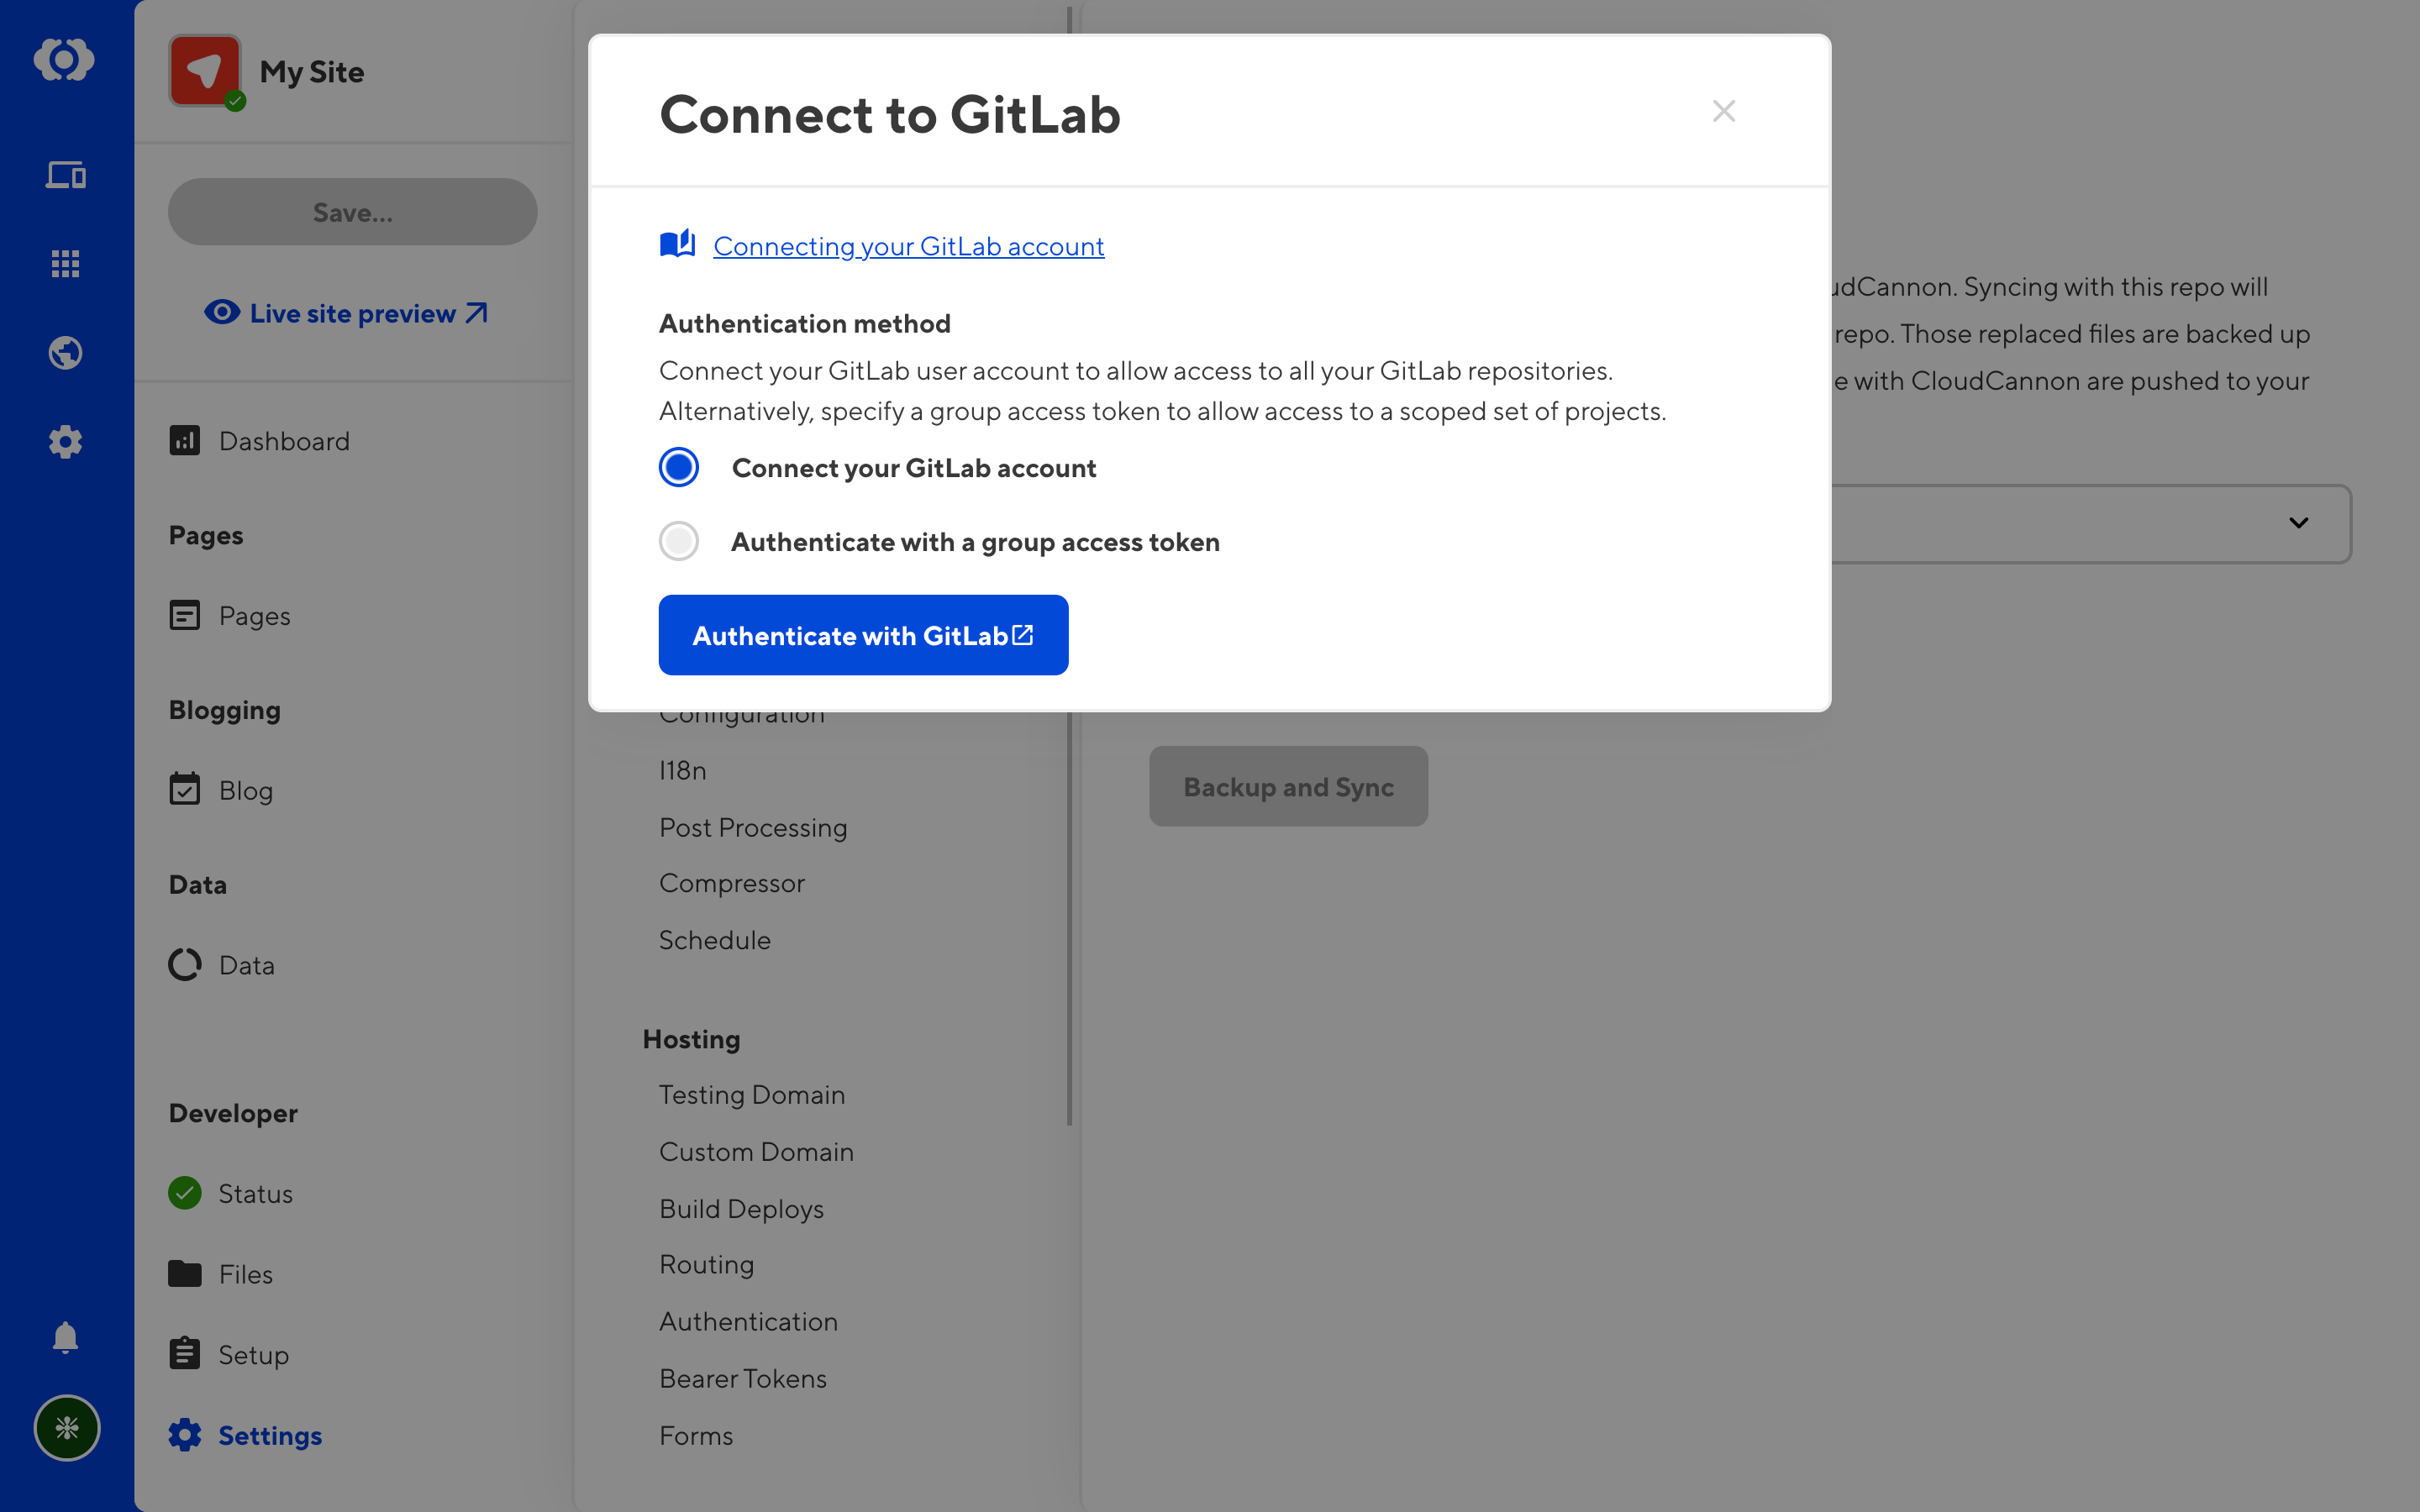
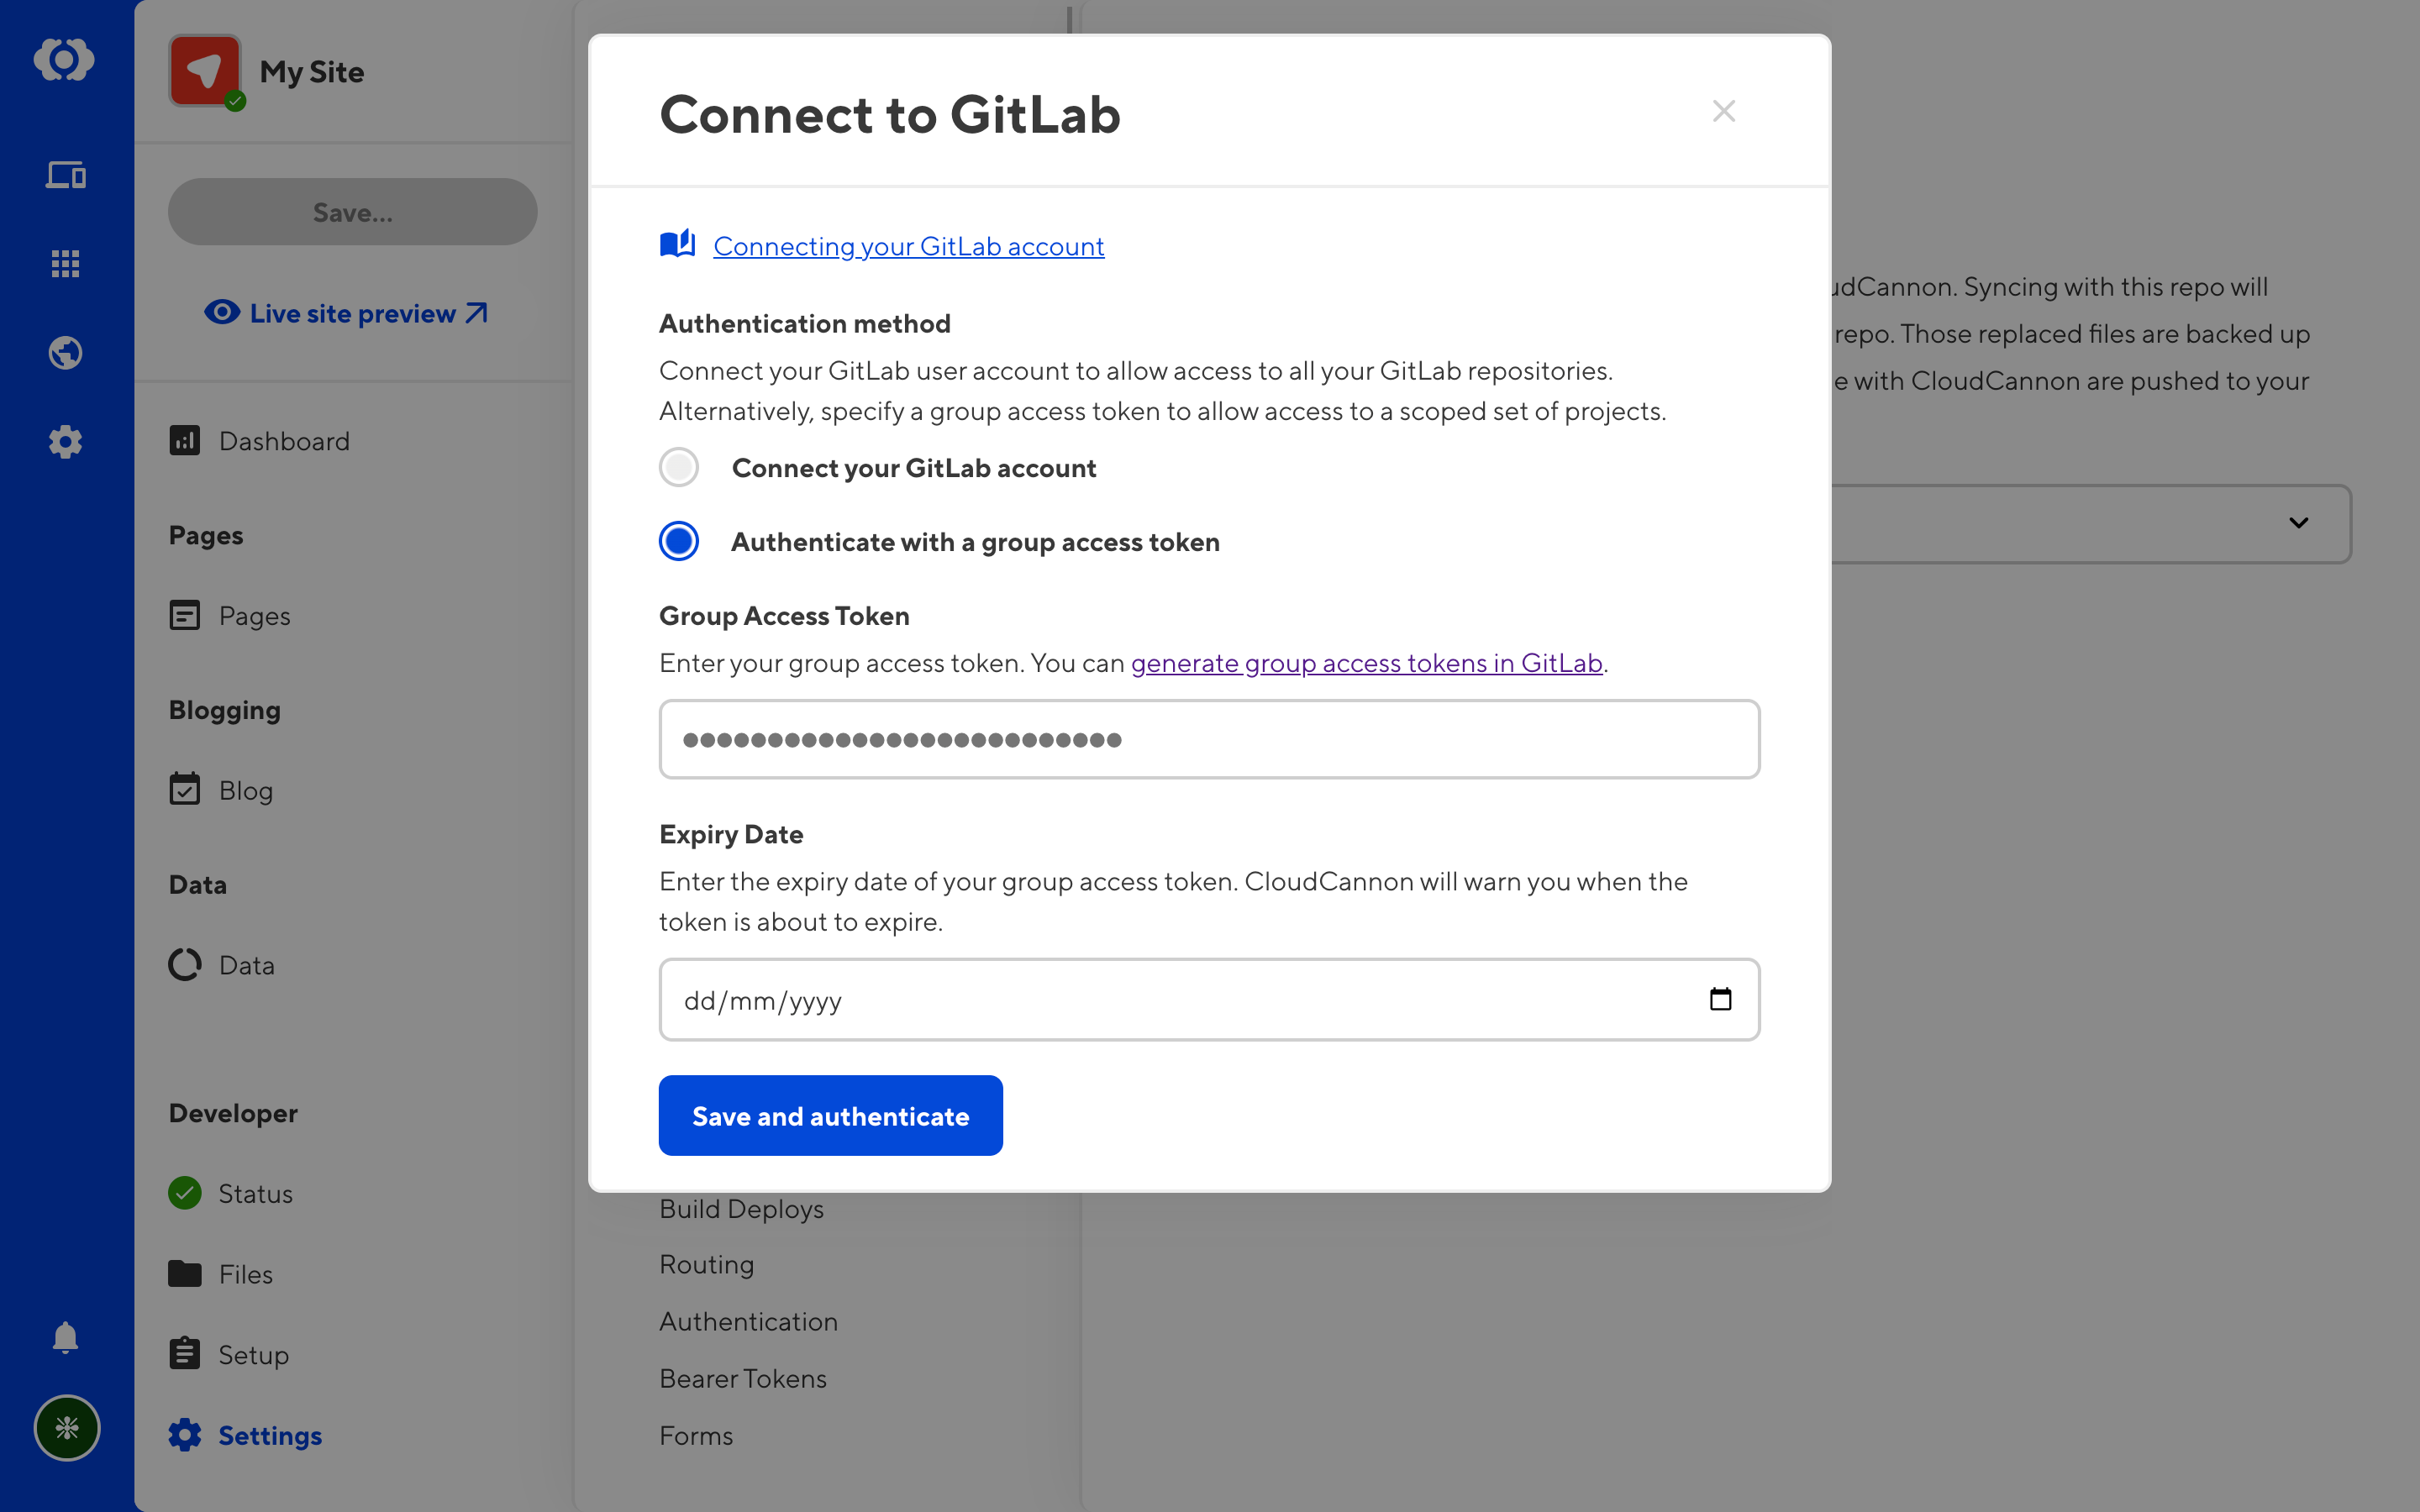
Authenticating with a group access token#
Alternatively, you can create a group access token in GitLab and save that token in CloudCannon. This will give your CloudCannon organization access to all the resources scoped to your token.
See GitLab's Group access tokens documentation for how to create and configure a token.
For full functionality on CloudCannon, your group access token should have (at least) the Maintainer role, and the api, read_api, read_repository, and write_repository scopes.
Copy the token into the Group Access Token field. You will also need to provide the expiry date of the token. CloudCannon will send a warning email to all owners of your organization when the token is about to expire.
Click Save and authenticate to finish.
Once you've authenticated, you can choose a GitLab repository, and a branch to connect to the site. If you don't have an appropriate branch ready, create a new one in GitLab and refresh this page.

Any existing files on your website will be replaced with the contents of the selected repository. Click Backup and Sync to continue, or exit the page to cancel the process.
GitLab is now connected. Changes you push to the Git repository are pulled in by CloudCannon. Any changes made on CloudCannon are automatically committed and pushed.