Git LFS is available on our Standard, Team, or Enterprise Plan.
Git Large File Storage (Git LFS) stores large files outside your Git Repository A storage location for the code and files that make up your website. CloudCannon supports the repository providers GitHub, GitLab, and Bitbucket, and highly recommends using a repository to store your website's files for better version control and collaboration.Git Repository
You can also keep your Git Repository small by storing images and other large files in a Digital Asset Manager An abbreviation of Digital Asset Management, a DAM is a system for organizing, storing, and retrieving digital assets like images, videos, and documents.DAM
Setting up Git LFS has two parts: installing Git LFS on your computer, and enabling Git LFS for your Site A website in CloudCannon that includes all the files, content, configuration, and settings needed to edit, build, and host a complete website.Site
Install Git LFS#
To install Git LFS, follow the installation guide on the Git Large File Storage website. Alternatively, you can use the instructions provided by Bitbucket, GitHub, or GitLab.
You can track your uploads path with Git LFS, so files you upload in CloudCannon are stored with Git LFS. For example, running git lfs track "uploads/**" tracks all files inside the uploads folder.
Enable Git LFS for your Site#
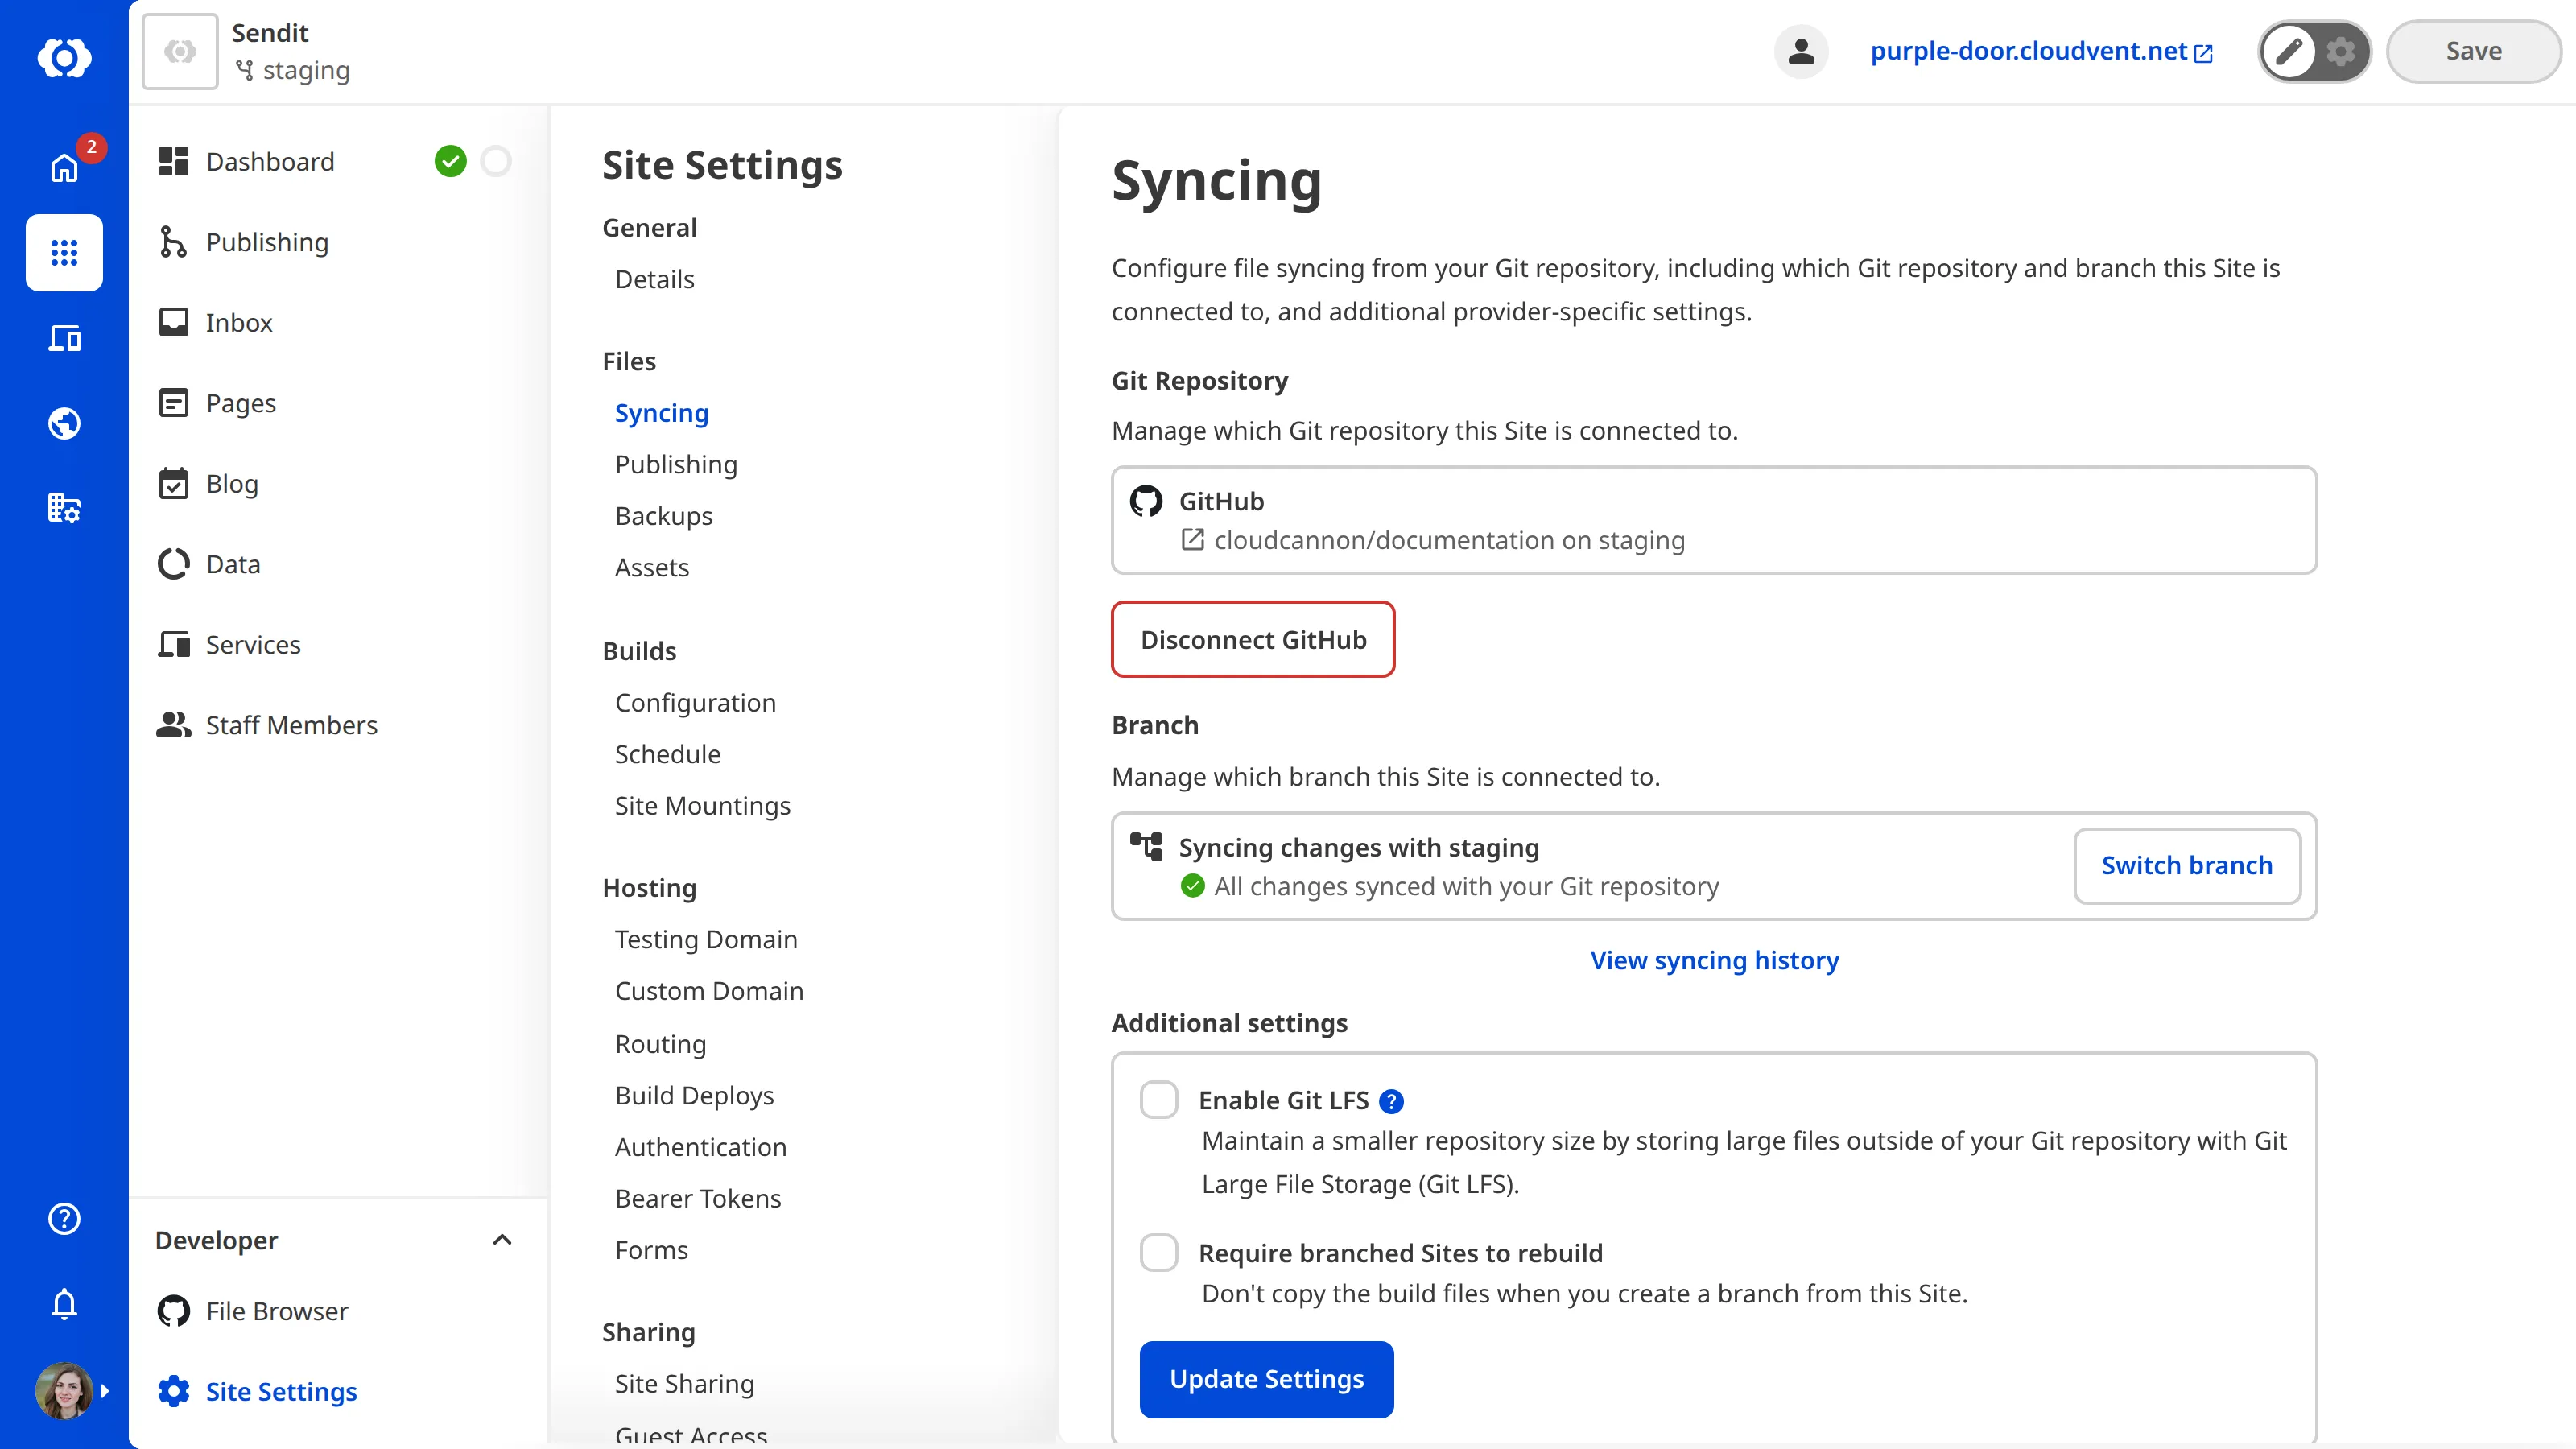
Before we begin, this article assumes your Site already syncs with a Git Repository. The Enable Git LFS checkbox only appears once your Site is connected to a Git Provider and has no syncing error.
To enable Git LFS for your Site:
- Navigate to the Syncing page under Site Settings.
- Select the Enable Git LFS checkbox under the Additional settings heading.
- Click the Update Settings button.
CloudCannon will download your Git LFS files the next time your Site syncs. While Enable Git LFS is off, CloudCannon syncs files tracked by Git LFS as pointer files instead of their contents.