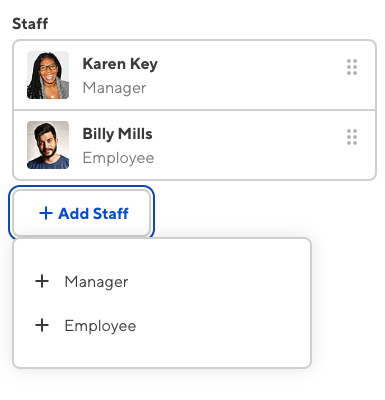
A structure is a predefined, custom template that determines what should populate an Array or object input. With the click of a button, you can easily add fields to an array or object from your list of predefined structures.
Structures are excellent for creating items you want to repeat across your site. An image gallery structure might contain fields for an image, an author, and a caption. A testimonial structure might contain fields for a quote and an author. An array using page-building components might reference several structures for common content blocks, such as a hero image, call to action, or video block.
Once you have defined your structures, your team members can easily add, remove, reorder, and update structure content using the Data Editor or the sidebar of the Visual or Content Editor.

For more information, including a list of all keys available for structure configuration, please read our reference documentation for structures.
Structures and arrays#
Structures and arrays go hand-in-hand. The Array input contains an ordered list of related items, while a structure is a template that determines what data CloudCannon should add to new array items. By creating structures, you can define different objects that your team members can add to arrays within your site.
When you first connect your site files and make them editable in the Data Editor, CloudCannon will automatically detect arrays in your front matter and data files.
You can add new items to your arrays without the need for configuration. Clicking the + Add button for an array will clone the last array item and clear the data from the new item to create a blank array object. This behavior is convenient if you have simple arrays, or do not want to configure structures.
The default array behavior may not be right for you if:
- Your array does not contain at least one object.
- You want to have different object types in your array.
Because the default behavior clones existing array items, CloudCannon will prevent you from removing the last item from an array if you do not have a structure configured. Additionally, cloning existing items does not allow for variation of object types. You can add different objects to the array manually using the Source Editor. However, this can become inefficient to maintain.
You can overcome these limitations by configuring data structures to add to your arrays.
Alternatively, configure inline Array inputs to set which input is used for array items. Inline array inputs also allow an array to be empty.
Structures and objects#
Structures also work for individual objects. The object input can contain a maximum of one value. After you reference a structure key from an object input, team members can select which structure they want to add to that object. Once a value is selected, you cannot add more until the value is replaced or deleted.