Your Site Navigation is on the left of your CloudCannon app and contains commonly used tools. Your Site Navigation appears whenever you open a Site in CloudCannon.
Navigation Sections#
Navigation Header#

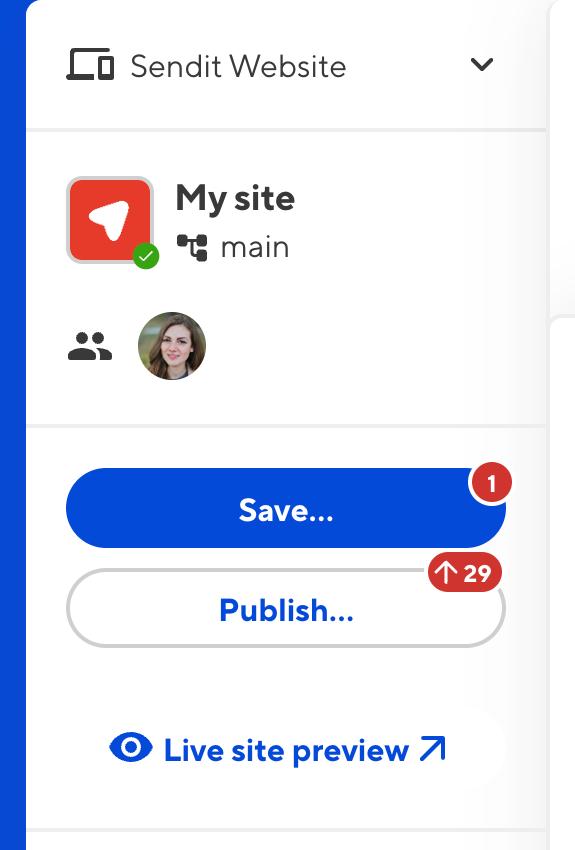
The Site Navigation Header contains basic information about your Site, which team members are using your Site, and tools to save, publish, and view your Site.
- Projects dropdown — If your Site is part of a Project, the Projects dropdown shows you which Project your Site belongs to and which Sites (if any) it publishes to.
- Site icon, Site name, and branch name — These are your basic Site details, so you know which Site you are editing.
- Avatars — The avatars for any team members active on your Site. Clicking on an avatar will show a list of files they have open, with an eye icon for files they are Viewing and a pencil for Editing.
- The Save button — Opens the Review your changes modal and allows you to save changes to your Git repository.
- The Publish button — If your Site has a Publish Branch, this button allows you to create a Pull Request or immediately merge your changes from this Site to any Sites it publishes to.
- The Live site preview button — Opens your Testing Domain or your Custom Domain, if you have one.
Some of these sections may not appear depending on your Site's configuration. For example, the Live site preview button is not applicable to Sites in Headless Mode.
The Save and Publish buttons sometimes have red notification bubbles in the top right. On the Save button, this indicates the number of files with unsaved changes. On the Publish button, the upwards arrow and number indicate how many commits this Site is ahead of your Publish Branch, while the downwards arrow and number indicate how many commits this Site is behind your Publish Branch. For more information, please read our documentation on saving your changes and updating from a Publish Branch.
Dashboard and Inbox#

At the top of the scrollable section in your Site Navigation are the links to the Dashboard and Inbox pages.
- Dashboard — Your Site home page, showing a preview of your last build and recent activity on your Site.
- Inbox — If your Site has a form, this button opens the Inbox page for your form. If you have multiple forms, each inbox will appear as separate items in your Site Navigation under the Inboxes heading.
Collections#

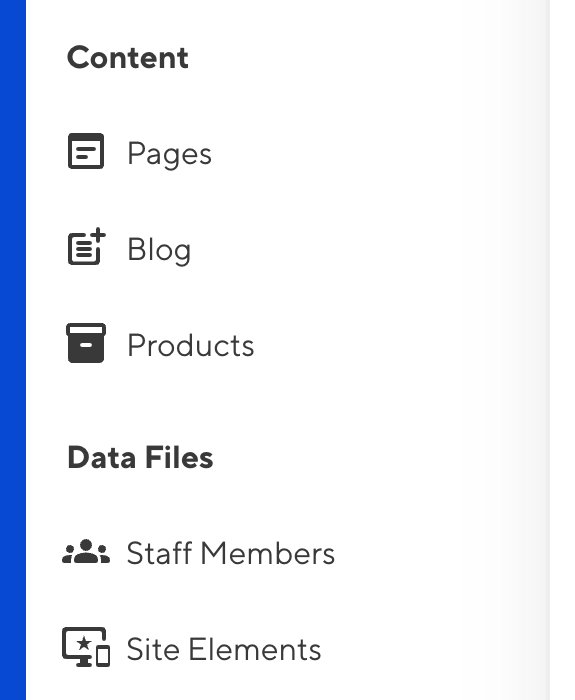
In the middle of the scrollable section in your Site Navigation are the links for your Collections.
- Collections — Groups of related content, such as a folder of blog articles, Staff Member profiles, or product pages. Clicking on a Collection will open the Collection browser.
By default, CloudCannon will sort your Collections in the following order: the Pages Collection, all output Collections in alphabetical order, then all non-output Collections in alphabetical order.
You can configure the order of your Collections using the Collection Groups option.
Developer Tools#

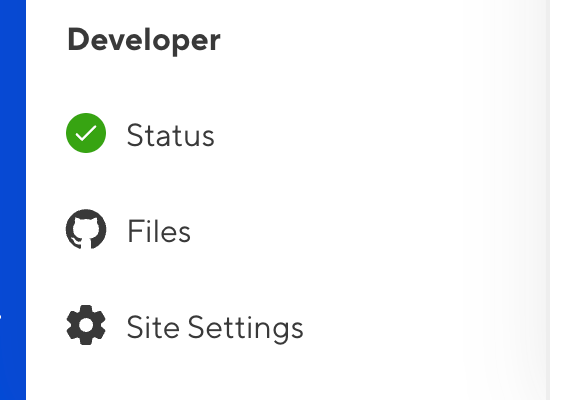
At the bottom of the scrollable section in your Site Navigation are your Developer tools. These are important for managing the Site itself, rather than its content.
- Status — This page has suggestions for Site configuration, summarizes your Site's status, and provides logs for your Syncs, Builds, and Build Deploys.
- Files — Open the File browser to see all the source files for your Site in the same file structure as your Git repository.
- Site Settings — All your CloudCannon settings for this Site, including settings for your files, builds, hosting, sharing, and more.
The Developer section is only available for team members with specific permissions.
Options#
collection_groups:
  - heading: Content
    collections:
      - pages
      - blog
  - heading: Data Files
    collections:
      - data
Use the collection_groups.heading key to define a text string for your group heading. The heading for each collection appears in bold in your Site Navigation above the list of collections within that group.
Use the collection_groups.collections key to list all the collections for a group by key name.
{
  "collection_groups": [
    {
      "heading": "Content",
      "collections": [
        "pages",
        "blog"
      ]
    },
    {
      "heading": "Data Files",
      "collections": [
        "data"
      ]
    }
  ]
}
Use the collection_groups.heading key to define a text string for your group heading. The heading for each collection appears in bold in your Site Navigation above the list of collections within that group.
Use the collection_groups.collections key to list all the collections for a group by key name.
Your Site Navigation has the following options available:
This key defines the groups and order of Collections in your Site Navigation. Each item in the array must contain the heading and collections keys.
The following nested keys are available for each entry in collection_groups:
headingcollections
This key has no default. If undefined, CloudCannon will sort your Collections in the following order: the Pages Collection, all output Collections in alphabetical order, then all non-output Collections in alphabetical order.