Client editing
Set up CloudCannon as your Hugo CMS and hand it over to your content team.
 By Mike Neumegen
What you'll learn here Direct link to this section
- Setting up CloudCannon
- Setting up visual editing in CloudCannon
- Customizing the editing interface in CloudCannon
- Deploy to live hosting
# Starting repo:
git clone git@github.com:CloudCannon/Megakit-Bootstrap-Agency-Template.git

# Starting branch:
git checkout client-editing-start

# Finished branch:
git checkout client-editing-end
We’re at the last step of the series and we haven’t even mentioned client editing yet. How are we going to squeeze this all into one step?
Well, that’s the beauty of Bookshop. It has tight integration with CloudCannon — a Git-based CMS for Hugo — so there’s really not too much further to go before we can hand it over to our content team.
First, let’s do a bit of clean up. We no longer need the original source files and directories. Remove everything from the root folder except our precious /hugo_src/ directory and the LICENSE file. Now move the contents of /hugo_src/ to the root directory and remove the folder.
The integration with CloudCannon automatically detects each component and adds editable fields. For this to work, however, we need the loop that runs over the components to happen in a Bookshop component rather than in our layout. Create /component-library/shared/hugo/page.hugo.html with the following:
{{ range . }}
 {{ partial "bookshop" . }}
{{ end }}
Now in /layouts/_default/list.html and /layouts/_default/single.html we can use our Bookshop partial. We’ll also add a special bookshop_bindings partial that helps CloudCannon detect the components:
{{ partial "bookshop_bindings" `.Params.content_blocks` }}
{{ partial "bookshop_partial" (slice "page" .Params.content_blocks) }}
We’ll also make some small enhancements to the editing interface. CloudCannon has three types of editing interfaces:
- Visual Editor — For editing content directly on the web page
- Content Editor — For editing content in an abstract, Google Docs-like view
- Data Editor — For editing structured data in a YAML, TOML, JSON, or CSV file
For our pages we want to use the visual editor, for the posts the content editor is better suited. We can easily configure this by creating a /cloudcannon.config.yaml file on our site with the following:
collections_config:
  pages:
    _enabled_editors:
      - visual
  posts:
    _enabled_editors:
      - content
      - visual
When the site builds on CloudCannon, we need to tell it to run the Bookshop npm library. Create /.cloudcannon/postbuild with the following:
# Clean the npm .bin for CI
rm -rf node_modules

# Install and run generate
npm i
npx "@bookshop/generate"
The npm package is required by Bookshop to enable live editing on CloudCannon. If you don’t have npm installed, check out the npm installation guide. Once npm is installed, run these commands in your terminal from the root directory:
npm init -y
npm i @bookshop/browser @bookshop/generate @bookshop/hugo-engine
One added benefit of the Bookshop npm package is it includes an entirely standalone component browser. Run the following in your terminal:
npx "@bookshop/browser"Now navigate to http://localhost:30775/. Clicking on the folder you’ll see a full list of your components. Clicking one renders it and allows you to interact with the front matter live. In this case, there are no styles as we haven’t used Bookshop’s convention for component CSS. If you were building components from scratch, the component browser is particularly useful for quickly iterating on a component without having to build the entire Hugo site.
Now it’s CloudCannon time. Sign up for an account if you don’t already have one. From here you can either push your site to a repository on your favorite Git provider or upload your site folder directly. The next screen should detect you’re using Hugo and let you configure the build. Our new site is fairly vanilla, though, so we shouldn’t need to tweak anything here.
After completing this step, your site should kick off a build and complete successfully. Click on “Pages” in the left sidebar, then “Home” and you’ll be in the Visual Editing interface.
This is where the magic happens. You can click on any component, which will bring up a small panel. Clicking the pencil icon and updating the content, reordering with the arrows, deleting a component, or adding a new one with the plus will update the page live — with no guesswork necessary.
Have a play around with your new, custom-built component system and admire all your hard work! You’ve done it! Even better, CloudCannon includes hosting. Clicking the *.cloudvent.net address on your site will take you to the live, publicly available preview website.
This site is almost ready to hand off to a client or content editing team. Let’s make one final tweak to give you a glimpse into how you can customize the editing interface.
You might have noticed that CloudCannon tries to guess the field type, for example showing an upload input for images. If CloudCannon is not sure, it’ll show a text field. The icon field represents an icon but it’s currently a text box with a string like ti-desktop. Our content editors won’t have any context or know what they can change this to. We could send them to the Themify docs as a reference, but that takes them out of the editing experience. Instead, let’s change this input to be a dropdown of all the available icon values.
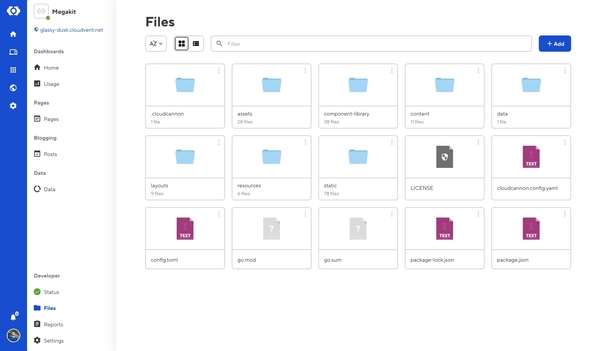
On your site click the files and open cloudcannon.config.yaml. This opens up the code editor which allows us to make changes directly on CloudCannon. There’s hundreds of icon options so instead of showing a hugely long code snippet, here’s a link to it. Replace the contents of cloudcannon.config.yaml with this snippet, save, and have a look at the editing input now.
This only scratches the surface of what is possible with customizing inputs on CloudCannon. To get a full idea of what’s possible, have a look at our input documentation.
That brings us to the end of this tutorial. We set out to turn a Bootstrap template into a client-ready Hugo site. I think the end result speaks for itself.
Lessons in this Tutorial
Bootstrap to a client-editable Hugo site