Have SSL on your CloudCannon website for free


Today I’m going to show you how you can add SSL to your CloudCannon website in under 5 minutes. What’s even better, it’s free!
Before we get started let’s cover a few questions:
What’s SSL? Direct link to this section
SSL is a way of ensuring all the data passed between a website visitor and the server remains private. For websites with login passwords and private data, SSL is essential. For static websites it’s not so important as the website is already public. However, for visitors there’s an extra level of trust from seeing the padlock in their browser.

What’s CloudFlare? Direct link to this section
CloudFlare is service which works as a reverse proxy for your website. What that means is when someone visits your website, the request will go to CloudFlare, then CloudFlare will download the website from the hosting provider and serve it to the user.
The advantage of doing this is CloudFlare does a number of performance and security enhancements so your website will load faster and be more immune to malicious attacks. They’ve also recently added free SSL support.
Why should I care? Direct link to this section
Google recently announced that it will prioritise sites that use SSL. Web designers should be approaching clients about SSL to ensure that their clients sites continue to rank well. Given that CloudFlare offers SSL for free AND you get the malicious traffic buffer of their CDN, using it is almost a no-brainer.
Let’s add SSL! Direct link to this section
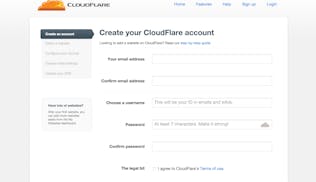
First off, head over to CloudFlare and register a new account
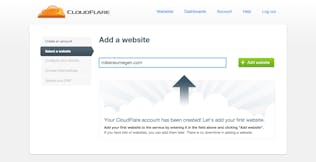
Next you’ll be asked for your website address
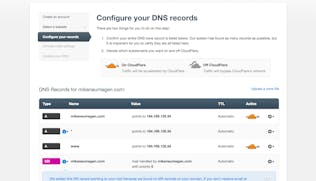
After this CloudFlare will take about a minute to scan your existing DNS records. Once it’s finished it, it’ll show you the DNS records it’s found. You need to verify these records are correct. For CloudCannon websites the DNS records should be fairly simple, usually the setup is:
- an A record for the root domain pointing to 184.169.135.34
- an A record for *.rootdomain pointing to 184.169.135.34
- perhaps an MX record if you have email set up for that domain
If you're setting up a new domain refer to our documentation under the "Use your Domain Registrar's DNS server" section and enter those details into CloudFlare.
Once you’re happy these are correct click the continue button.
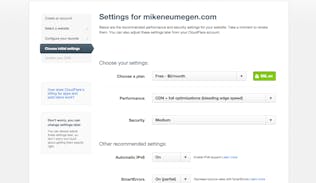
Next up is configuring CloudFlare. I switched the plan to free and the performance to CDN + Full optimizations.
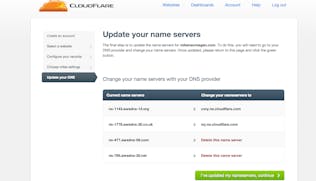
The last step is updating your nameservers. To do this log in to your domain provider and change the nameservers to the ones that CloudFlare gives you.
That’s it! It’s so easy to get setup. Changing your DNS can take up to 48 hours to propagate and CloudFlare’s free SSL can take up to 24 hours to set up, so while there should be no downtime, it might be a day or two before you have SSL and CloudFlare serving your website.
Now I can access my site on https://mikeneumegen.com or http://mikeneumegen.com and everything loads super fast.
Give it a go and get in touch if you have any problems setting CloudFlare up. We’re always here to help.
Launch your website today
Give your content team full autonomy on your developer-approved tech stack with CloudCannon.


