Manage your sites from the terminal with CloudCannon’s CLI


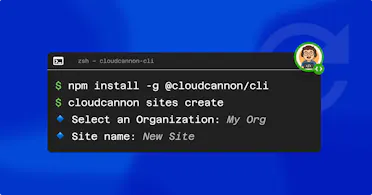
With CloudCannon’s new CLI you can set up, configure, and validate new sites directly from your terminal. The old workflow was browser-first: create the site in the app, commit a config, push, wait for a build, check if it looked right, make adjustments, repeat. Today, all of those actions can happen from the terminal.
This post walks through what the new workflow might look like in practice, from onboarding the new site to checking the rest of your portfolio — all from the terminal, without needing to push to CloudCannon.
Install and authenticate Direct link to this section
npm install -g @cloudcannon/cli
cloudcannon login
cloudcannon login opens a browser window to authenticate against your CloudCannon account. Once that's done, the token is stored locally and every subsequent command picks it up automatically.
For shared environments where an interactive browser flow isn't an option, you can use access key credentials via environment variables instead:
export CC_ACCESS_KEY_ID=your_key_id
export CC_ACCESS_KEY_SECRET=your_key_secret
We'll come back to this pattern when we wire things into CI.
Onboarding a new client site Direct link to this section
Generate the config Direct link to this section
From the project root:
cloudcannon configure generateFor an Astro project, as in our example site, it will identify your content collections, suggest build commands, and propose an output path. It runs interactively by default, so each suggestion is a prompt you can confirm or adjust.
For a typical Astro site with a blog and content pages, the output from the first phase looks something like this:
CloudCannon

🔹 Scanned 167 files.
|
🔹 Which static site generator does this site use?
	Astro
|
🔹 Set a source folder? (The subfolder containing your site files)
	No
|
🔹 Generated configuration.
|
🔹 Select which content folders you want as Collections: (how your content is grouped)
	/src/content/pages, /src/content/posts, /src/content/posts/examples, /src/content/posts/_releases
|
🔹 cloudcannon.config.yml
			paths:
				static: public
				uploads: public/uploads
			timezone: YourTimeZone
			markdown:
				engine: commonmark
				options:
					gfm: true
			collections_config:
			[...]
|
🔹 Create this files at /Users/username/Dev/work/astro-paper-demo/cloudcannon.config.yml?
	Yes
|
🔹 Done!
Here's the collections_config section of that generated cloudcannon.config.yml, which tells CloudCannon how to present content to editors:
cloudcannon.config.yml
...
collections_config:
 	content_pages:
		path: src/content/pages
		icon: contact_page
	posts:
		path: src/content/posts
		icon: event_available
	posts_examples:
		path: src/content/posts/examples
		icon: sound_sampler
	posts_releases:
		path: src/content/posts/releases
		icon: auto_delete
...
One thing to know: the CLI generates collections config and build settings, but not _inputs or _structures. Your editors will have a working CMS, but input types and component schemas need configuring separately before the site is production-ready. If you’re using CloudCannon's agent skills, that step happens automatically after this one. For a manual setup, it's just your next task.
Validate before you push Direct link to this section
Before committing anything, you can check your settings:
cloudcannon validateThis checks cloudcannon.config.yml, .cloudcannon/initial-site-settings.json, and any routing or split config files against the CloudCannon schema. Whether it’s an unsupported key or a misplaced field: it catches the basics before they cause a broken build.
A validation error might look something like this:
❌ invalid: cloudcannon.config.yml
	$.collections_config.content_pages: unexpected property FoobarConfig
Whereas a clean pass looks like this:
✅ valid: cloudcannon.config.ymlUploading the site Direct link to this section
Now let’s get the site connected to your CloudCannon organization, choosing either your Org name or its UUID, and following the prompts:
cloudcannon sites create --org "Tom's Demo Org"
|
🔹 Site name:
	astro-paper-demo
|
🔹 Enter the git remote URL for your site:
	git@github.com:tomrcc.astro-paper-demo.git
|
🔹 Branch:
	main
Trigger the first build Direct link to this section
With the config committed and pushed, the site is connected to its repository. New sites start in a build-locked state, so before triggering a build you'll want to unlock it and confirm the build settings:
cloudcannon sites update-build-config --site "astro-paper-demo" --install-command "pnpm i" --build-command "pnpm run build" --output-path "dist" --no-building-lockedRemoving the build lock and updating the build config will trigger a rebuild. After that completes you can check the output:
cloudcannon sites print-last-build --site "astro-paper-demo"The site is live. When you’re ready, you can invite client editors to sign up, log in, and start working. You haven't needed to open the CloudCannon app once.
Checking in on your other 30 sites Direct link to this section
So your new site is up. But what about your other client sites? Imagine it's Monday morning, and before you start anything else you want to know what happened to your portfolio over the weekend.
Your portfolio, at a glance Direct link to this section
cloudcannon sites listThis returns every site across all your Organizations in one shot. For agencies working with multiple client orgs, you can scope it down:
cloudcannon orgs sites list --org "roadrunner-group"Both commands support sorting and filtering. Sort by last build date to spot which sites have gone quiet. Filter by status to pull out recent failures. Once your portfolio is queryable from the terminal, scripting against it is a short step.
The Monday morning sweep Direct link to this section
If you’d like to follow the lead from Tom’s video, here's a handy script that checks build and sync health across every site, as well as checking how recently sites have been updated.
Schedule that as a cron job or a morning CI run and you'll know before clients do when something breaks. (Some of our agency partners already route build failure alerts directly into their team's Slack using a similar setup, so their developers can stay across site health without additional steps.
CI integration Direct link to this section
There are two initial patterns worth setting up.
The first is non-interactive auth. In your CloudCannon Account Settings you can create an Access Key. Add your Access Key credentials as CI secrets, set them as environment variables, and every CLI command works exactly as it does locally:
# GitHub Actions
- name: "Log in to CloudCannon"
  env:
    CLOUDCANNON_ACCESS_KEY_ID: ${{ secrets.CLOUDCANNON_ACCESS_KEY_ID }}
    CLOUDCANNON_ACCESS_KEY_SECRET: ${{ secrets.CLOUDCANNON_ACCESS_KEY_SECRET }}
  run: |
	  cloudcannon login </span>
		  --access-key-id "$CLOUDCANNON_ACCESS_KEY_ID" <br>			--access-key-secret "$CLOUDCANNON_ACCESS_KEY_SECRET"
(Missed something? Check out the health-check.yml file in Tom’s demo site.)
The second is build gates. We didn’t show this in the video, but you could pull the last failed build for a site and exit non-zero if there was one, blocking a merge until it's resolved:
# GitHub Actions
- name: Check CloudCannon build status
  env:
    CLOUDCANNON_ACCESS_KEY_ID: ${{ secrets.CLOUDCANNON_ACCESS_KEY_ID }}
    CLOUDCANNON_ACCESS_KEY_SECRET: ${{ secrets.CLOUDCANNON_ACCESS_KEY_SECRET }}
  run: |
    FAILED=$(cloudcannon sites print-last-failed-build <br>      --site ${{ vars.CLOUDCANNON_SITE }} 2>/dev/null)
    if [ -n "$FAILED" ]; then
      echo "Last CloudCannon build failed. Blocking merge."
      exit 1
    fi
Between these two, CloudCannon becomes a full participant in whatever pipeline you're already running.
And that’s a morning’s work Direct link to this section
One new site configured, validated, and live. Thirty others assessed in seconds. Neither required leaving the terminal.
That covers our automation and oversight layers. For more on the development side, the other half of the picture is the dev server: local CloudCannon previews, and config changes reflected instantly without a push. We've written about that as well — find out how you can move even faster to give your team the editing experience that will work best for them.
Learn more about the CloudCannon CLI
Browse our developer reference material on the CLI, and dive in!


