Build your editing experience locally with the CloudCannon dev server


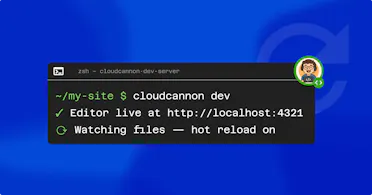
Every CloudCannon developer knows the loop: change the config, commit, push, wait for a build, check it in CloudCannon. That’s probably fine for one adjustment. But a thoughtfully customized editing experience is the sum of multiple small adjustments, and the round trips were the cost of making them, often in a slow afternoon of context switching for developers.
The dev server closes that loop. It runs CloudCannon's editing experience on your machine, against your local files, and reflects config changes the moment you save. No commits, no pushes, no builds.
In our previous post, we onboarded a new client site on Astro from the terminal. CloudCannon’s new CLI detected the SSG, generated a working config, validated it, and triggered the first build. In the middle of all that, we deliberately left a loose end: the CLI generates your collections and build settings, but not your _inputs or _structures. At this stage, the editors would have a working CMS. It’s just not a finished one yet.
This post picks that job back up. And it’s the job our new dev server was built for.
An interface you get to shape Direct link to this section
CloudCannon’s editing experience isn’t fixed. You decide what your editors see: which fields, which input types, which page components, right down to the wording of a comment under a toggle. That flexibility makes configuring the editing experience naturally iterative, particularly when it comes to inputs and structures. They’re the interface your editors will actually live in, and getting them right means trying things: should this field be a select or a multiselect? Does this component need a color input? Should this comment say ‘hero image’ or ‘banner’?
Now each of those questions can be answered as fast as you can save a file, without waiting on a push and a build.
Getting set up (again) Direct link to this section
The dev server ships as part of the CloudCannon CLI, so if you followed along in our last post, you already have it. If not:
npm install -g @cloudcannon/cli
cloudcannon login
You need two things running side by side: your SSG’s own dev server, and CloudCannon’s. For our Astro client site, that’s one terminal running the local build and one running the editor.
# Terminal 1 (Astro build)
npm run dev

# Terminal 2 (CloudCannon)
cloudcannon dev [output_path]
The CloudCannon editor opens in your browser, pointed at your local files. The collections we generated in the last post are already there in the sidebar: posts, authors, pages. Content is readable and editable out of the box. Now we get to tailor it: shaping the inputs and components into an interface built for this client’s editors specifically.
The loop in action Direct link to this section
Let’s start with something small. The blog posts in this project have a featured boolean in their front matter, and right now it renders as a checkbox. Let’s make that a switch with a more visual On/Off state.
Open cloudcannon.config.yml and add an input definition:
cloudcannon.config.yml
...
_inputs:
  featured:
    type: switch
    comment: Feature this article on the homepage featured posts list.
...
Save the file. Switch back to the browser. The text field is now a toggle, with the comment sitting under it.
That’s the whole loop. No commit, no build, no waiting. The gap between ‘I wonder if this should be a switch’ and seeing the switch is however long it takes you to save a file.
It might sound like a small thing, but it changes how you work more than you’d expect. When feedback is instant, you can try more things. You can experiment with an input type you haven’t used before, because trying it costs nothing. You can fine-tune the wording of a comment, because checking it takes a second. The quality bar for the finished editing experience goes up, simply because iterating stopped being expensive.
Building out the components Direct link to this section
Structures are where the dev server really earns its keep. Perhaps a client site has a page builder pattern: an array of components (hero, feature grid, testimonial, CTA) that editors can add, remove, and rearrange. Defining those in _structures means describing every component’s fields, labels and preview appearance. It’s the most expressive part of any CloudCannon config, and the part that benefits most from a fast feedback loop.
Here’s a first pass at a hero:
_structures:
  page_sections:
    values:
      - label: Hero
        icon: title
        value:
          _type: hero
          heading:
          subheading:
          image:
          cta_label:
          cta_url:
Save, switch to the browser, open a page, hit ‘Add section’. The hero appears in the component picker with its icon and label. Add one, and there are your five fields.
Now the iteration starts. The image field could be an image input with a paths setting so uploads land in the right folder or DAM. The cta_url should be a URL input. The heading could take a character-count comment, a quick way to help editors keep headings inside the 60 characters the design looks best at. Each of those is a save-and-glance, maybe ten seconds. Under the old workflow, without the dev server, each one would have been a push and potentially a build to test.
We won’t walk through every possible field here (Tom does more in the above video!), but you can see the shape of the task: work through the components one at a time, checking each change in the editor as you go, until adding a page section feels the way it should for someone who’s never seen a YAML file.
When it looks right, ship it Direct link to this section
The dev server is a development tool. Your editors never see it; it exists for exactly this phase, when you’re building or refining the editing experience. Once the config feels right, the workflow rejoins the one from the last post:
cloudcannon validate
git add cloudcannon.config.yml
git commit -m "Add inputs and page section structures"
git push
validate catches anything malformed before it costs you a build. Push, and the live CloudCannon site picks up the finished config. Your client’s editors get the polished experience, and they never knew about the forty small experiments it took to get there.
But editing experiences are never really finished. Clients will ask for a testimonial component with a star rating, or an editor wants a dropdown where there’s currently a text field. Those requests used to mean quoting a few hours’ work, if you could fit it in. Now you can run cloudcannon dev, make the change, watch it appear, and ship it before the reply email would have been finished.
Scaffold, iterate, validate Direct link to this section
With the dev server in place, the full local loop for a single CloudCannon site looks like this:
cloudcannon configure generate   # scaffold the config
cloudcannon dev                  # build out the editing experience
cloudcannon validate             # check it before committing
cloudcannon sites rebuild        # trigger the live build
You can scaffold, iterate, validate, and ship, all from the terminal. The app is still there when you want it. You just don’t need it to do your job anymore.
Learn more about the CloudCannon dev server
The dev server ships with the CloudCannon CLI, so you’re one install away from a faster feedback loop.


