Astro Layouts: Shared Headers, Footers and Meta
In this lesson you will learn how to use Astro layout components for repeated content.
 By Rodney Johnson
After seeing how to spin up a new Astro site in the first installment of this Astro Tutorial series, we now take a look at Astro layouts, styling and adding favicons. Astro layouts let us re-use content over different pages. We will use them here to add headers and footers to the site. Creating a single layout component will make changing headers and footers across all pages quick and convenient. After creating headers and footers, we’ll add styling to the menu from the previous lesson; it will actually open and close! Finally, you will see how to handle static assets in an Astro project.
Let’s start with adding a new layout file.
First Astro layout file Direct link to this section
The idea of layouts is to make repeated content more maintainable. For example, if we want to add a new social network icon to the footer, using a layout file, we do so by only changing the layout component. There is no need to update pages that include the footer individually.
The layout file is an Astro component, and looks much like an Astro page file. The main difference is that we include a <slot> element in the layout. This acts as a placeholder for the page’s unique content. Let’s see that in action.
Create a new src/layouts folder, and in there add a BaseLayout.astro file with this content:
---
import Menu from "~/components/Menu";

export interface Props {
  title: string;
  description: string;
}

const { description, title }: Props = Astro.props;
---

<html lang="en">
  <head>
    <meta charset="utf-8" />
    <meta name="viewport" content="width=device-width" />
    <title>{title}</title>
    <meta name="description" content={description} />
  </head>
  <header>
    <div class="header-wrapper">
      <h1><a href="/">Novelty Cycles</a></h1>
      <Menu client:load />
    </div>
  </header>
  <body>
    <slot />
  </body>
  <footer>
    <div class="footer-wrapper"><a href="/about">About Novelty Cycles</a></div>
  </footer>
  </html>
We are taking the boilerplate code from index.astro to build the layout. We brought over the title tag and also added a new, meta description tag, to the header. Both of these values will change page-by-page. When you use the layout, you will pass in values for title and description as props. That way you can vary those values by page, but still keep the code for them in a separate layout component.
You can find the props defined in the last line of the front matter, where they are destructured from the Astro.props object. The Astro object will crop up a few more times as you become more familiar with Astro itself. As well as extract props from this object, you can access globally defined variables and meta for the current page. Anyway, back to props, we are working in TypeScript; you see the definition for the Props type alias we just used in the export interface block, right in the middle of the front matter section.
Astro markup JSX Direct link to this section
Astro markup shares much in common with the JSX used in React. You see that where we use the title and description props in the head markup. You just wrap a JavaScript string variable in braces {} whenever you want to use it in a template. We will look at more JSX features, like enumerating an array, later in this tutorial series.
Using Astro layouts for styling Direct link to this section
Now we have the layout defined, let’s try using it. Layout components are imported just like other components. Replace the existing content in the front matter of the index.astro file:
---
import BaseLayout from "~/layouts/BaseLayout.astro";

const title = "Novelty Cycles Home";
const description = "Novelty cycles home page, step in and explore our world.";
---
As well as importing the layout here, we also define the title and description for this page (needed by the BaseLayout component).
Next, replace the template code (below the front matter) using the BaseLayout component:
<!-- ...TRUNCATED -->
---

<BaseLayout description={description} title={title}>
  <main>
    <h2>Who are we?</h2>
    <p>We are Novelty Cycles.</p>
  </main>
</BaseLayout>
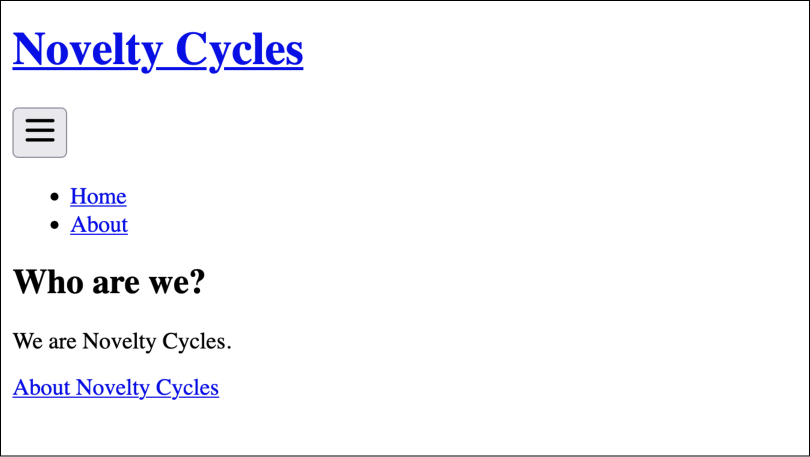
Save, then jump over to your browser. You should see the browser tab title matches the value we just set. On top, the header, and footer from the layout will both be present. The <slot /> element from the layout is replaced with the content from index.astro.
Layouts are a powerful Astro feature, you can nest them and even add multiple, named, slots where needed. For now, though, let’s try to add a little styling to the site.
Styling Astro Apps Direct link to this section
Astro works with Tailwind and other popular styling frameworks like Sass. It also has out-of-the-box PostCSS support. We will use vanilla CSS here, so you will see a few more Astro features. Using vanilla CSS with Astro, you can add styles in a global CSS file or a separate style tag within your Astro files. A third alternative is to use style elements within your framework components. This last option is limited to frameworks that support style blocks (like Svelte).
Let’s start by adding a global CSS file. Create a new src/styles folder. In there, add a global.css file, then copy and paste the content from global.css.
Typically, when working with a global CSS file, you will want to add it to every page. This makes the BaseLayout the ideal place for us to add global CSS. All we need to do is insert an import statement to the layout’s front matter. Astro takes care of the rest:
---
import Menu from "~/components/Menu";
import "~/styles/global.css";

// TRUNCATED...
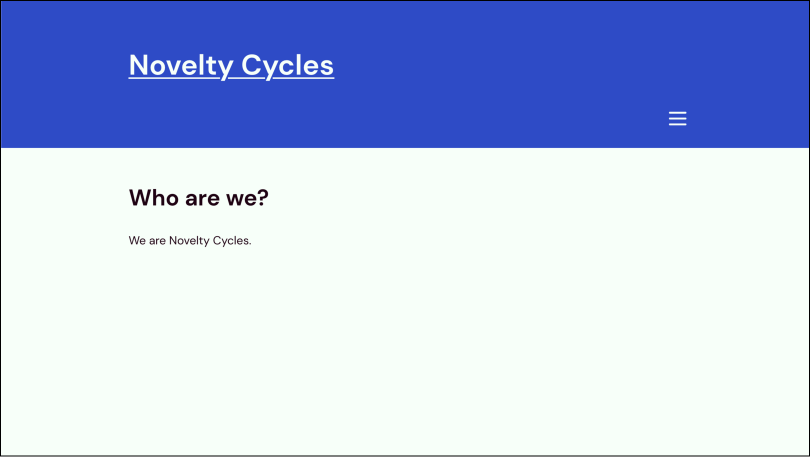
If you refresh the browser now, things should already look a little nicer. The menu even opens and closes now!
Fonts and static hosted files Direct link to this section
You might have noticed that there is some CSS for self-hosted fonts in global.css:
@font-face {
  font-display: swap;
  font-family: "DM Sans";
  font-style: normal;
  font-weight: 400;
  src: url("/fonts/dm-sans-v11-latin-regular.woff2") format("woff2"),
      url("/fonts/dm-sans-v11-latin-regular.woff") format("woff");
}
The src URL links to /fonts/…. We mentioned, in the last lesson, that the public folder in your Astro project is for files which Astro does not need to process. Font WOFF files fall neatly into that category.
Anything in the public folder will be served from the final, built site. So, if we added a robots file as public/robots.txt, its URL on the final site would be https://example.com/robots.txt. For the font CSS to work, we need to create a public/fonts folder, then place the font files in there. Download these four font files and add them to your newly created fonts folder:
- dm-sans-v11-latin-regular.woff
- dm-sans-v11-latin-regular.woff2
- dm-sans-v11-latin-700.woff
- dm-sans-v11-latin-700.woff2

Save and refresh once more. You should now see a sans-serif font, instead of the browser default.
Favicons Direct link to this section
Favicons are another example of a static file, which you can put in the public folder. Let’s wrap up this part of the tutorial by adding favicons to the site. To support both legacy browsers and modern devices, you will want to serve favicons in a few sizes and formats. Save these files to the public folder:
Of course, the final part is to link these files in the HTML head section of our site. You guessed it! We will add them to the layout. Update the Astro markup in src/layouts/BaseLayout.astro:
<html lang="en">
  <head>
    <meta charset="utf-8" />
    <link rel="icon" href="/favicon.ico" sizes="any" />
    <link rel="icon" href="/icon.svg" type="image/svg+xml" />
    <link rel="apple-touch-icon" href="/apple-touch-icon.png" />
    <link rel="manifest" crossorigin="use-credentials" href="/manifest.json" />
    <meta name="viewport" content="width=device-width" />
    <title>{title}</title>
    <meta name="description" content={description} />
  </head>
  <!-- TRUNCATED... -->
</html>
You see here, like a lot you will do in Astro, the code is no different to what you would have learned in your HTML & JavaScript 101 course.
Astro layouts: what’s next? Direct link to this section
We covered a fair amount in this part of the tutorial. It all centered around the layout component we added. For more advanced Astro layout use cases, dive into the excellent Astro docs. Beyond layouts, see an Evil Martians blog post for recommended favicon formats for a modern site. Finally, there’s more on self-hosting and font best practices, in a fantastic web.dev article.
After covering so much in this tutorial, we will take our foot off the gas a little in the next one. We see how you can import data from JSON files right into your Astro templates — handy for giving content creators more flexibility to update data. We will see you can edit the underlying JSON data visually from your CMS.
I hope you enjoyed this tutorial, and you are looking forward to seeing even more Astro features in the next one.
Lessons in this Tutorial
Astro Beginner Tutorial Series
- Creating an Astro Site: Beginners’ Tutorial
- Astro Layouts: Shared Headers, Footers and Meta
- Astro JSON Imports
- Astro Blogging: adding Markdown Blog Posts
- Astro Content Collections: Typed Markdown
- Astro Blog RSS Feed