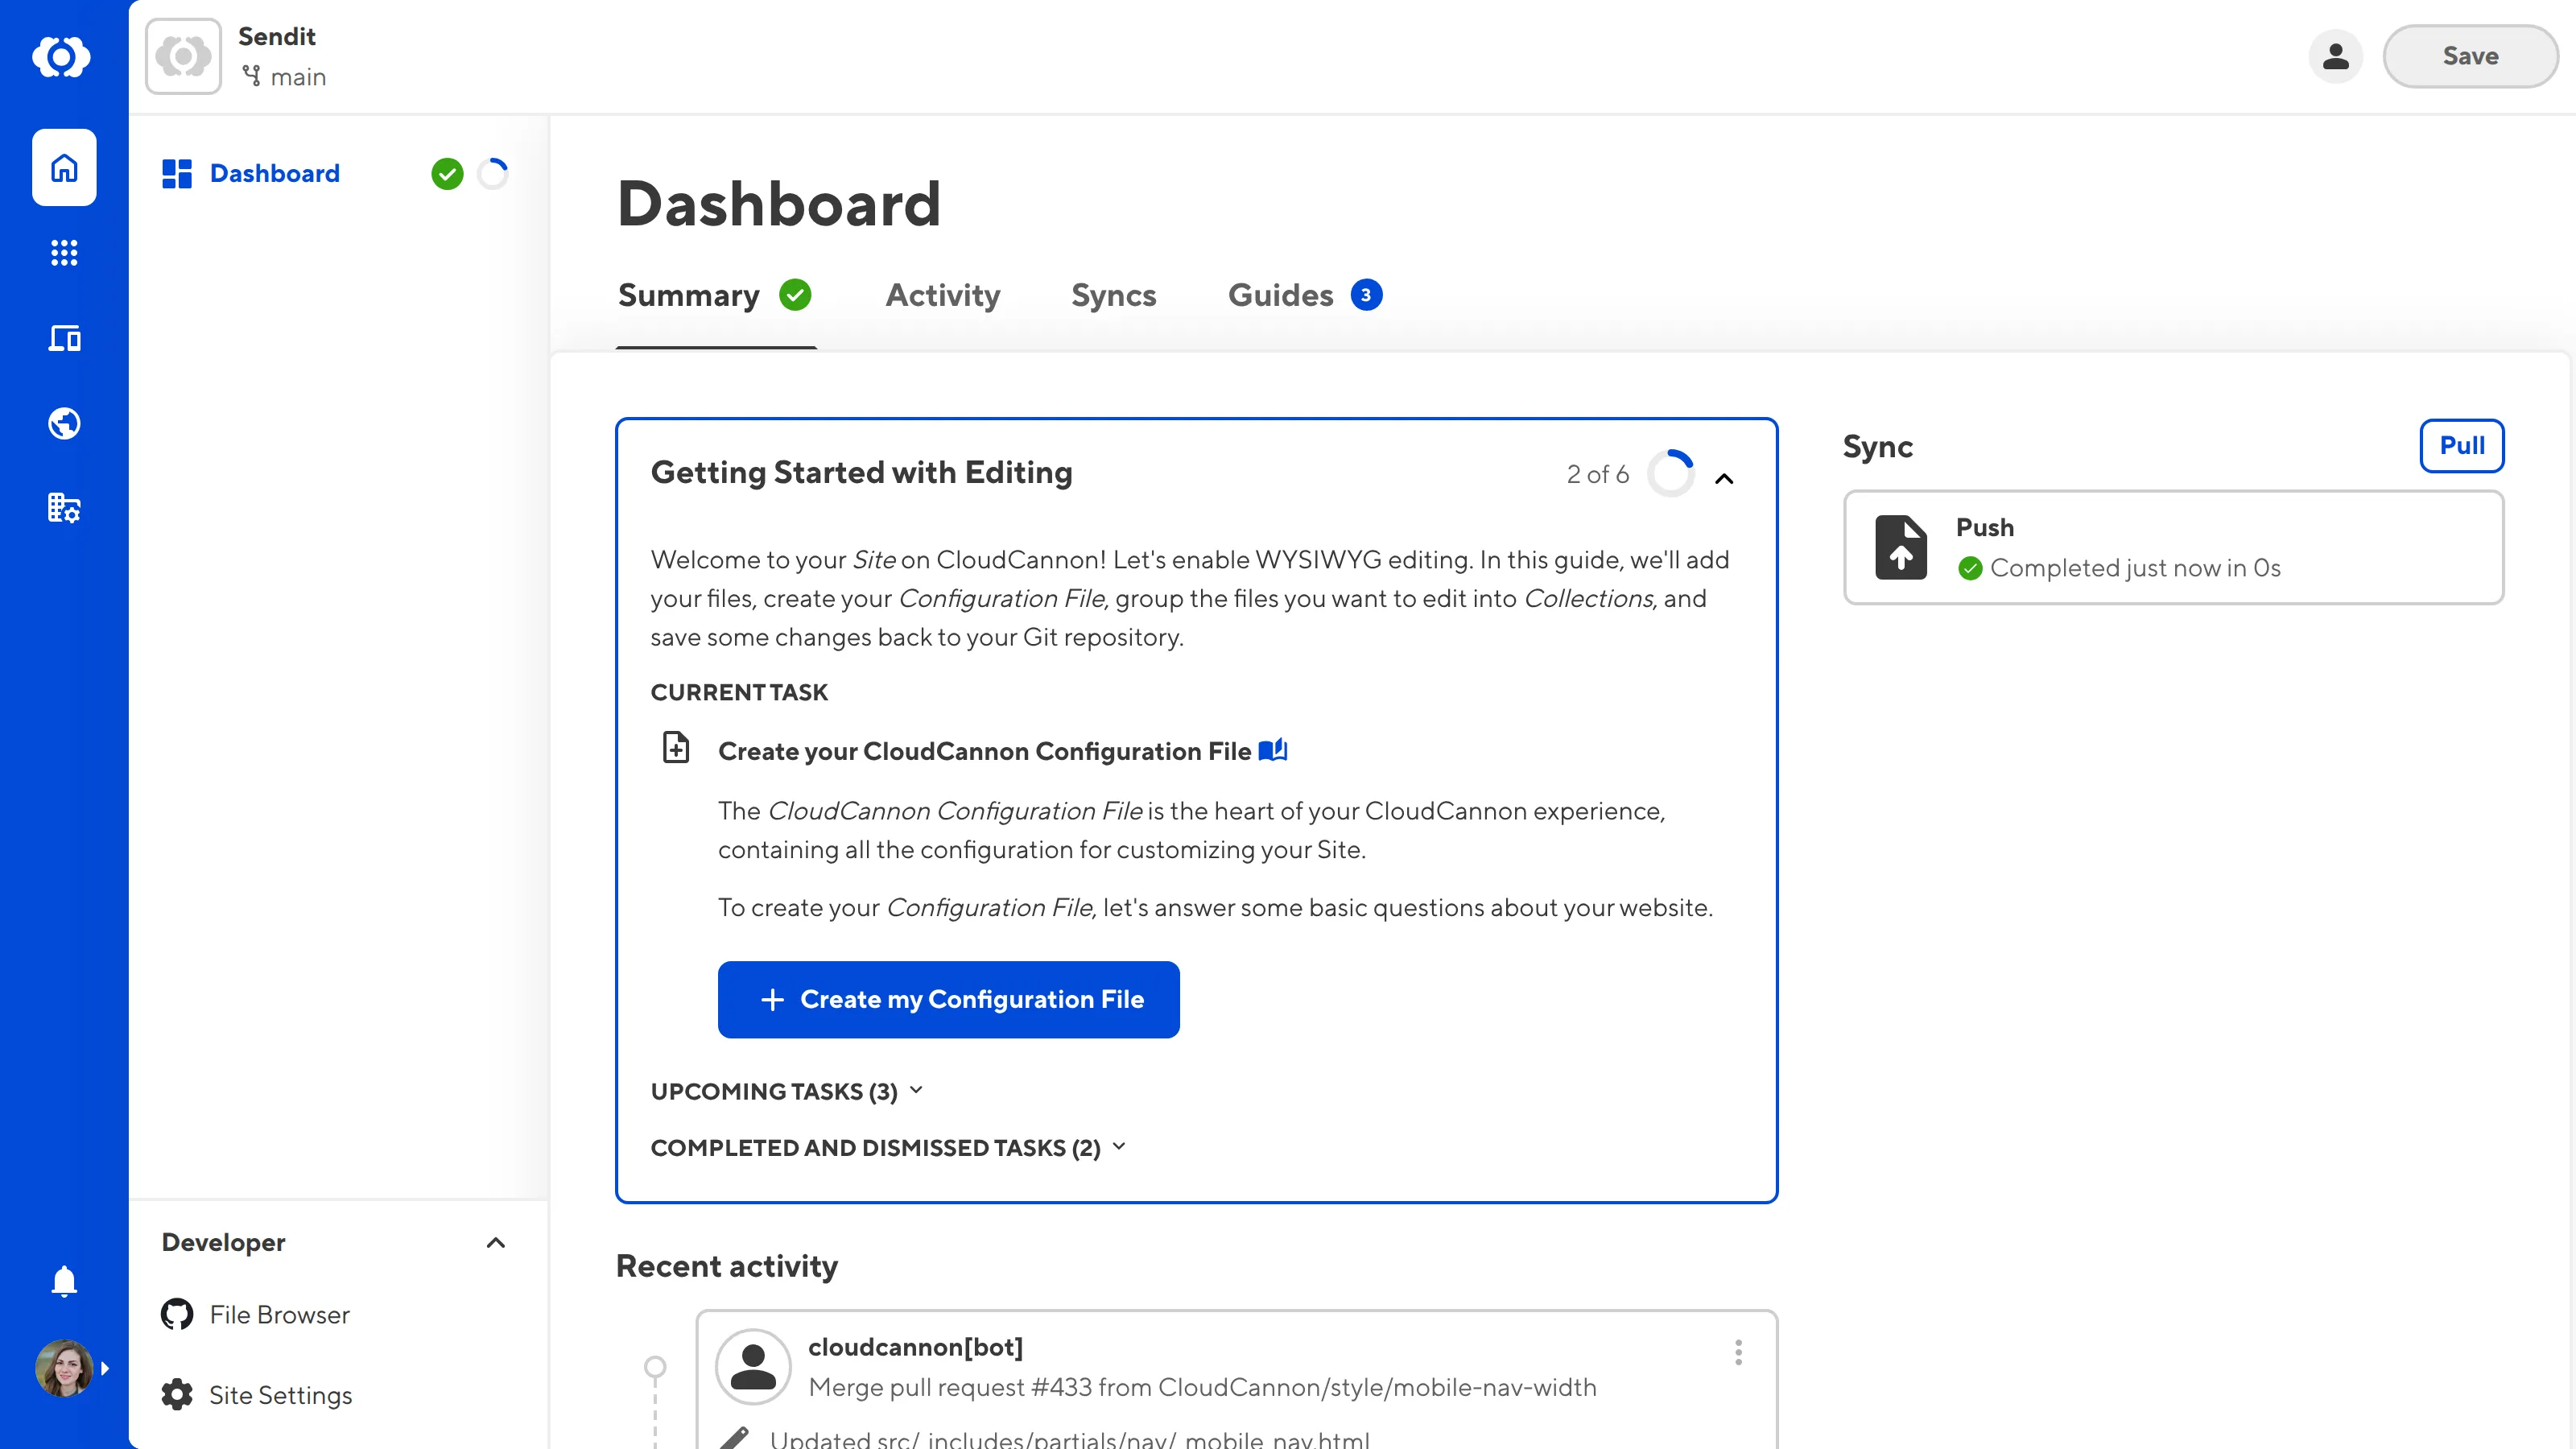
The next task in the Getting Started with Editing in-app guide is to Create your CloudCannon Configuration File.

The CloudCannon Configuration File is the heart of your CloudCannon experience, allowing you to customize the functionality and appearance of your Site. You can configure your Site Navigation, Editing Interfaces, file appearance in the app, how CloudCannon adds new files, and more by adding formatted content to your Configuration File.
As we go through the later steps of this guide, we'll add more to our Configuration File. Let's create one.
Initial content for the CloudCannon Configuration File#
Click the + Create my Configuration File button in your in-app guide under the Create your CloudCannon Configuration File task. CloudCannon will open the Create my Configuration File modal.

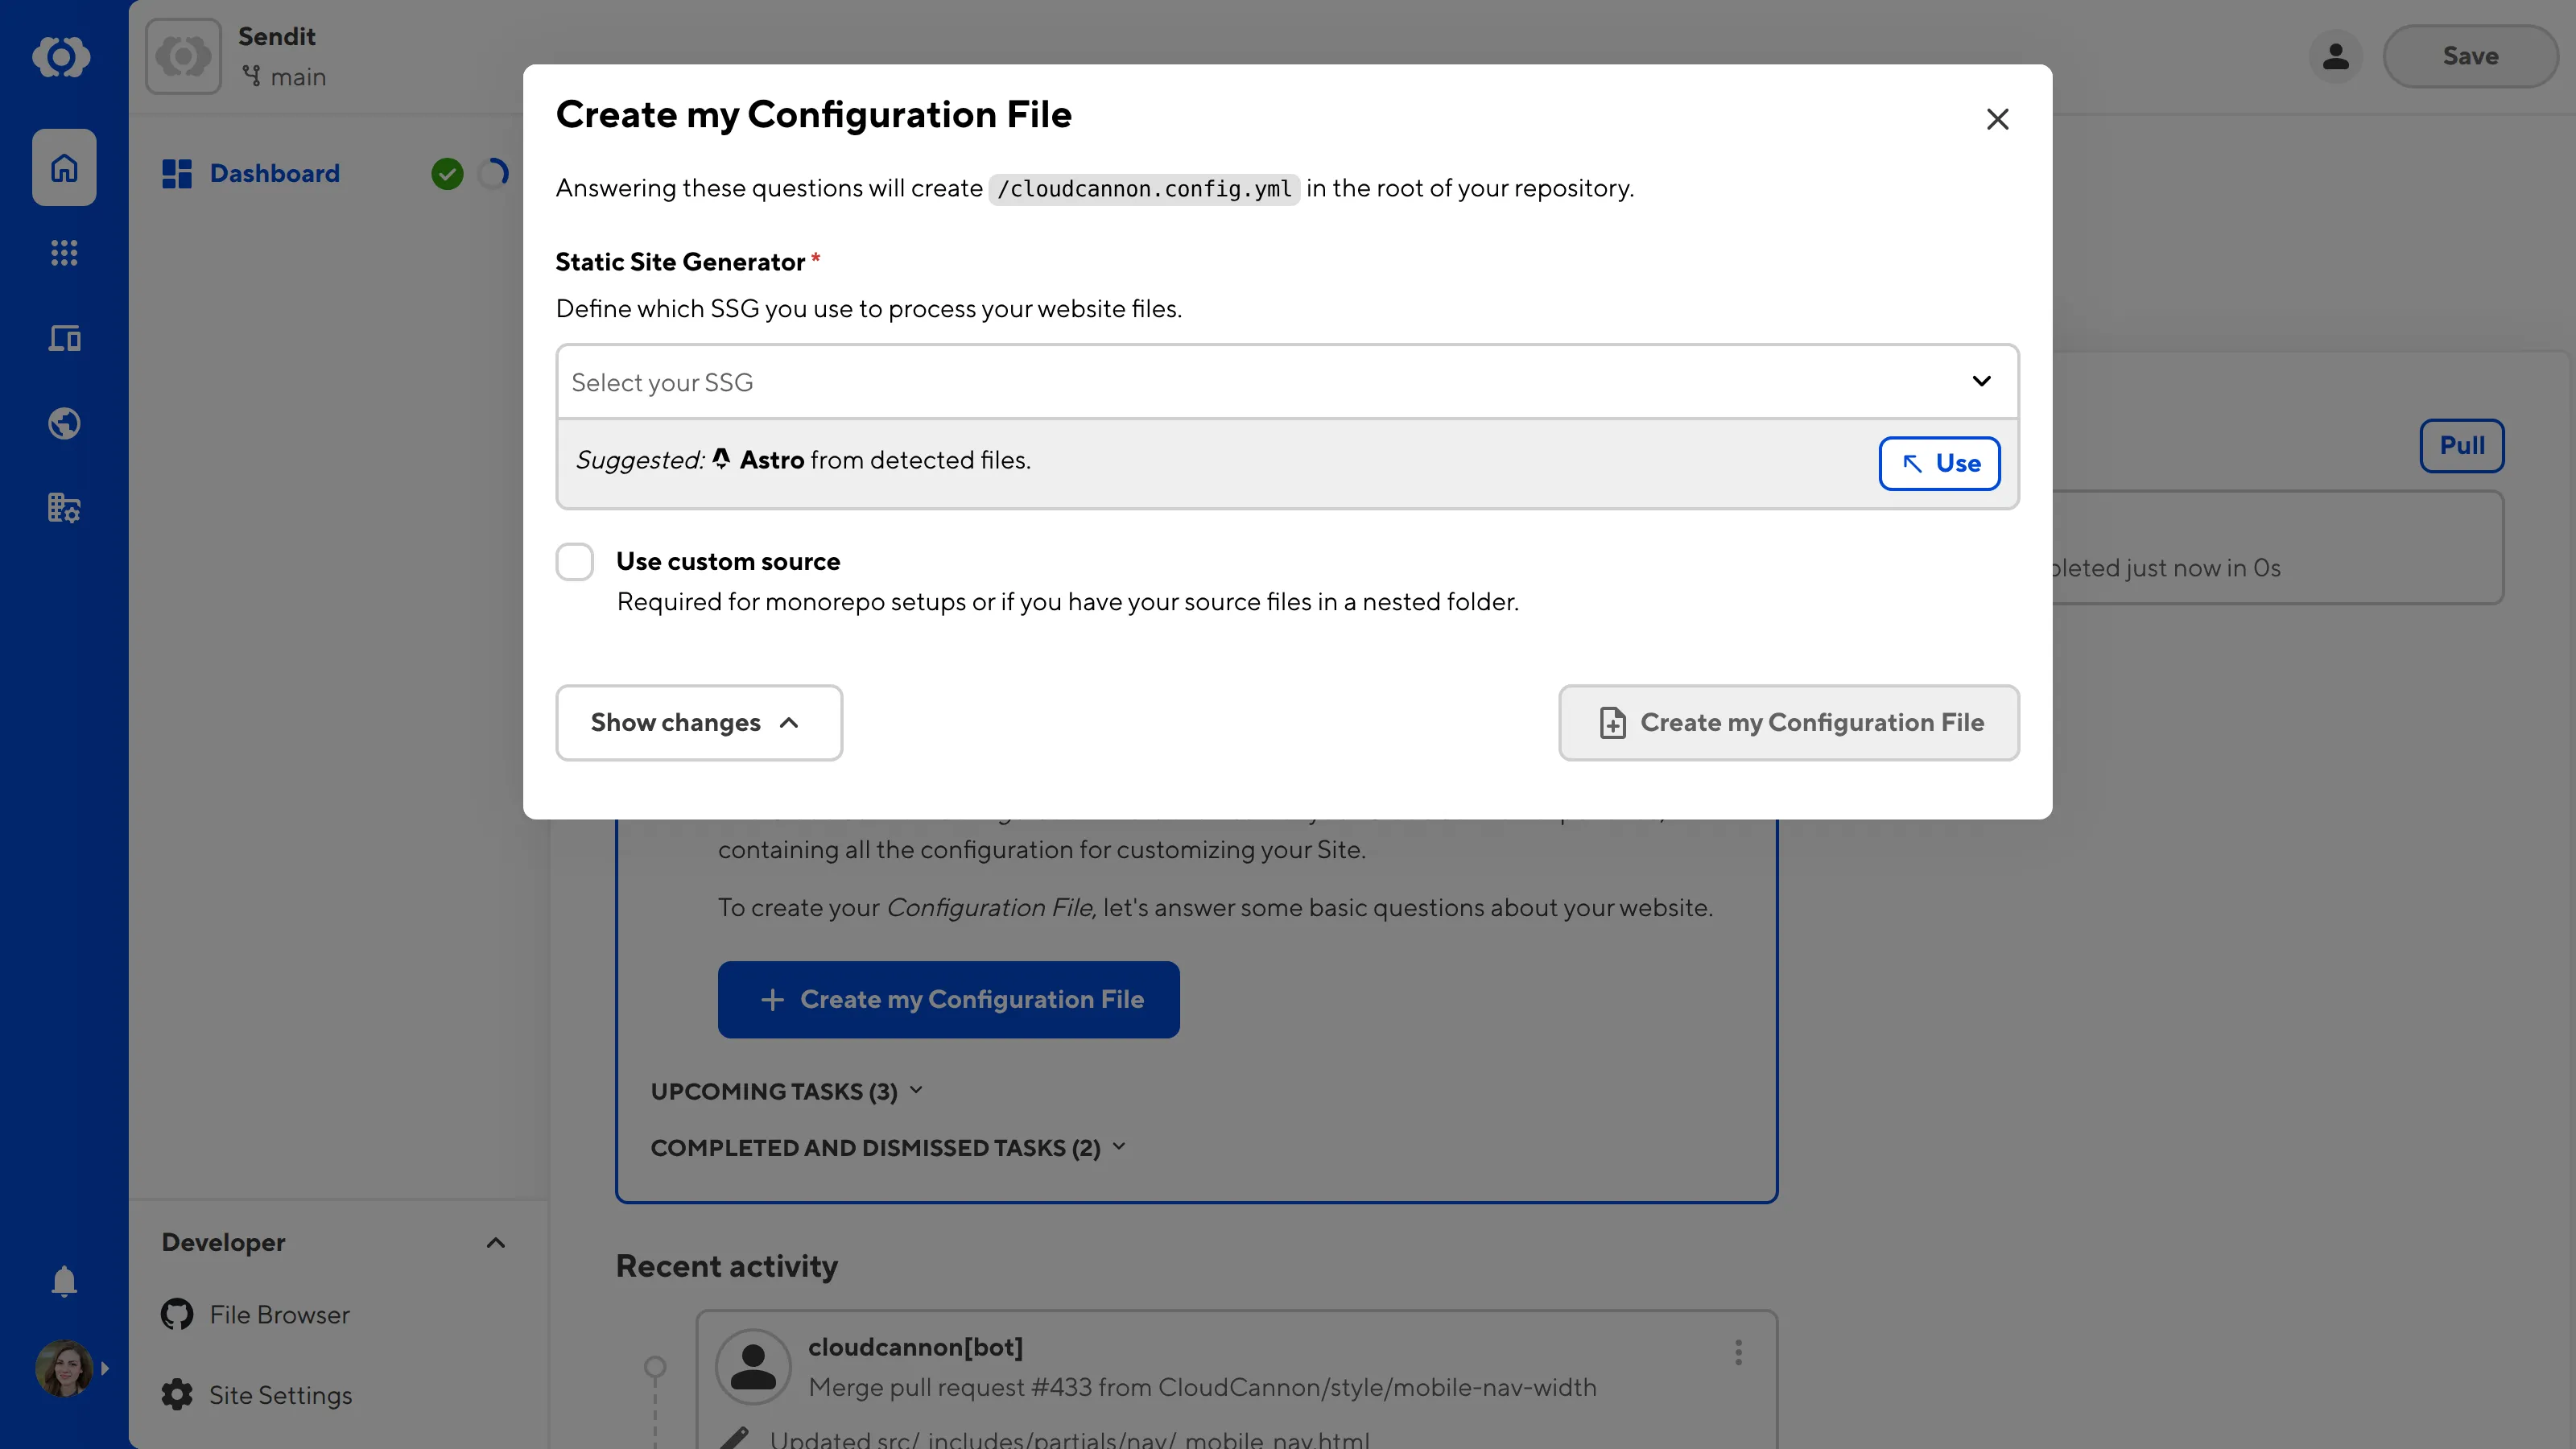
The CloudCannon Configuration File is stored at the root of your website directory by default and can be YAML (or JSON). When you answer the questions in this modal, CloudCannon will create the /cloudcannon.config.yml file in the root of your repository.

To start with, CloudCannon needs to know two key pieces of information about your Site: which Static Site Generator (SSG) you are using and where your Source Folder is in your repository.
An SSG is a tool for generating a static HTML website from your files. CloudCannon supports various SSGs, from Astro, Eleventy, and Hugo to Jekyll, MkDocs, and Lume. You can choose whichever SSG is appropriate for your website files.
CloudCannon will use the information found in your files to suggest an SSG. You can click on the Use button next to the suggested SSG to select it, or use an option from the Static Site Generator dropdown.
The Source Folder defines the base path for your SSG source files relative to the root of your directory. Most websites use the root of their repository as the Source Folder. However, if your source folder is nested in your repository (such as if you have a mono-repo), you should check the Use custom source box and enter the file path in the Source Folder text field.
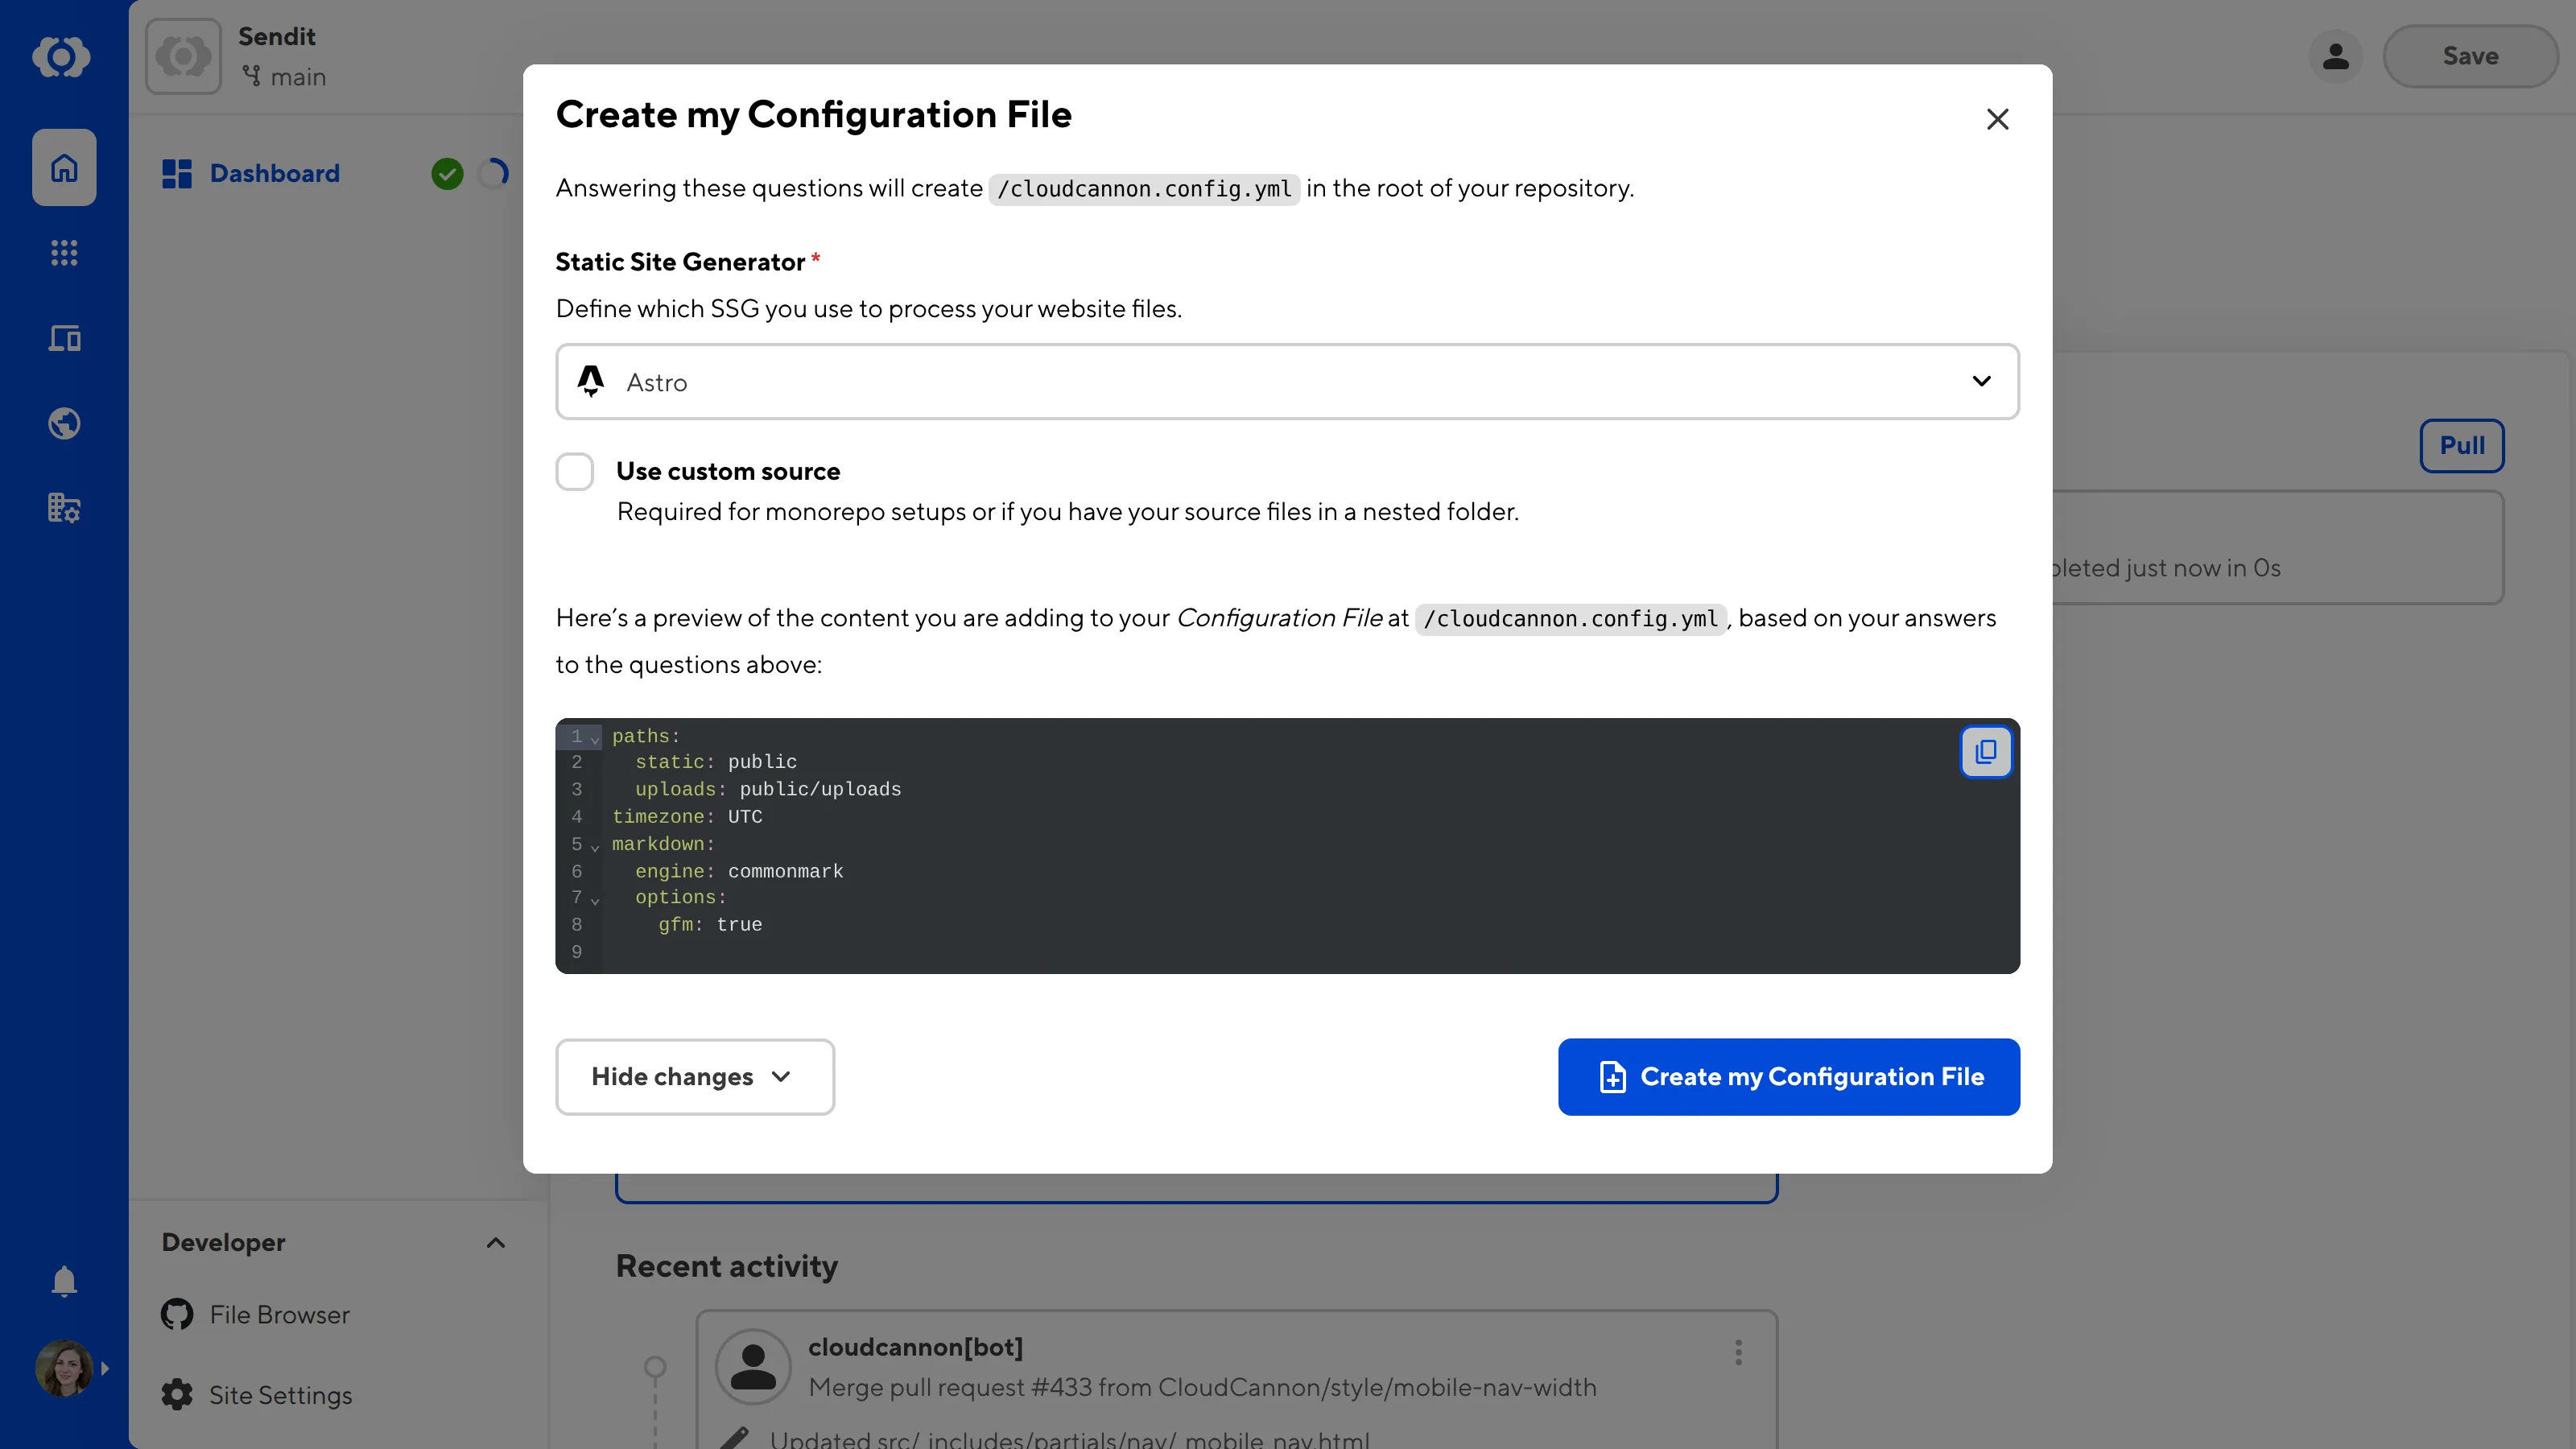
At the bottom of the Create my Configuration File modal is the Show changes button. Clicking this button will show you a preview of the initial content of your CloudCannon Configuration File. This content is based on your answers to the above questions and converted to YAML.

Click the Create my Configuration File button at the bottom of the modal. CloudCannon will add cloudcannon.config.yml to the root of your repository. Once you have returned to your Site Dashboard, you can mark the Create your CloudCannon Configuration File task as complete.
Congratulations! You've made your first change to your website content: adding a file. You might notice that the Save button in the top right now has a red "1" notification. This indicates that you have made a change to one file. Don't click the Save button just yet—we'll talk about saving changes to your Site in the save your Configuration File step of this guide.

You might also notice a new UI element next to the Save button. This is the Configuration Mode switch. Now that we have a Configuration File, we can use Configuration Mode to customize our Site and store our preferences.
In the next step of this guide, we'll use Configuration Mode to group our files into user-friendly Collections.