In the previous step of this guide, we added CloudCannon as an app integration in Okta. Okta will use the information we provided to generate an XML metadata file with the SAML 2.0 details required by CloudCannon.
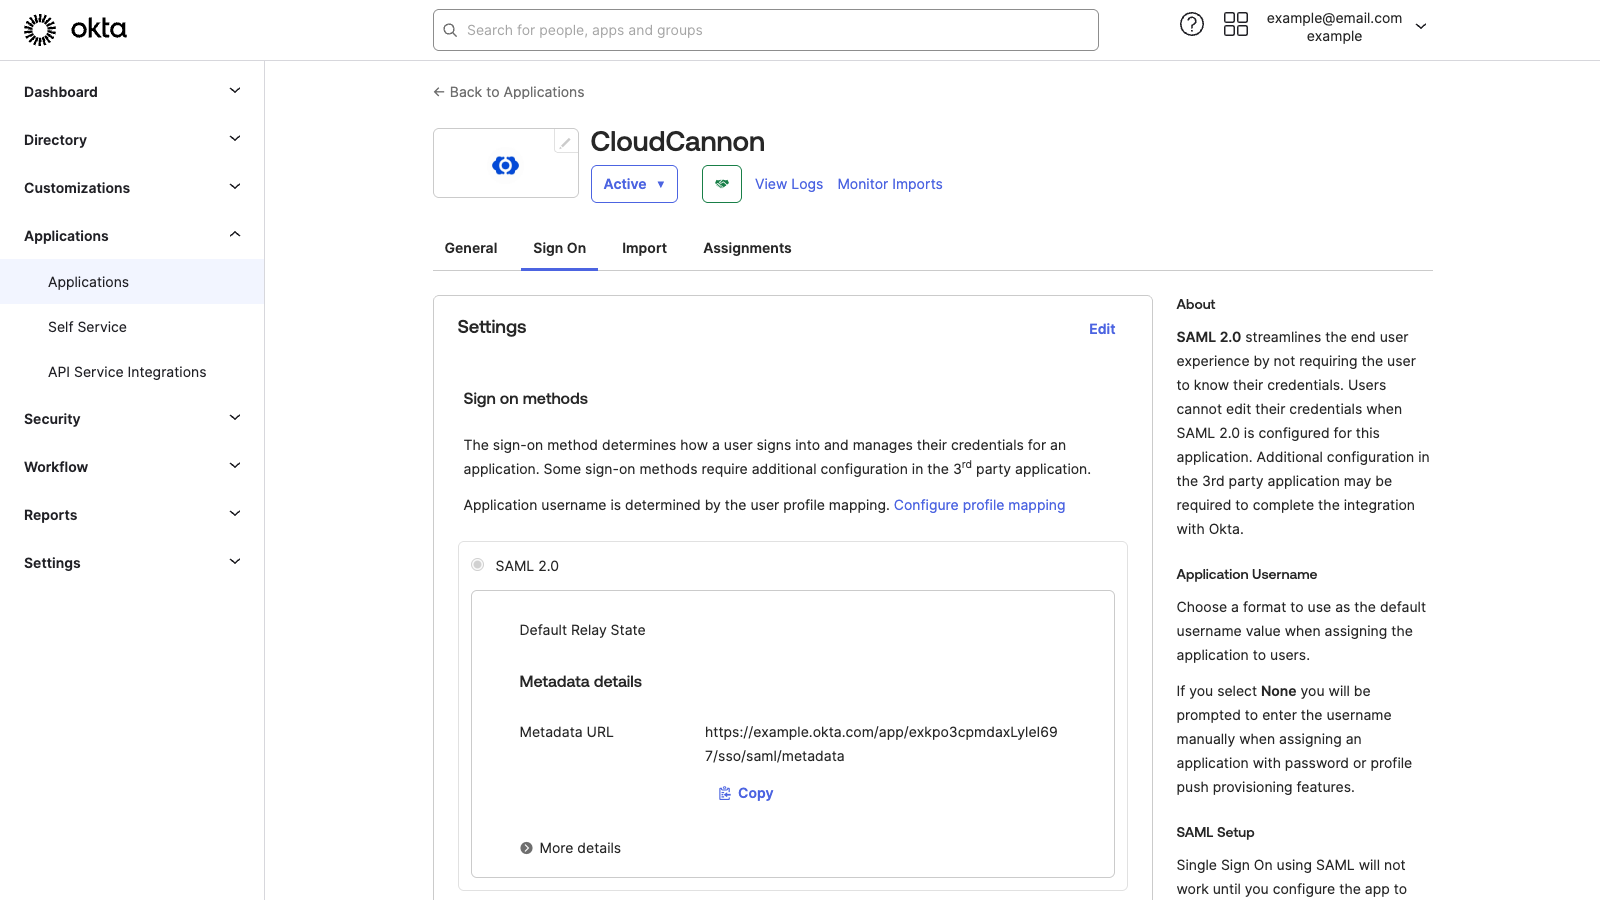
In Okta, navigate to the Application page for the CloudCannon app integration you created in the previous step of this guide.
Under Metadata details, you will find the Metadata URL. The Metadata URL on the Single Sign-On page should look like https://example.okta.com/app/xxxxx/sso/saml/metadata, except example will be your Okta username, and the xxxxx characters will be a unique string.
Click the Copy button under your Metadata URL and open this URL using another tab in your Internet browser.

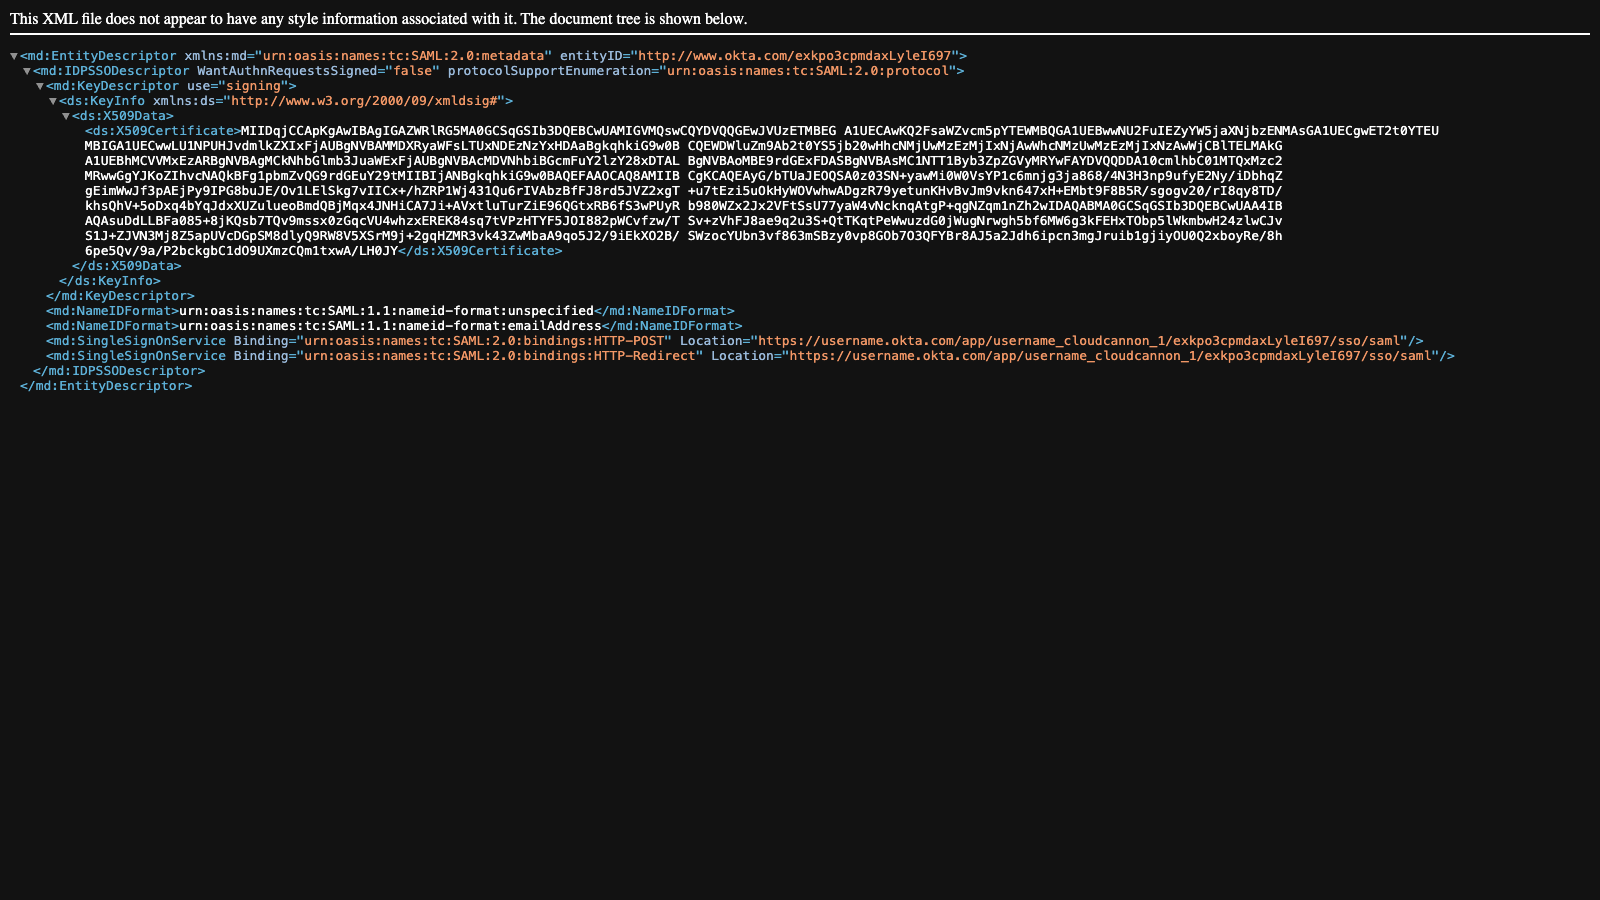
The Metadata URL should show you something like this:

This information is the contents of your XML metadata file. Right-click anywhere on the screen and select the Save as... option from your Internet browser menu. The name of this option may differ slightly from browser to browser.
Your Internet browser will open your computer's File Browser and give you the option to name your XML file before you save it. We recommend "CloudCannon-Okta-metadata.xml" or something similar so you can easily find this file again.
Save the file to your computer.
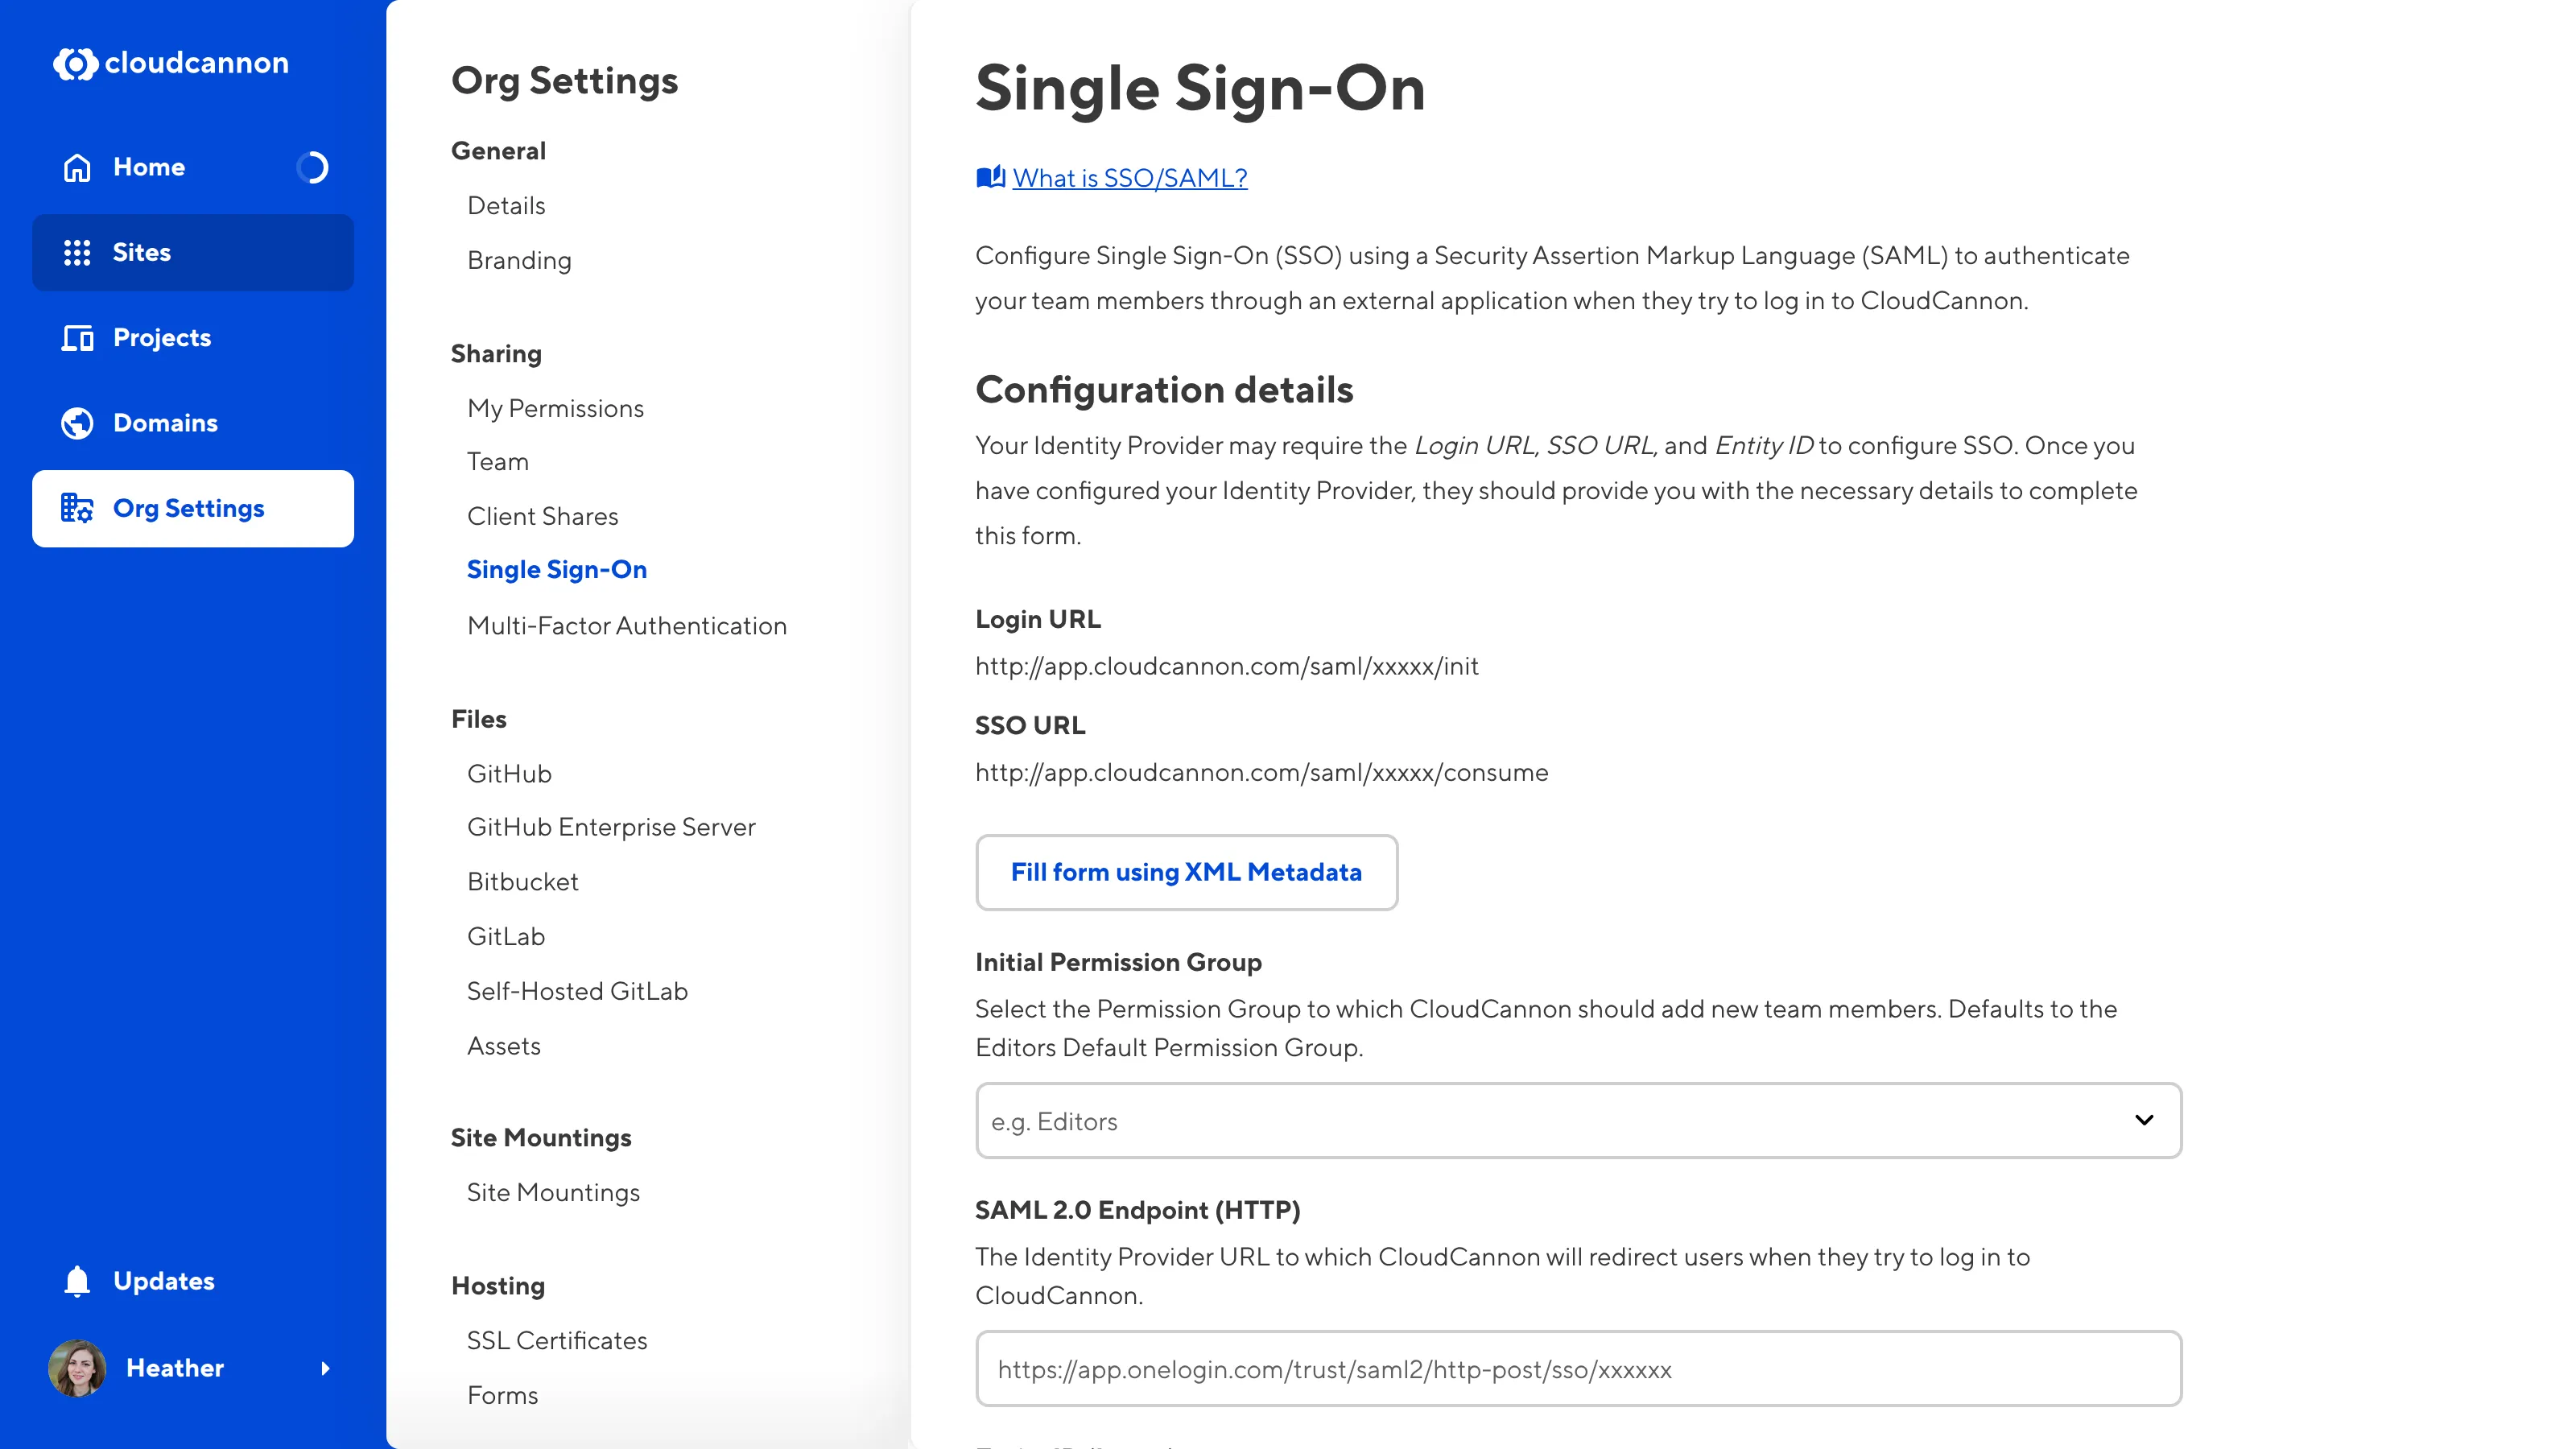
In CloudCannon, navigate to the Single Sign-On page under Org Settings.
To set up SAML 2.0, CloudCannon needs the following details: SAML 2.0 Endpoint (HTTP), Entity ID (Issuer), Name ID Format, Authn Context, Signing Algorithm, and X.509 Certificate.
If you need a reminder on these terms, check out the first page of this guide.
CloudCannon can use the XML metadata file generated by Okta to populate the majority of these fields.
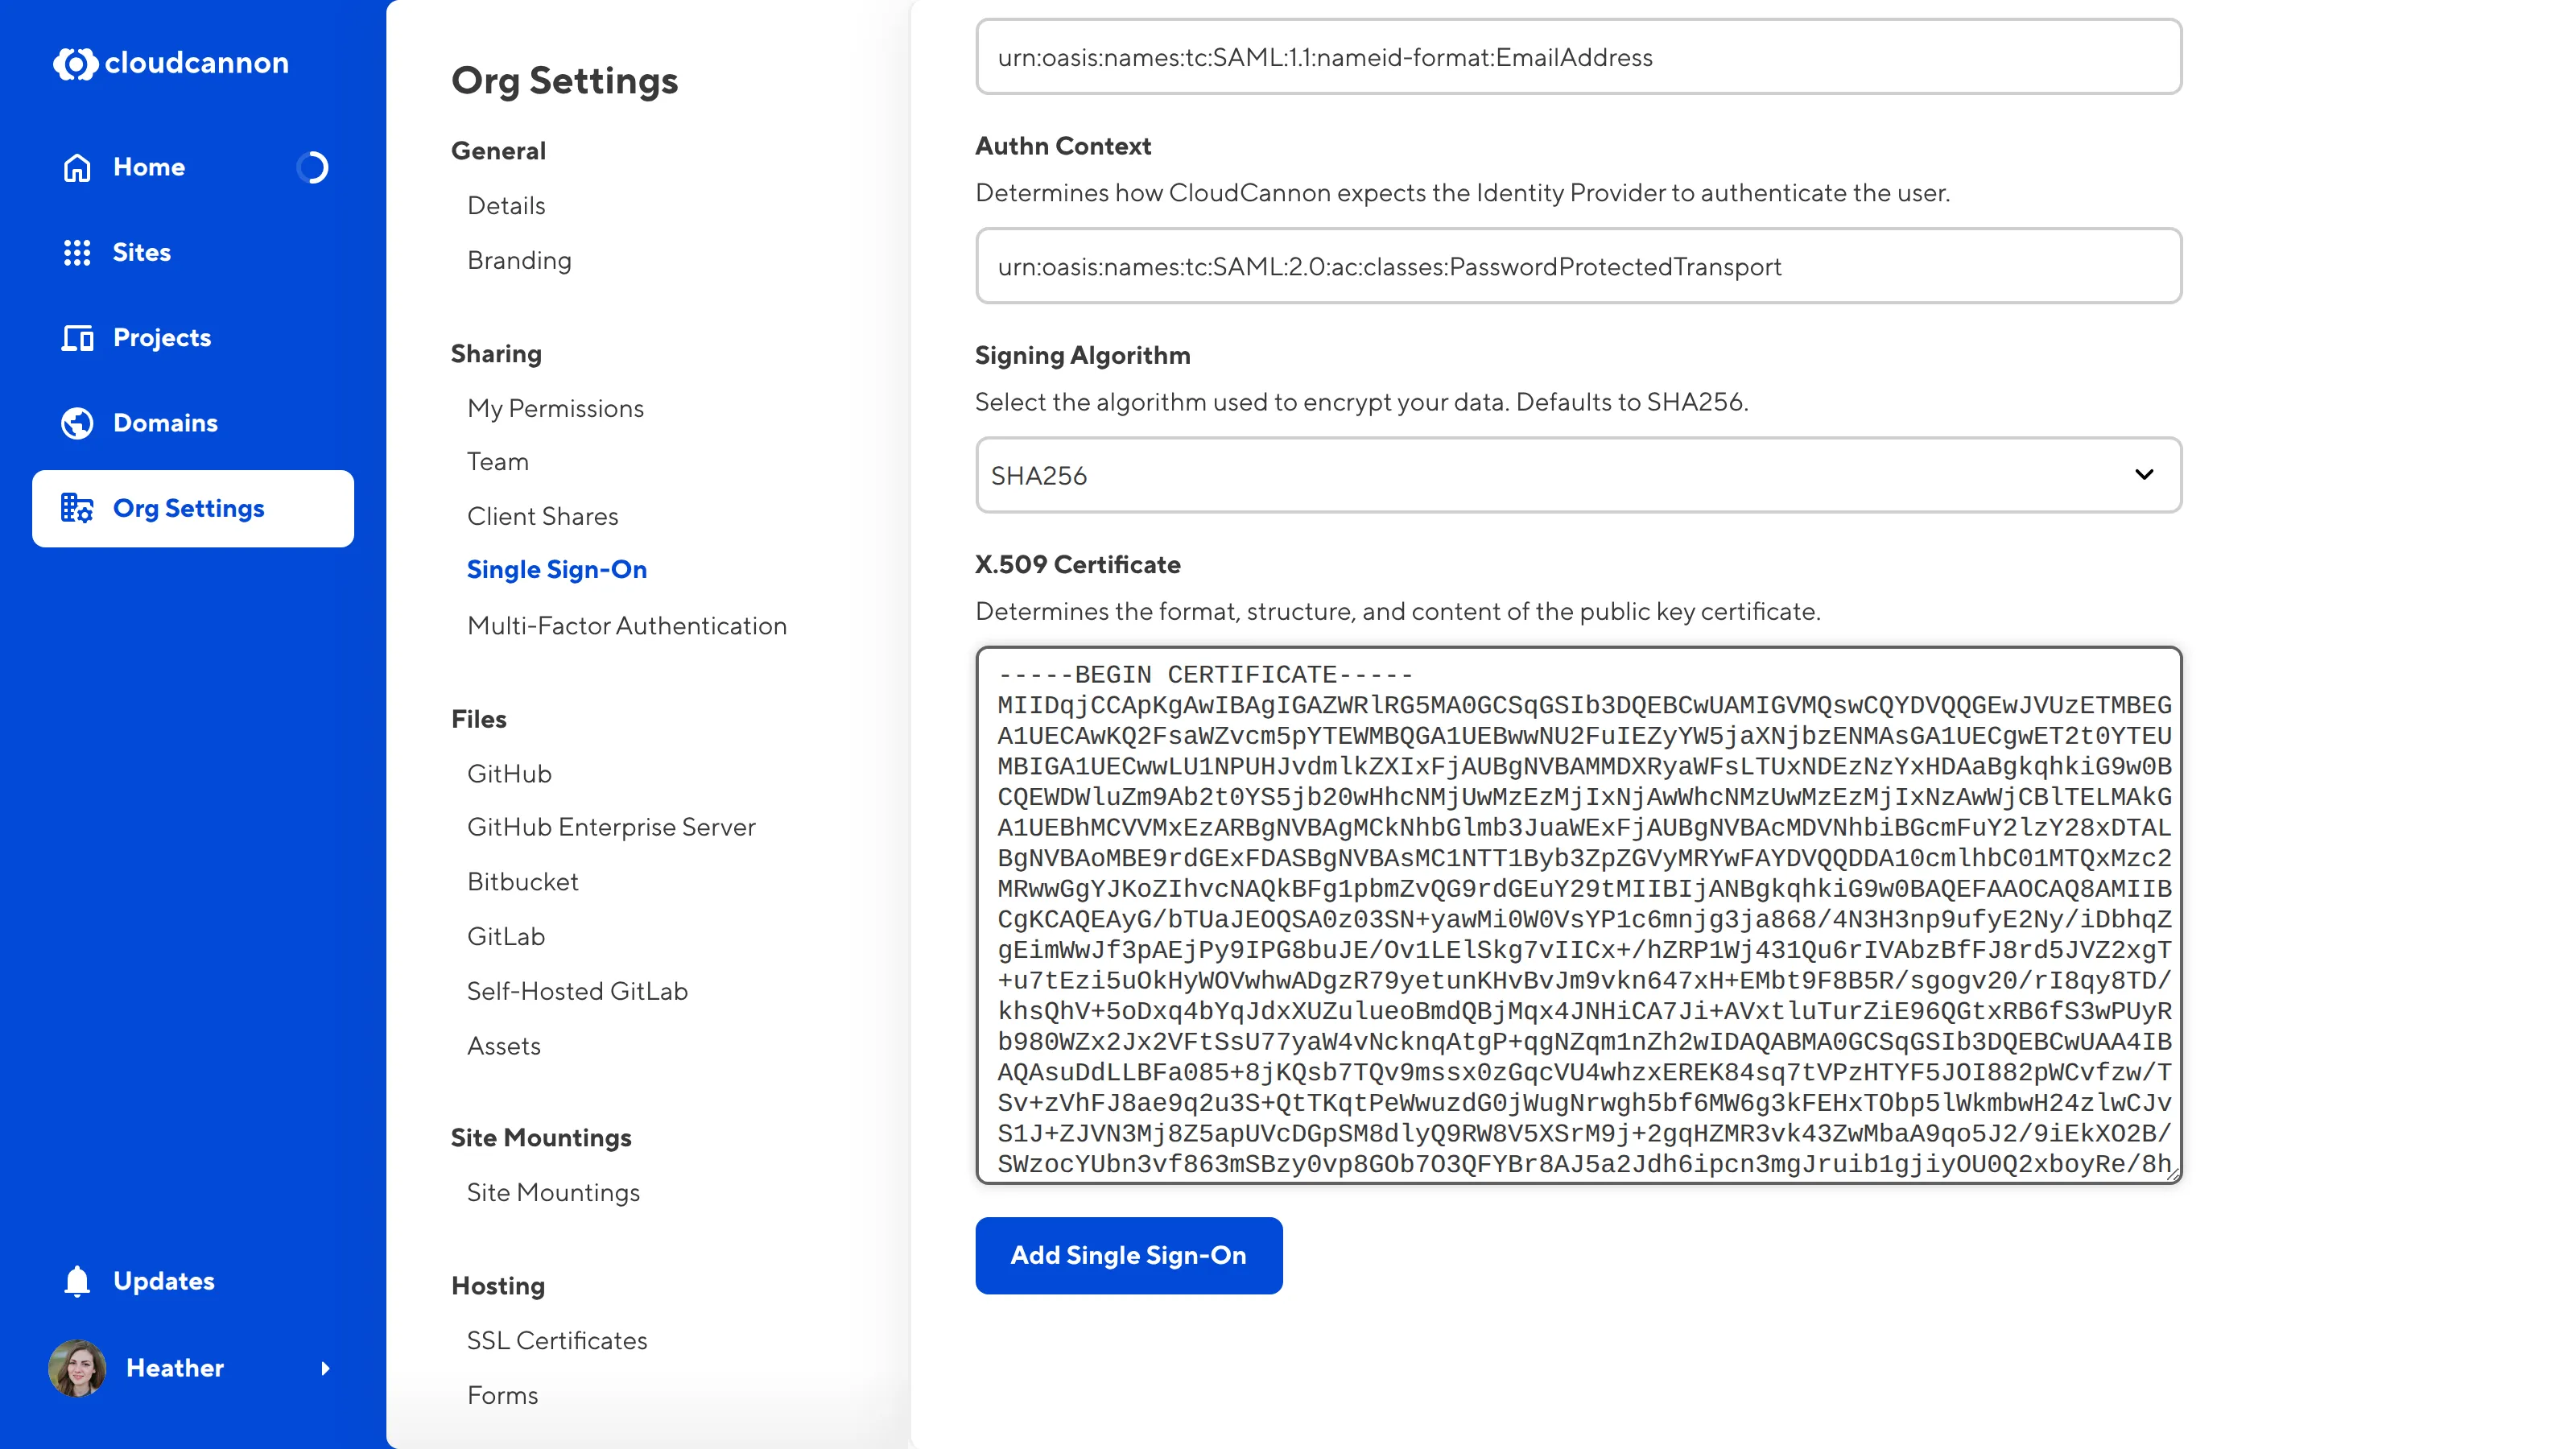
Click the Fill form using XML Metadata button, and select the XML metadata file we just downloaded using your computer's File Browser. CloudCannon will update most of the text fields on the Single Sign-On page using the contents of this file.

You may want to customize two fields on the Single Sign-On page: Initial Permission Group and Signing Algorithm.
The Initial Permission Group dropdown lists all the Permission Groups configured for your Organization. This field controls which Permission Group CloudCannon should add a new user to if they have not logged in to your Organization before. By default, CloudCannon uses the Editors Default Permission Group. We recommend choosing a Permission Group with fewer permissions and moving specific members to a different group if they require more permissions.
The Signing Algorithm dropdown has two options: SHA256 and SHA1. By default, CloudCannon uses the SHA256 signing algorithm to encrypt your data. We recommend using the default algorithm unless you know your workflow requires SHA1.
Scroll to the bottom of the page and click Add Single Sign-On.
You have successfully configured SSO/SAML with Okta and CloudCannon!
You can share your Login URL with your team. To see your login page, click the View SAML Landing Page button. Your Login URL is at the top of the Single Sign-On page under Org Settings. It should look like https://app.cloudcannon.com/saml/xxxxx/init, except the x characters will be your unique Organization ID.
CloudCannon will redirect users to your Okta landing page each time they attempt to log in to your Organization.

Please refer to the Okta documentation for assistance managing your Identity Provider.
In the next step of this guide (optional), we will cover managing your SSO settings in CloudCannon. If you need further assistance, our friendly support team is always available to help.