You can already edit your files in CloudCannon and save your changes to your Git repository, but let's customize the editing experience for your team members. In the next few steps of this guide, we'll review key configurations that will help you understand CloudCannon better and give you the tools to customize your experience.
Let's configure your Collections!
There are multiple ways you can configure the appearance and functionality of your Collections, such as:
- Adding a description or documentation link to the Collection browser page.
- Configuring the output URL of your files.
- Creating globs to control which files are visible in your Collection browser.
- Configuring which editing interfaces are permitted for Collection files.
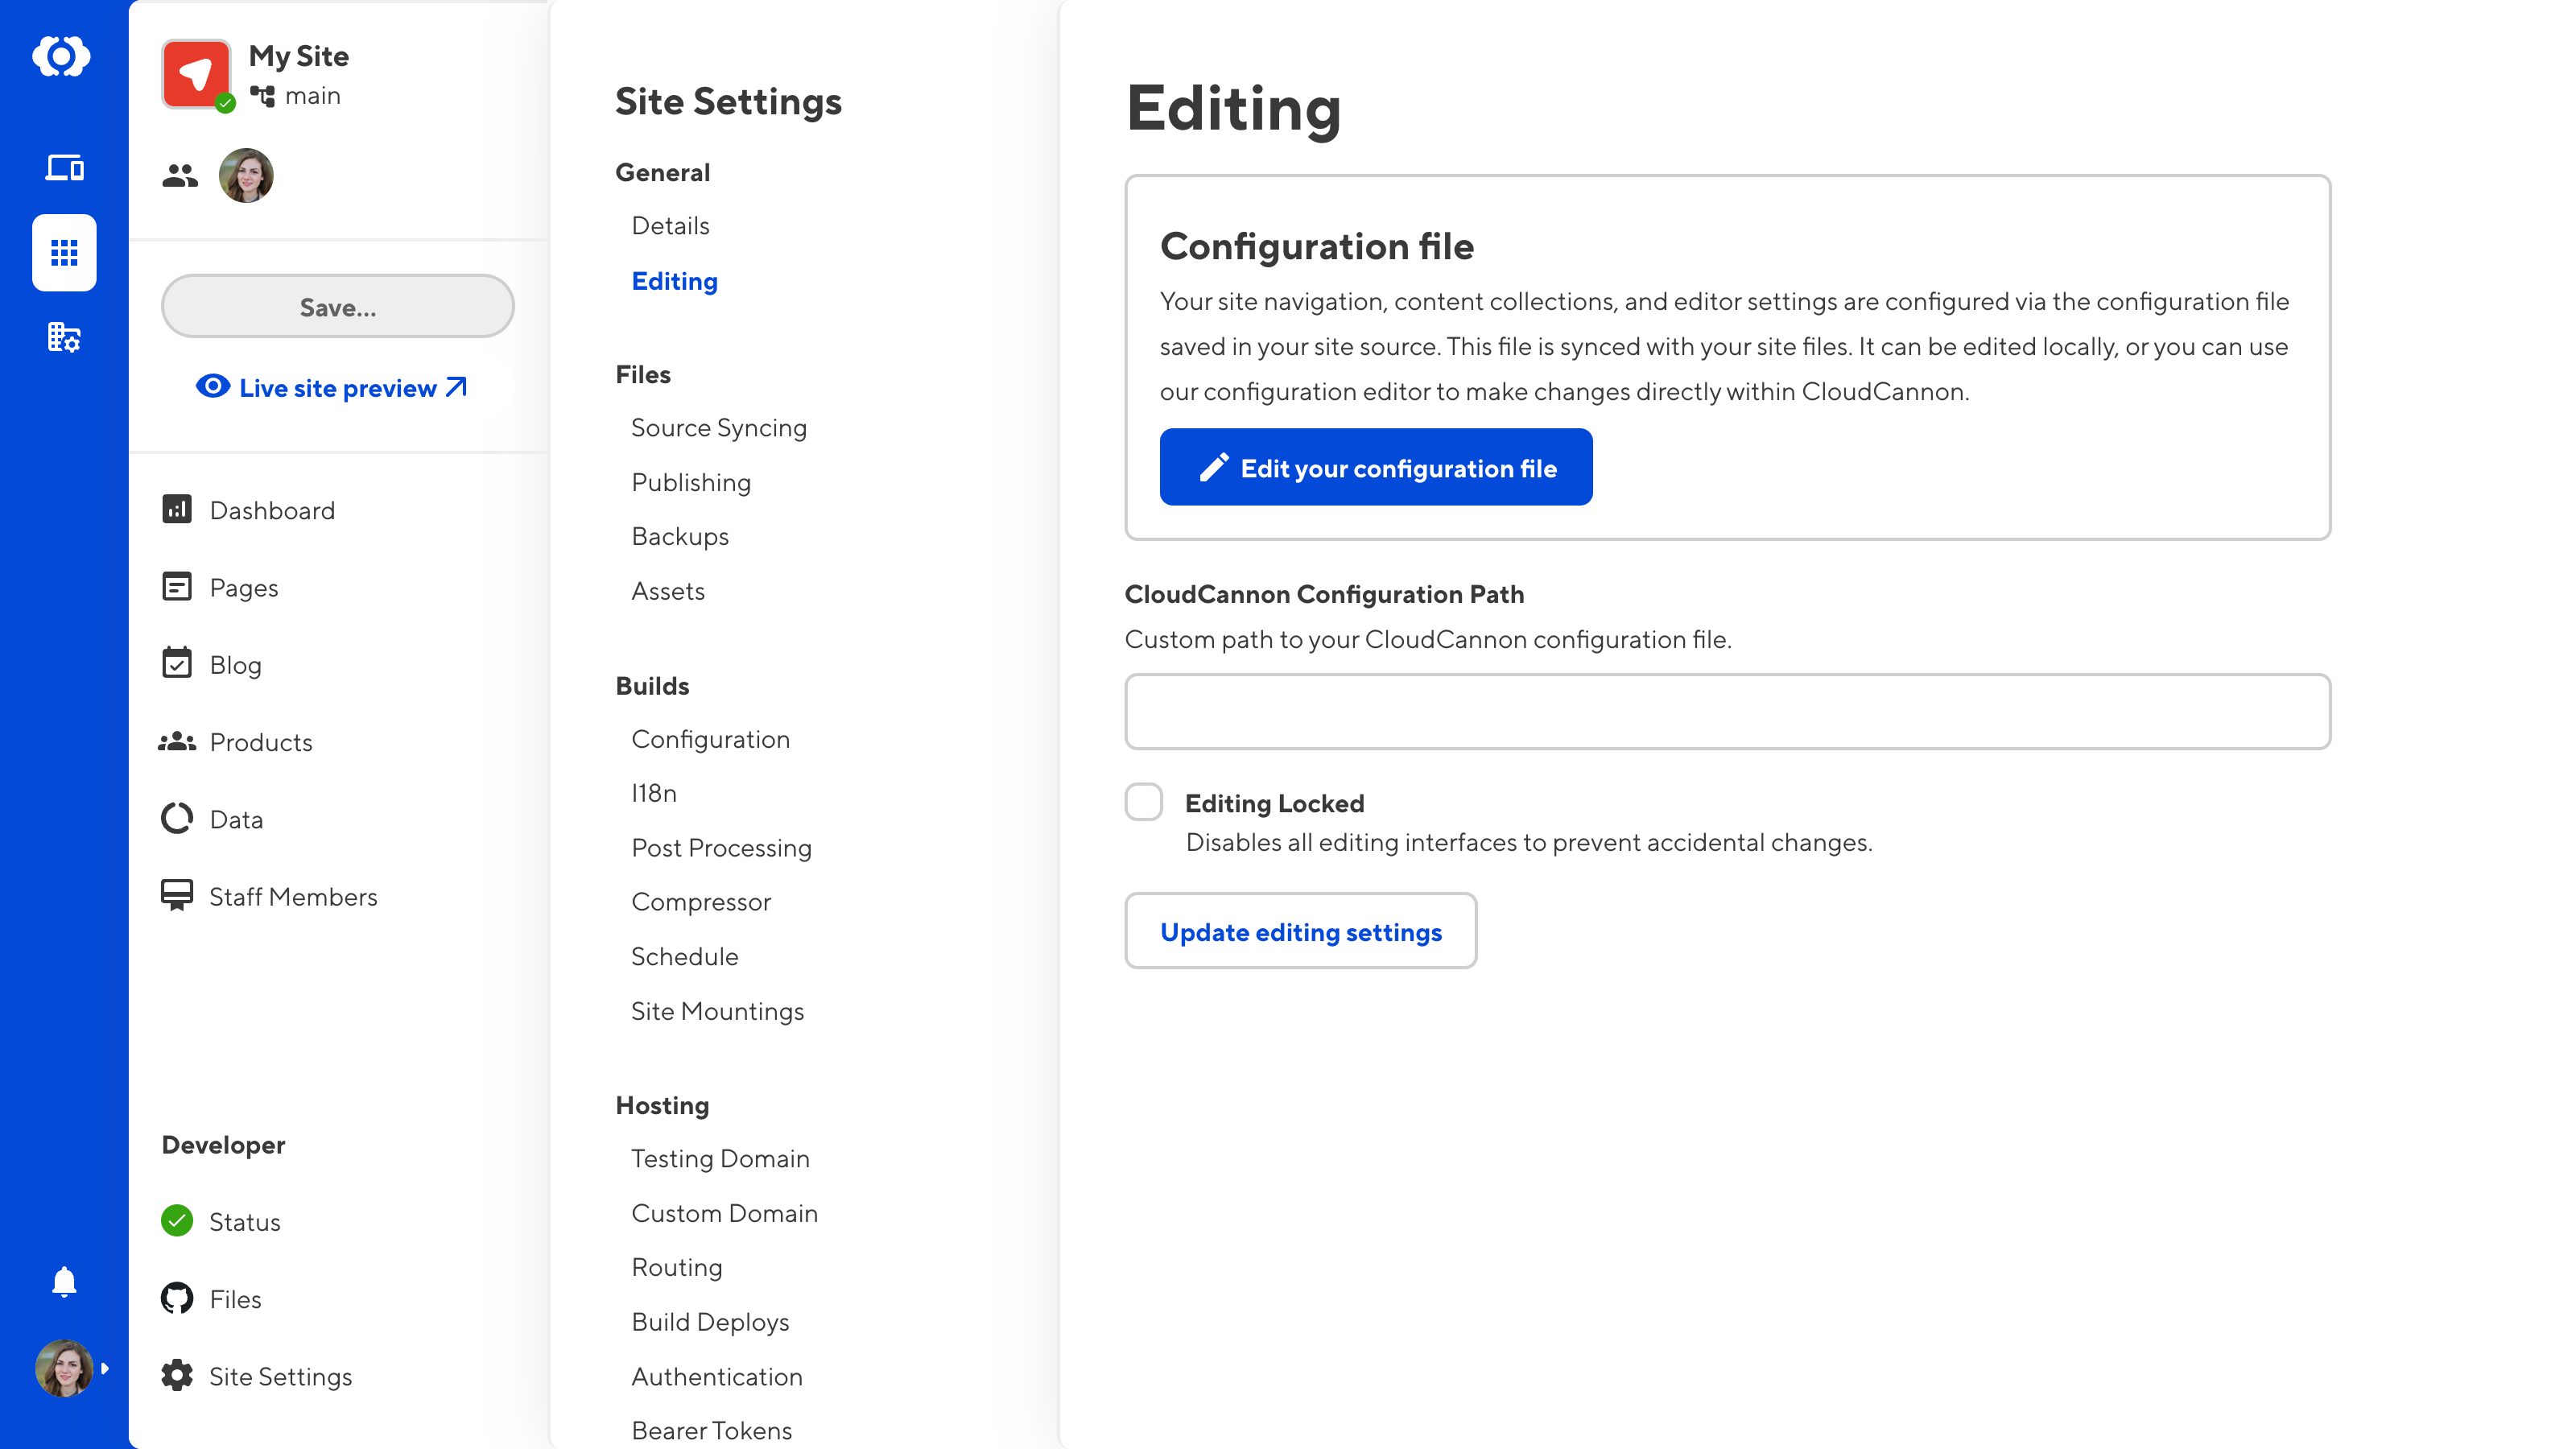
You can familiarize yourself these settings by browsing your CloudCannon configuration file in the Data Editor. If you want to undertake some self-directed exploration you can open your CloudCannon configuration file by clicking on Site Settings in your Site Navigation, opening the Editing page, and clicking the Edit your configuration file button.
To begin, we'll configure how your Collections appear in your Site Navigation, how your file cards appear in your Collection browser, and create a Schema for our team members to use as a template for new files.
Collection appearance configuration#
Earlier in this guide, we generated our CloudCannon configuration file, which added our Collections to the Site Navigation. Here's an example. On this Site, we have five Collections, three of which output to pages on our website (Pages, Blog, and Products) and two containing data files (Data and Staff Members).
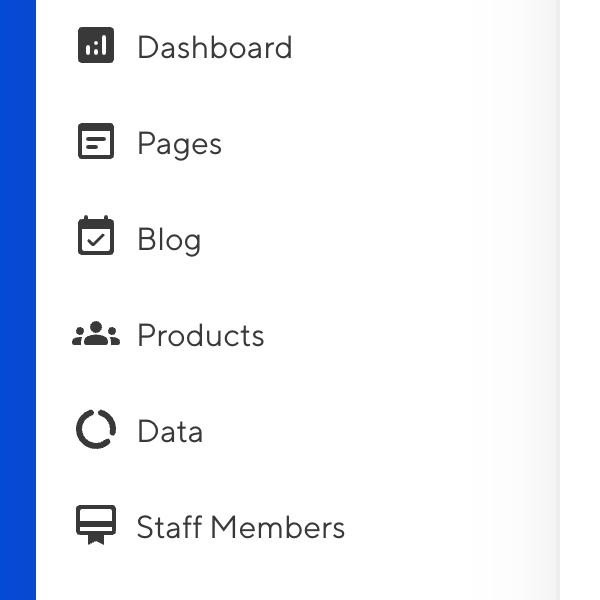
Let's configure how these Collections appear in the Site Navigation. You can follow along and update the appearance of your own Collections as we go.
Open your CloudCannon configuration file by clicking Site Settings in your Site Navigation. Then, open the Editing page. Click the Edit your configuration file button to open your CloudCannon configuration file in the Data Editor.
Navigate to the Collections section under Collections and Paths. CloudCannon lists all your Collections here. You can click on any Collection to see the configuration settings specific to that Collection.
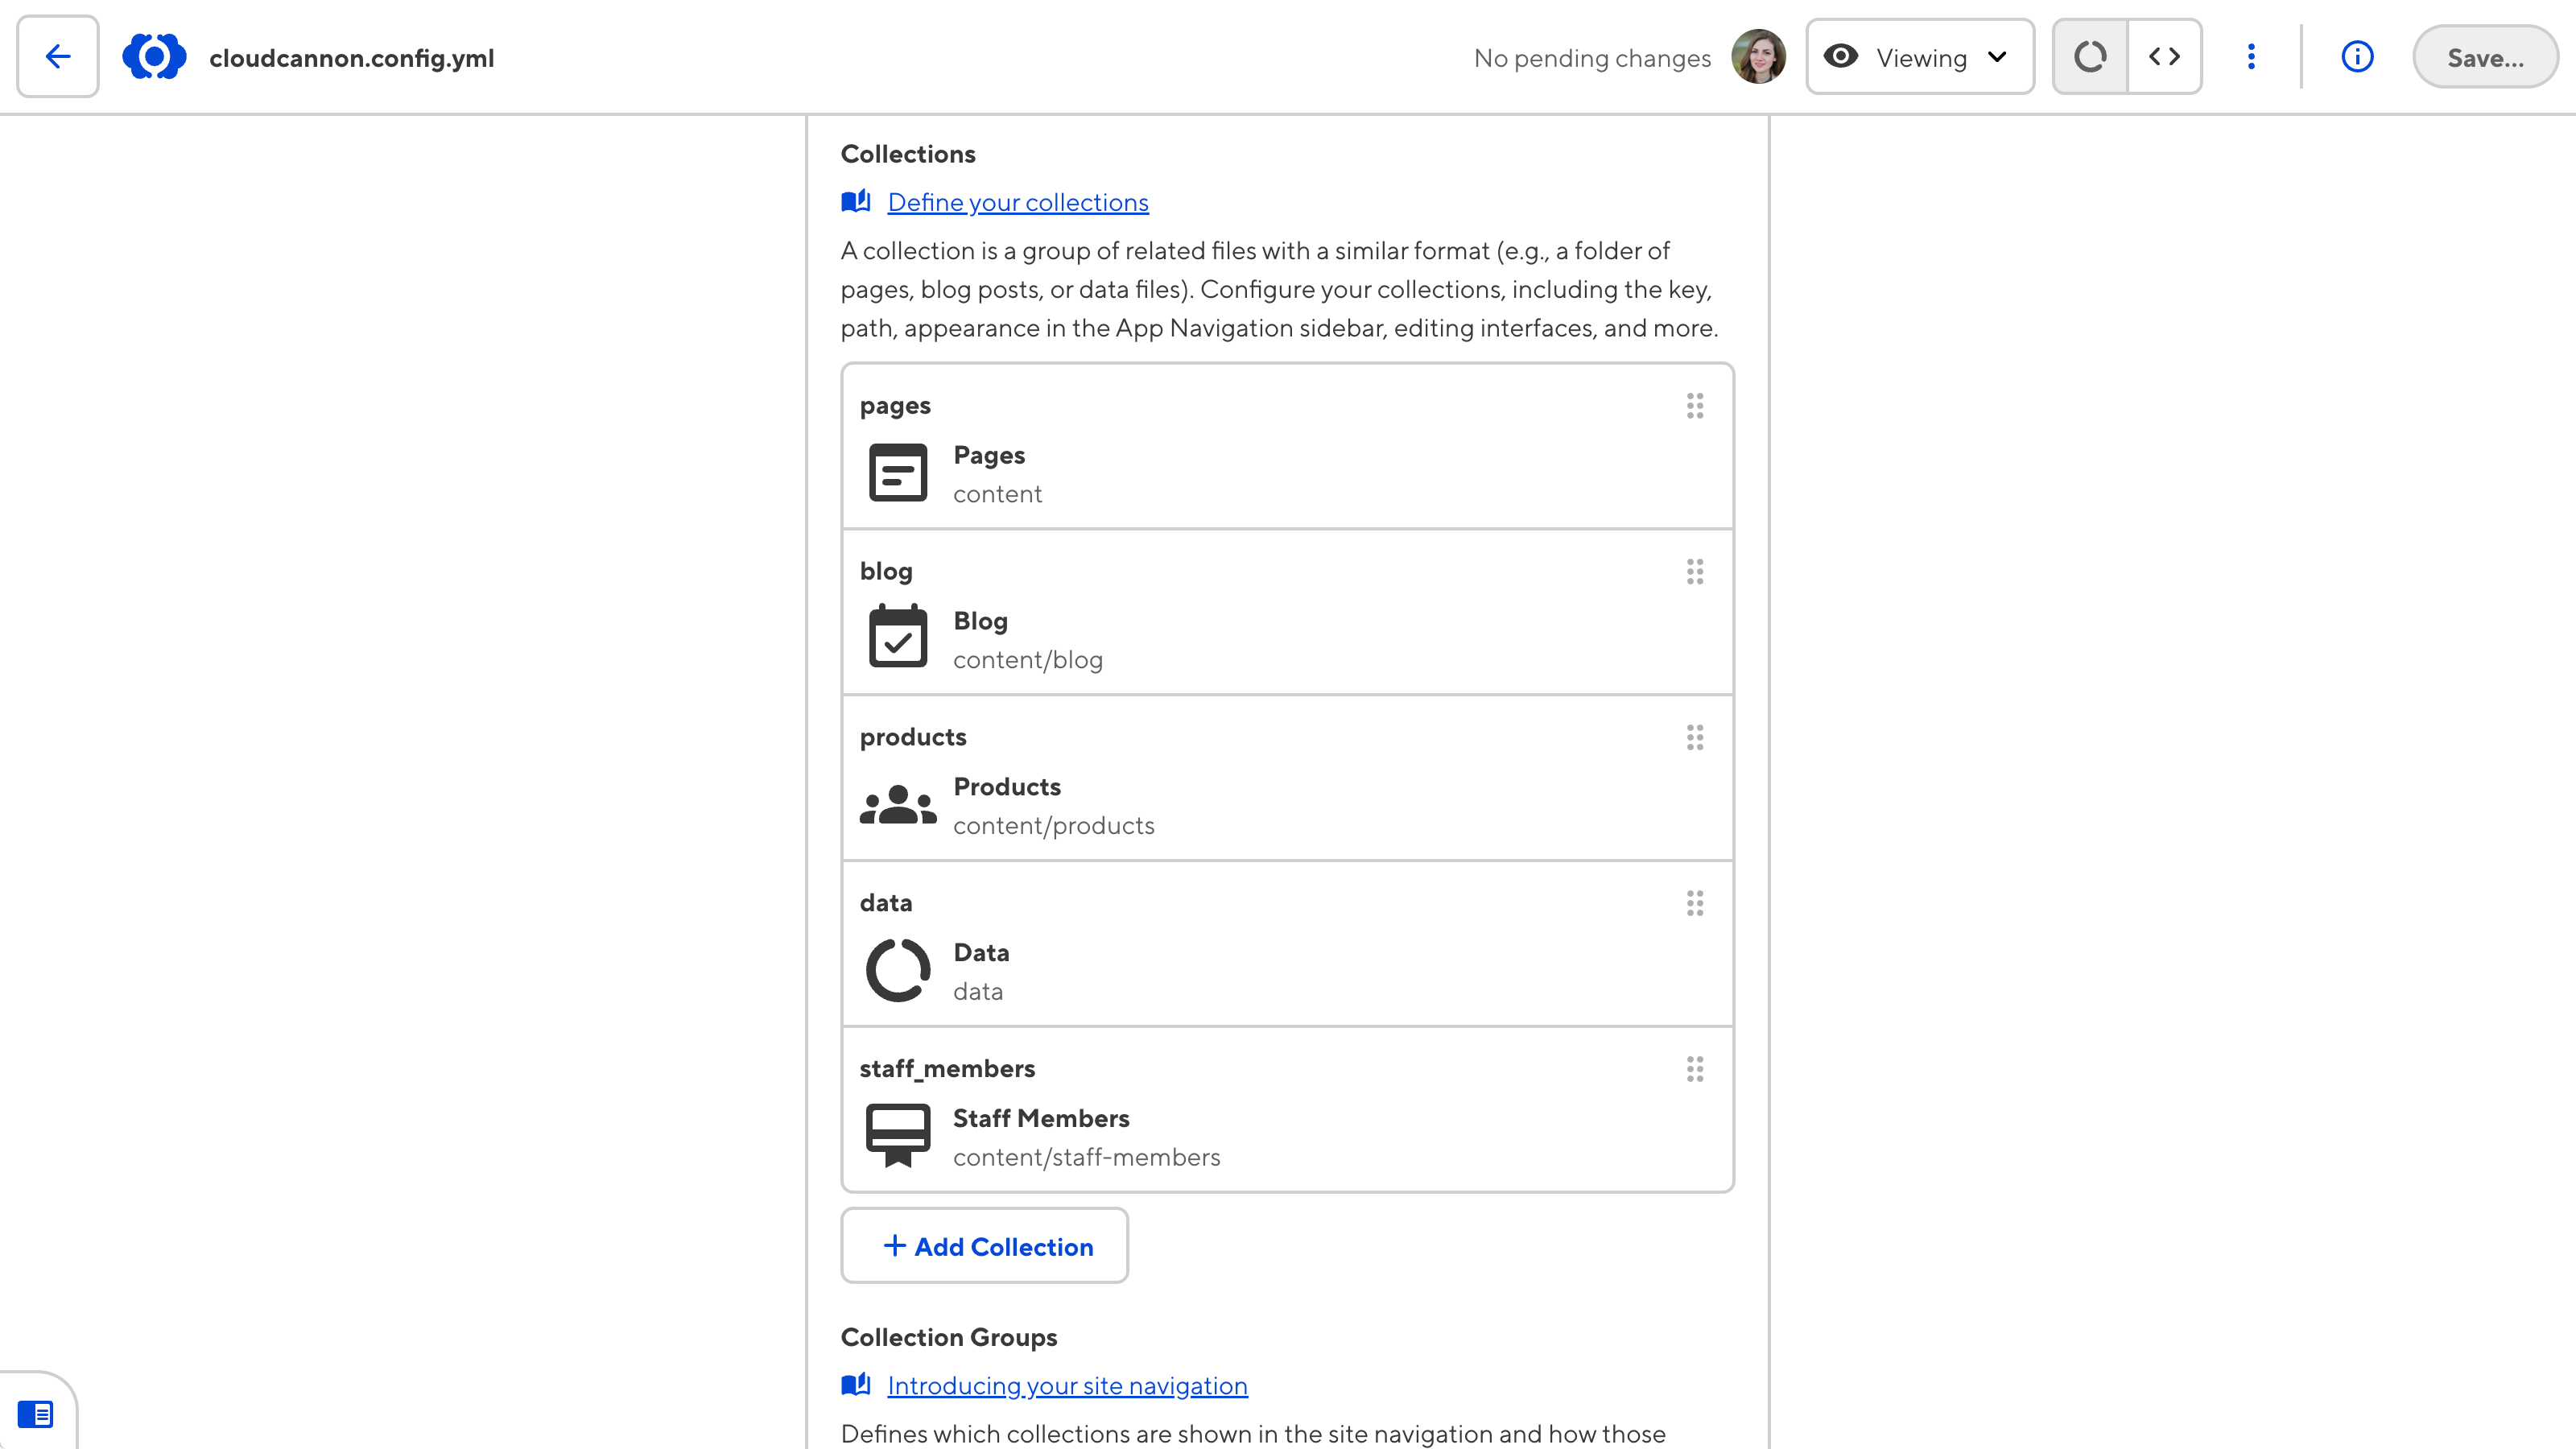
When you generate the configuration file, CloudCannon automatically chooses an icon for each Collection from Google's Material Icons list based on its name. Some of these icons aren't quite right. For example, CloudCannon chose the card_membership icon for the Staff Members Collection because it shares the word "member". Let's change some icons.
First, let's open the Staff Members Collection. There are four sections on the Collection configuration panel: Collection setup, Collection display, Collection editing interfaces, and Creating and updating pages.
To update the icon for a Collection, navigate to the Icon dropdown under Collection display.
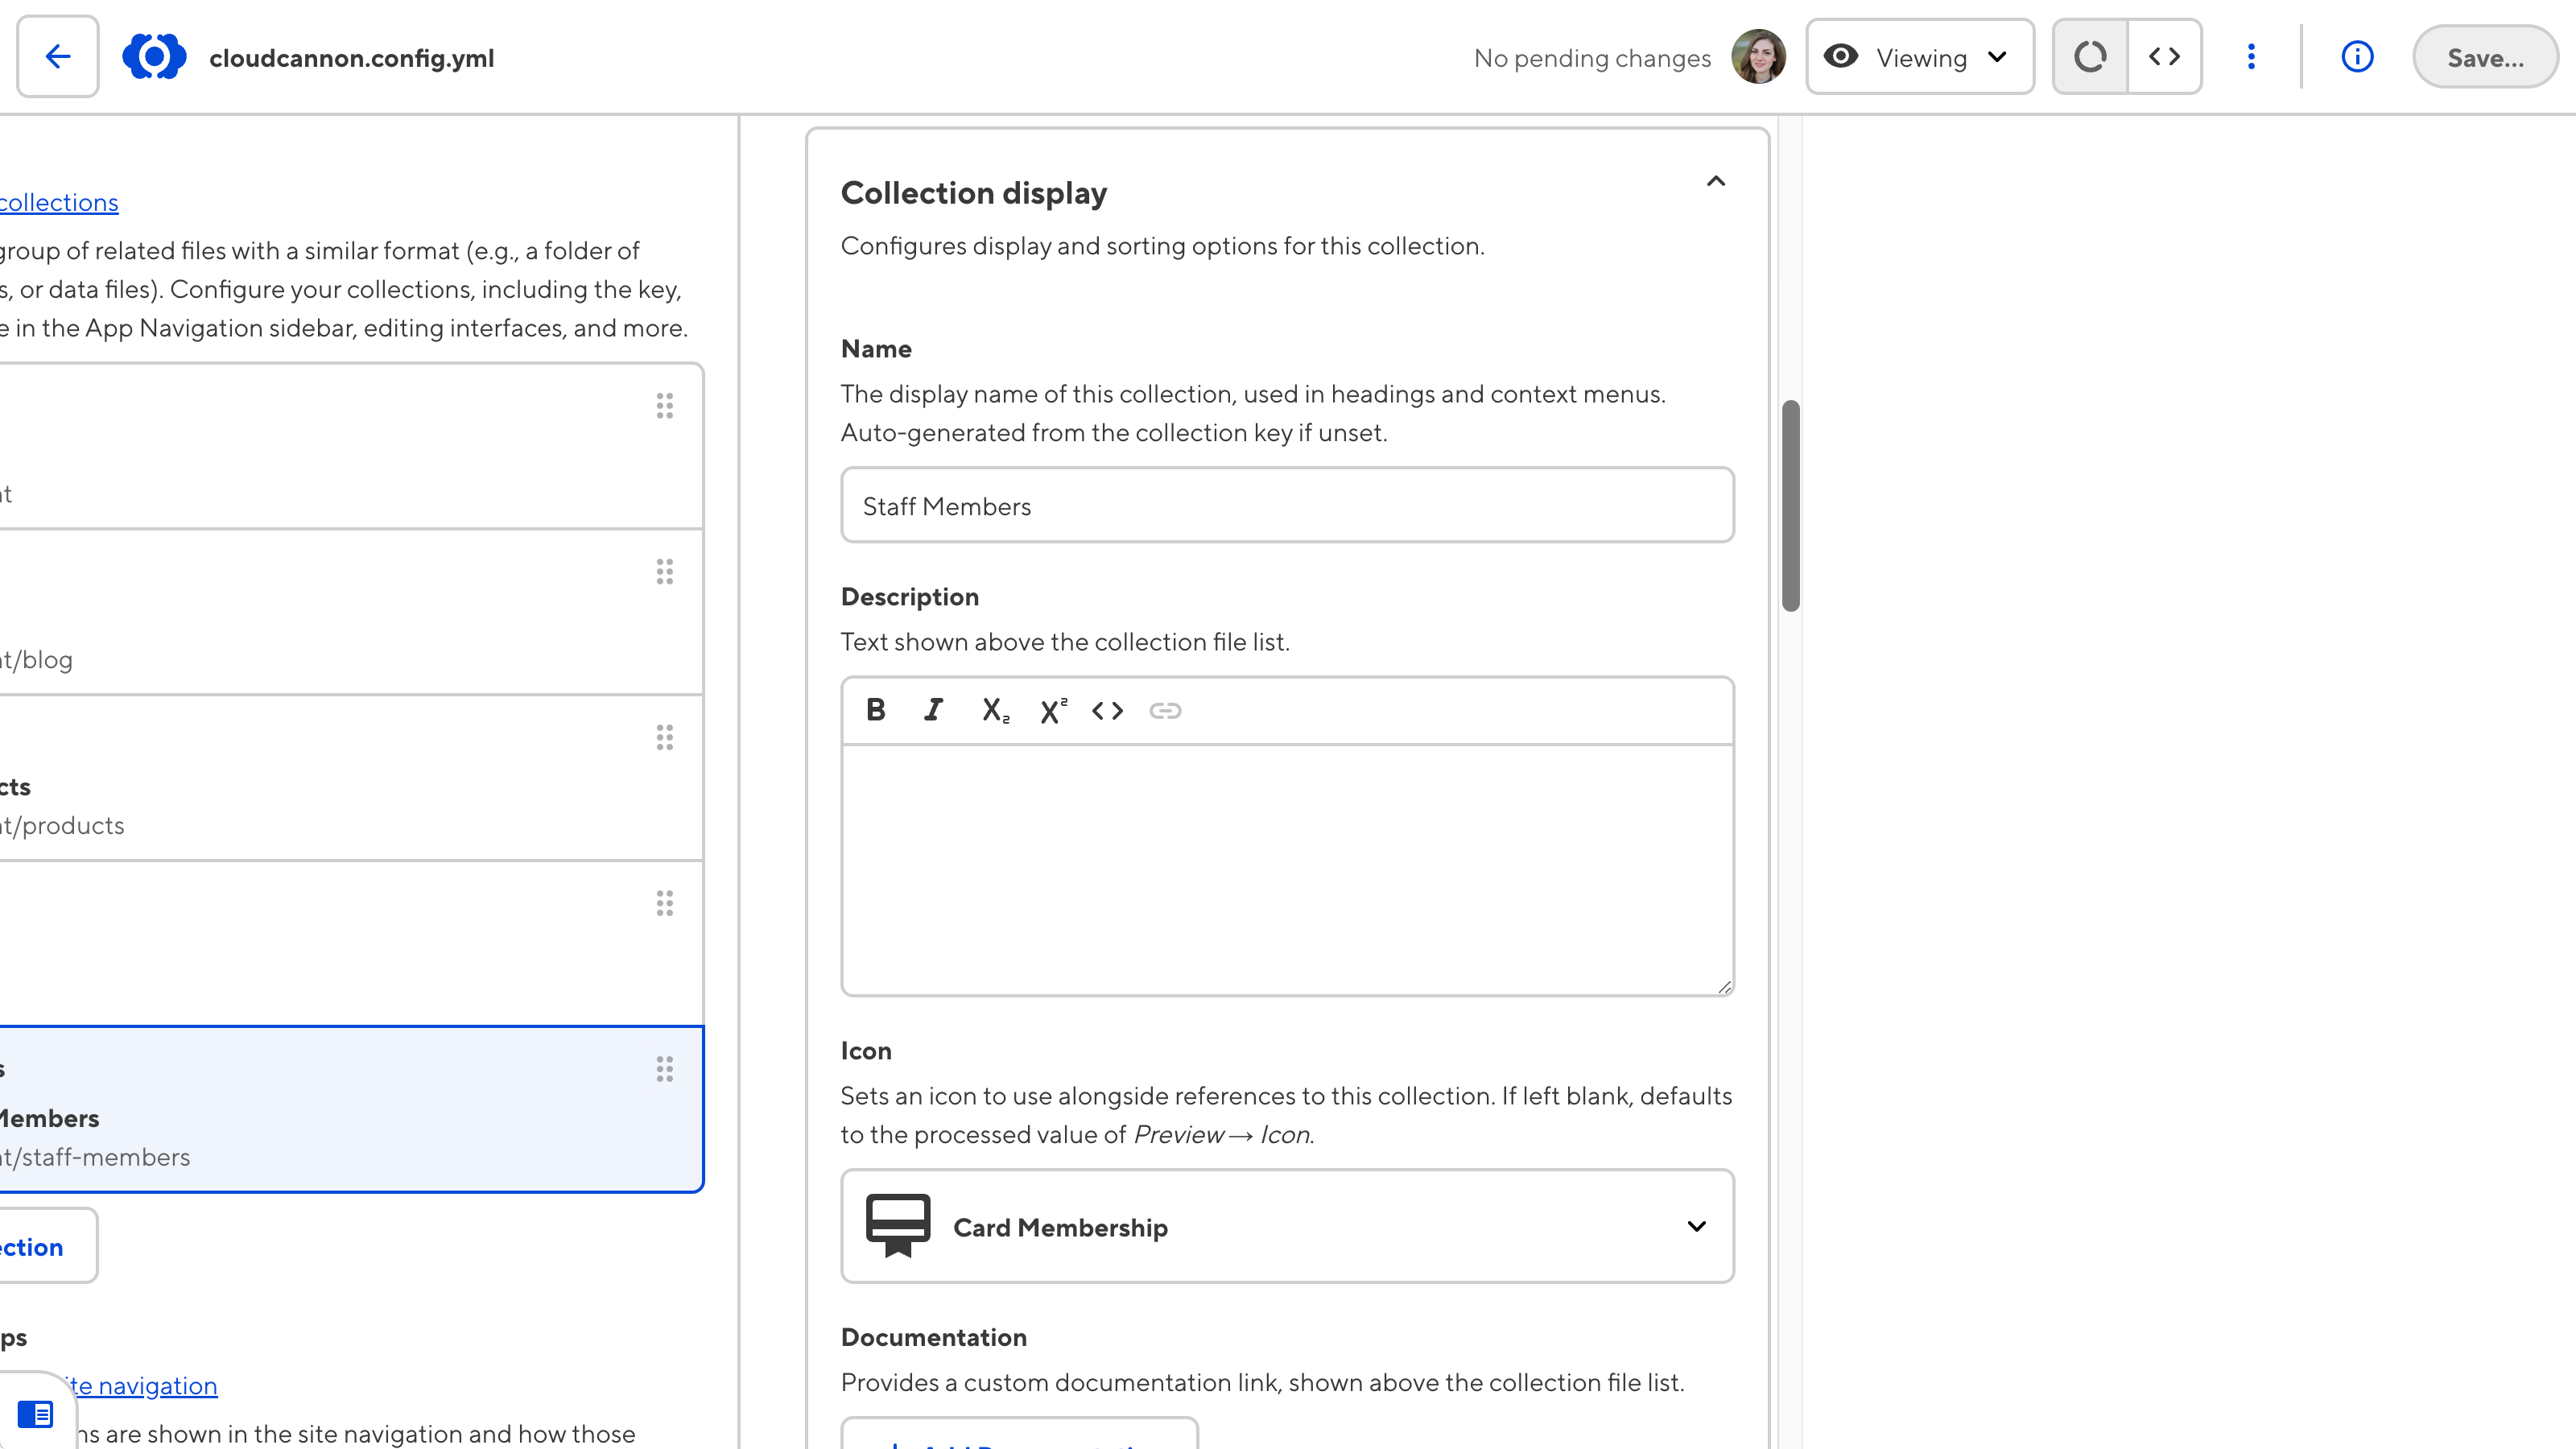
Using the Icon dropdown inside each Collection, let's change the Staff Members icon to groups, Blog to post_add, Products to inventory_2, and Data to important_devices.
Next, the name of the Data Collection doesn't accurately communicate its contents to non-technical team members. This Collection contains data files for the Site's navigation, footer, metadata, and blog tags. Let's rename this Collection to "Site Elements" in the Site Navigation.
To update the display name for a Collection, navigate to the Name text input under Collection display. CloudCannon automatically generates the display name for a Collection based on its key. Updating the display name does not affect the key name for the Collection or the folder name in your Git repository. Using the Name text input, let's change the display name for the Data Collection to "Site Elements".
Finally, CloudCannon has automatically grouped all our Collections together in the Site Navigation. Let's add Collection groups to create a visual distinction between output and non-output Collections.
To add Collection Groups, navigate to the Collection Groups section under Collections and Paths.
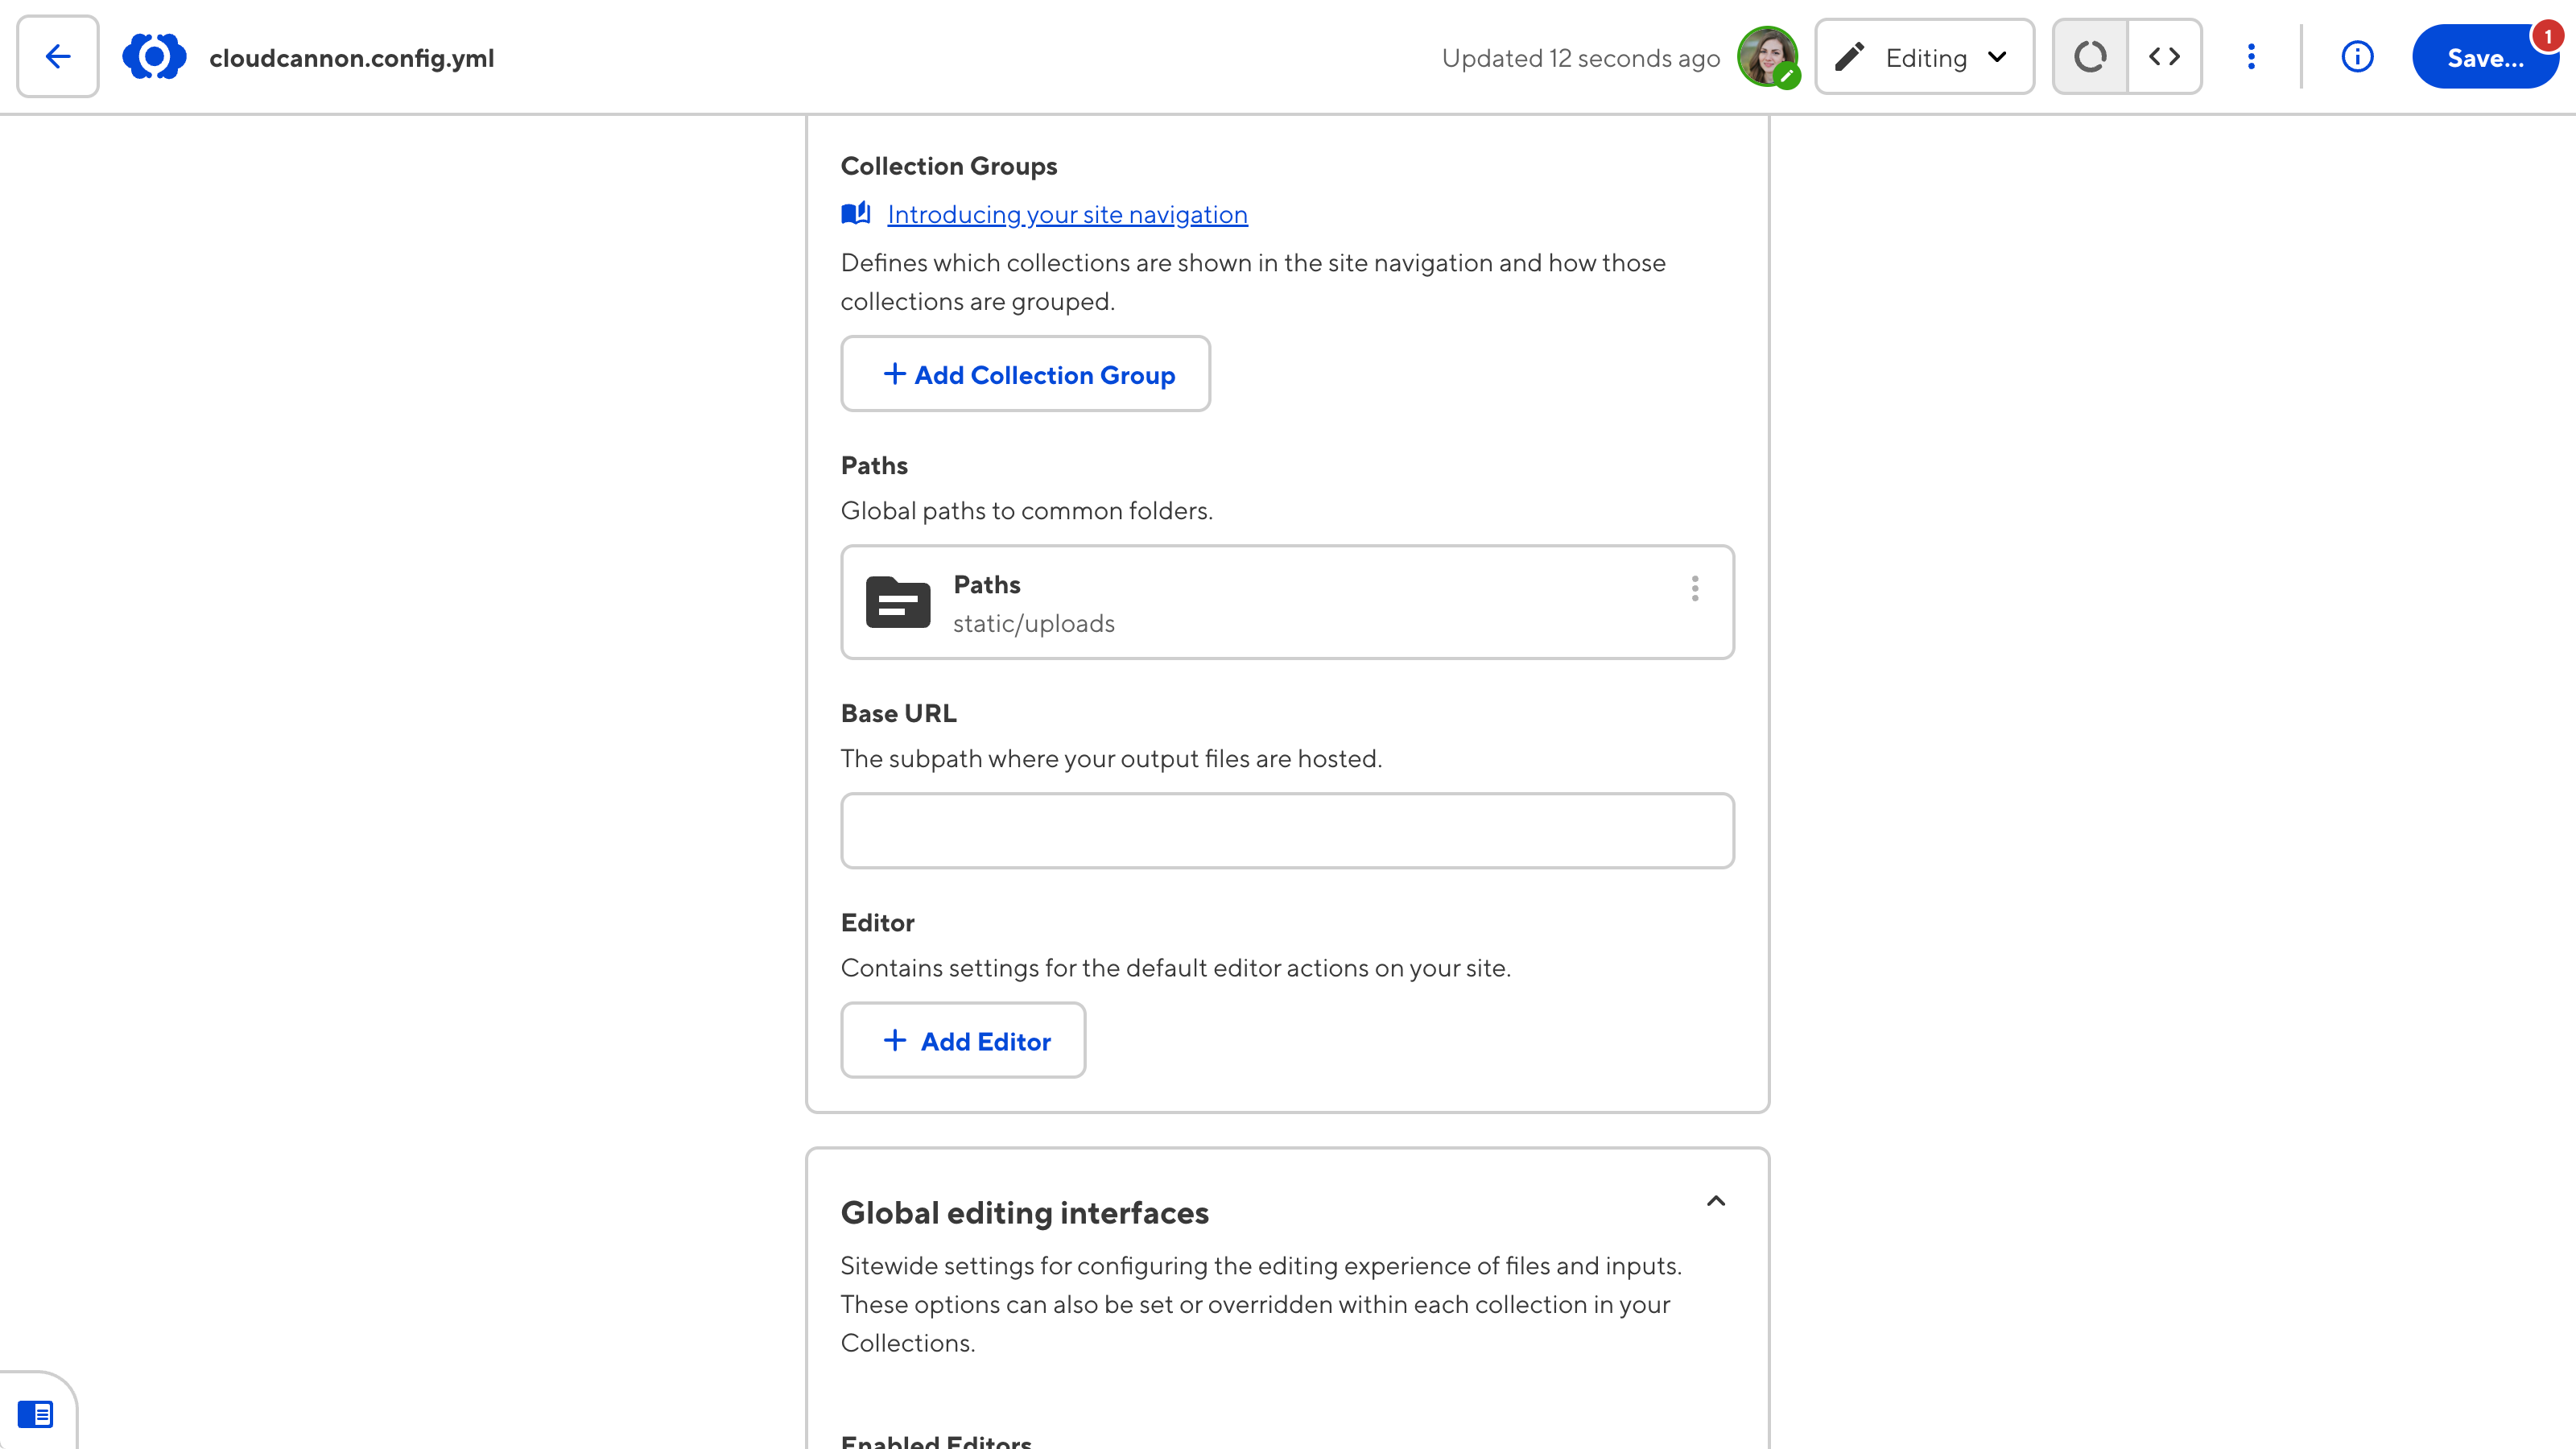
Click the + Add Collection Group button to open the Collection Group configuration panel. In the Heading text input, enter the group's name. This will appear above your Collection items in the Site Navigation.
Click the + Add Collection button to create a new Text input in the Collections array. Enter the Collection key name (i.e., not the display name) for each Collection you want to include in the group. You can reorder the Collections within a group using this Array input or reorder the groups in your Site Navigation using the Array input under the Collection Group section.
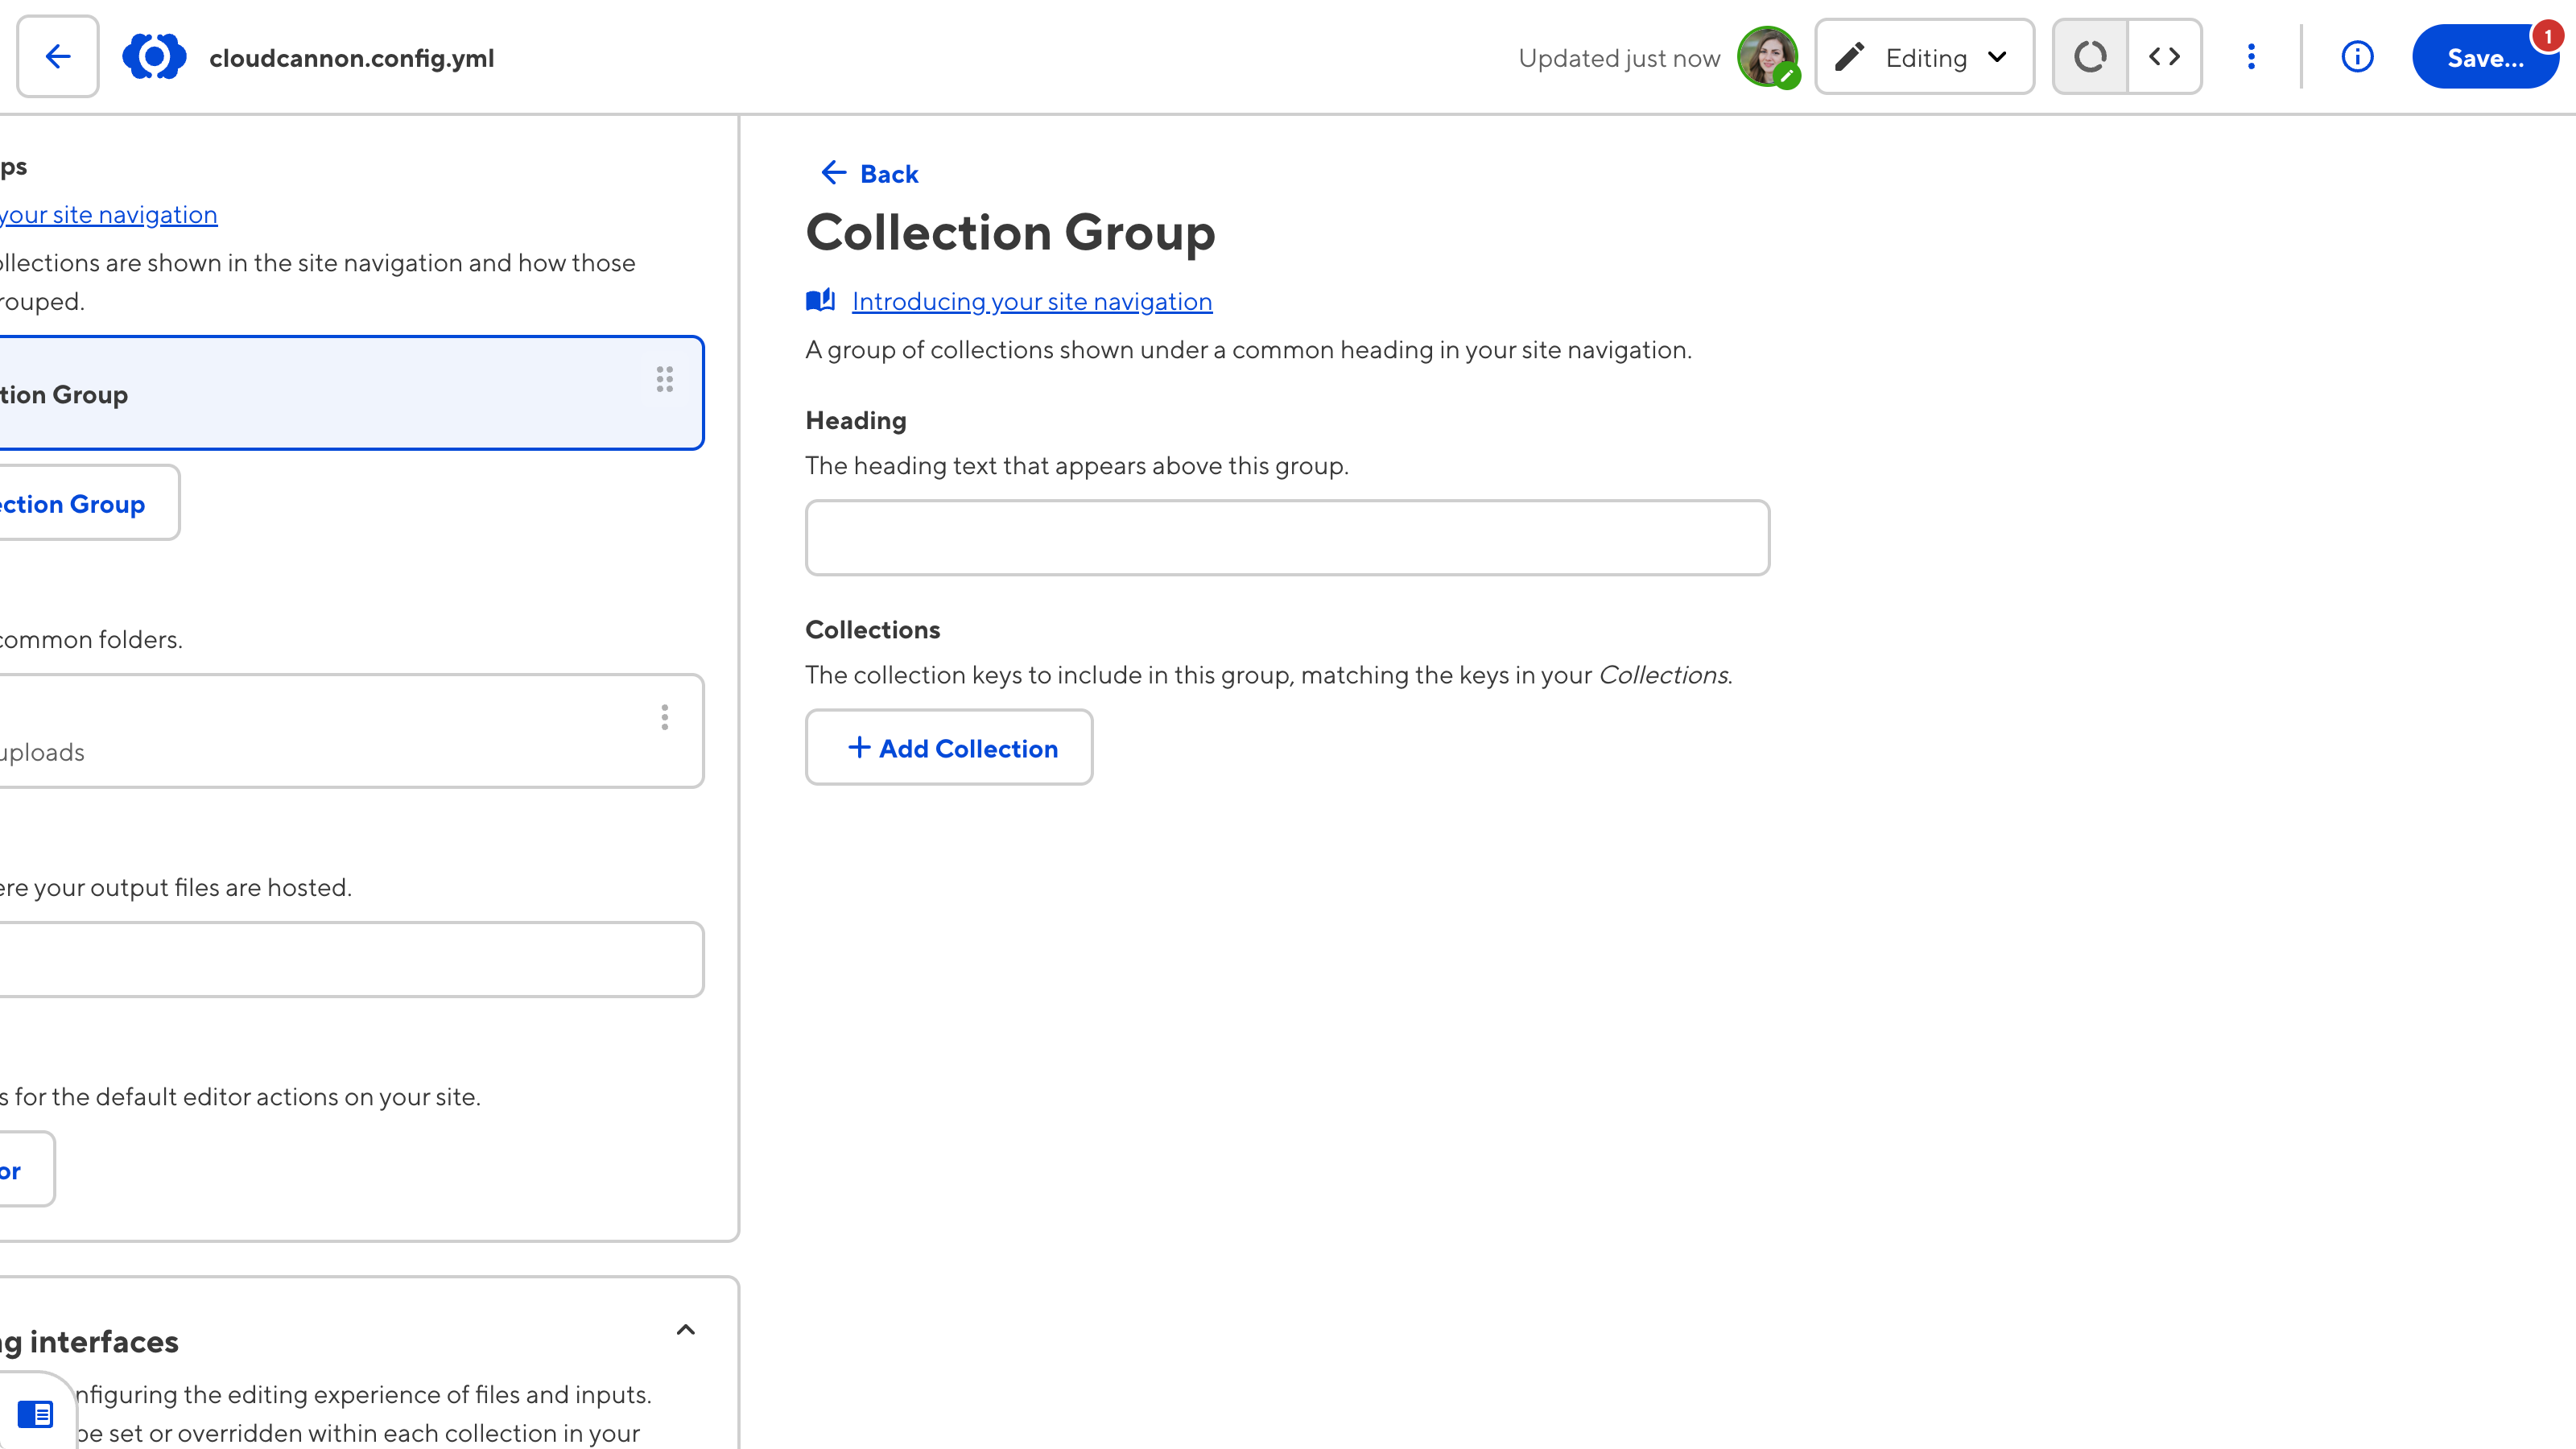
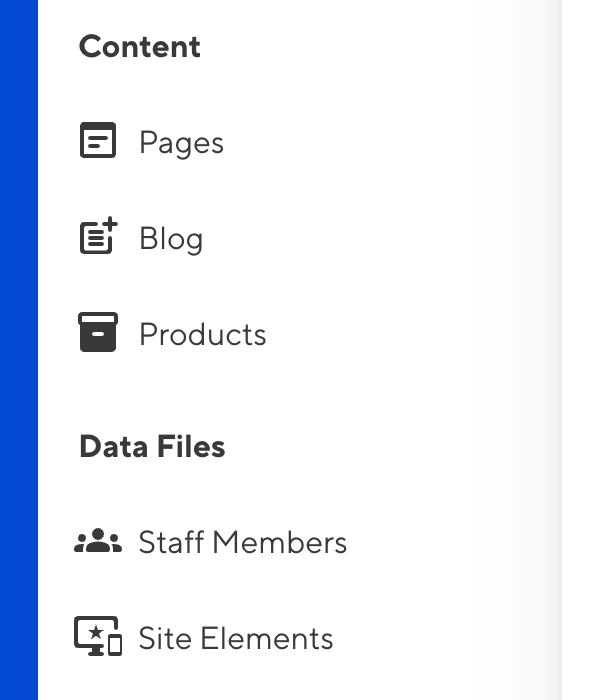
In this example, we'll create two Collection groups: "Content", which contains the pages, blog, and products Collections, and "Data Files", which contains the staff_members and data Collections.
Make sure to spell the Collection key name correctly when adding it to a Collection Group.
After these configuration updates, here is what the Collections in our Site Navigation look like.
If you would prefer to configure the appearance of your Collections in the Source Editor or your local development environment, you can achieve the same configuration with the following code:
collections_config:
  pages:
    path: content
    name: Pages
    icon: wysiwyg
  blog:
    path: content/blog
    name: Blog
    icon: post_add
  products:
    path: content/products
    name: Products
    icon: inventory_2
  data:
    path: data
    name: Site Elements
    icon: important_devices
  staff_members:
    path: content/staff-members
    name: Staff Members
    icon: groups
collection_groups:
  - heading: Content
    collections:
      - pages
      - blog
      - products
  - heading: Data Files
    collections:
      - staff_members
      - data
{
  "collections_config": {
    "pages": {
      "path": "content",
      "name": "Pages",
      "icon": "wysiwyg"
    },
    "blog": {
      "path": "content/blog",
      "name": "Blog",
      "icon": "post_add"
    },
    "products": {
      "path": "content/products",
      "name": "Products",
      "icon": "inventory_2"
    },
    "data": {
      "path": "data",
      "name": "Site Elements",
      "icon": "important_devices"
    },
    "staff_members": {
      "path": "content/staff-members",
      "name": "Staff Members",
      "icon": "groups"
    }
  },
  "collection_groups": [
    {
      "heading": "Content",
      "collections": [
        "pages",
        "blog",
        "products"
      ]
    },
    {
      "heading": "Data Files",
      "collections": [
        "staff_members",
        "data"
      ]
    }
  ]
}
Schema configuration#
A schema is a predefined template that determines what should populate a Collection file. You can configure several Schemas for each Collection, creating a list of file templates for you and your team. You can select a Schema using the + Add button dropdown in the top right of your Collection browser.
Schemas help you keep files consistent within a Collection. When you create a new Collection file, CloudCannon will automatically populate the file's front matter with inputs and structured data from your Schema. CloudCannon will also update the front matter to match your Schema when you open an existing file.
Schema files are the same file type as the file you want to create. For example, you must use a Markdown Schema to create a new Markdown file in your Collection.
For more information about the default CloudCannon behavior for Collections with no configured Schemas, please read our documentation on schemas.
Let's walk through an example. You can follow along and add Schemas to your own Collections as we go.
We want to create a blog post Schema for our Blog Collection. This Schema will contain four structured data keys in the front matter: title, date, author, and image. When our team members create a new file using this Schema, they can enter values for these keys using inputs in the sidebar of the Content Editor (we'll cover input configuration in a later step of this guide).
To add a Schema, create the template Schema file using the File Browser or your local development environment. We recommend saving all your Schemas in a dedicated "Schemas" folder in the root directory of your Git repository.
Here's our Schema file:
---
title:
date:
author:
image:
---
Next, let's connect our post.md Schema to the Blog Collection.
To connect a Schema to a Collection, open your CloudCannon configuration file in the Data Editor. Navigate to the Collections section under Collections and Paths and click on the Collection you want to configure. You'll find the Schemas section under Creating and updating pages.
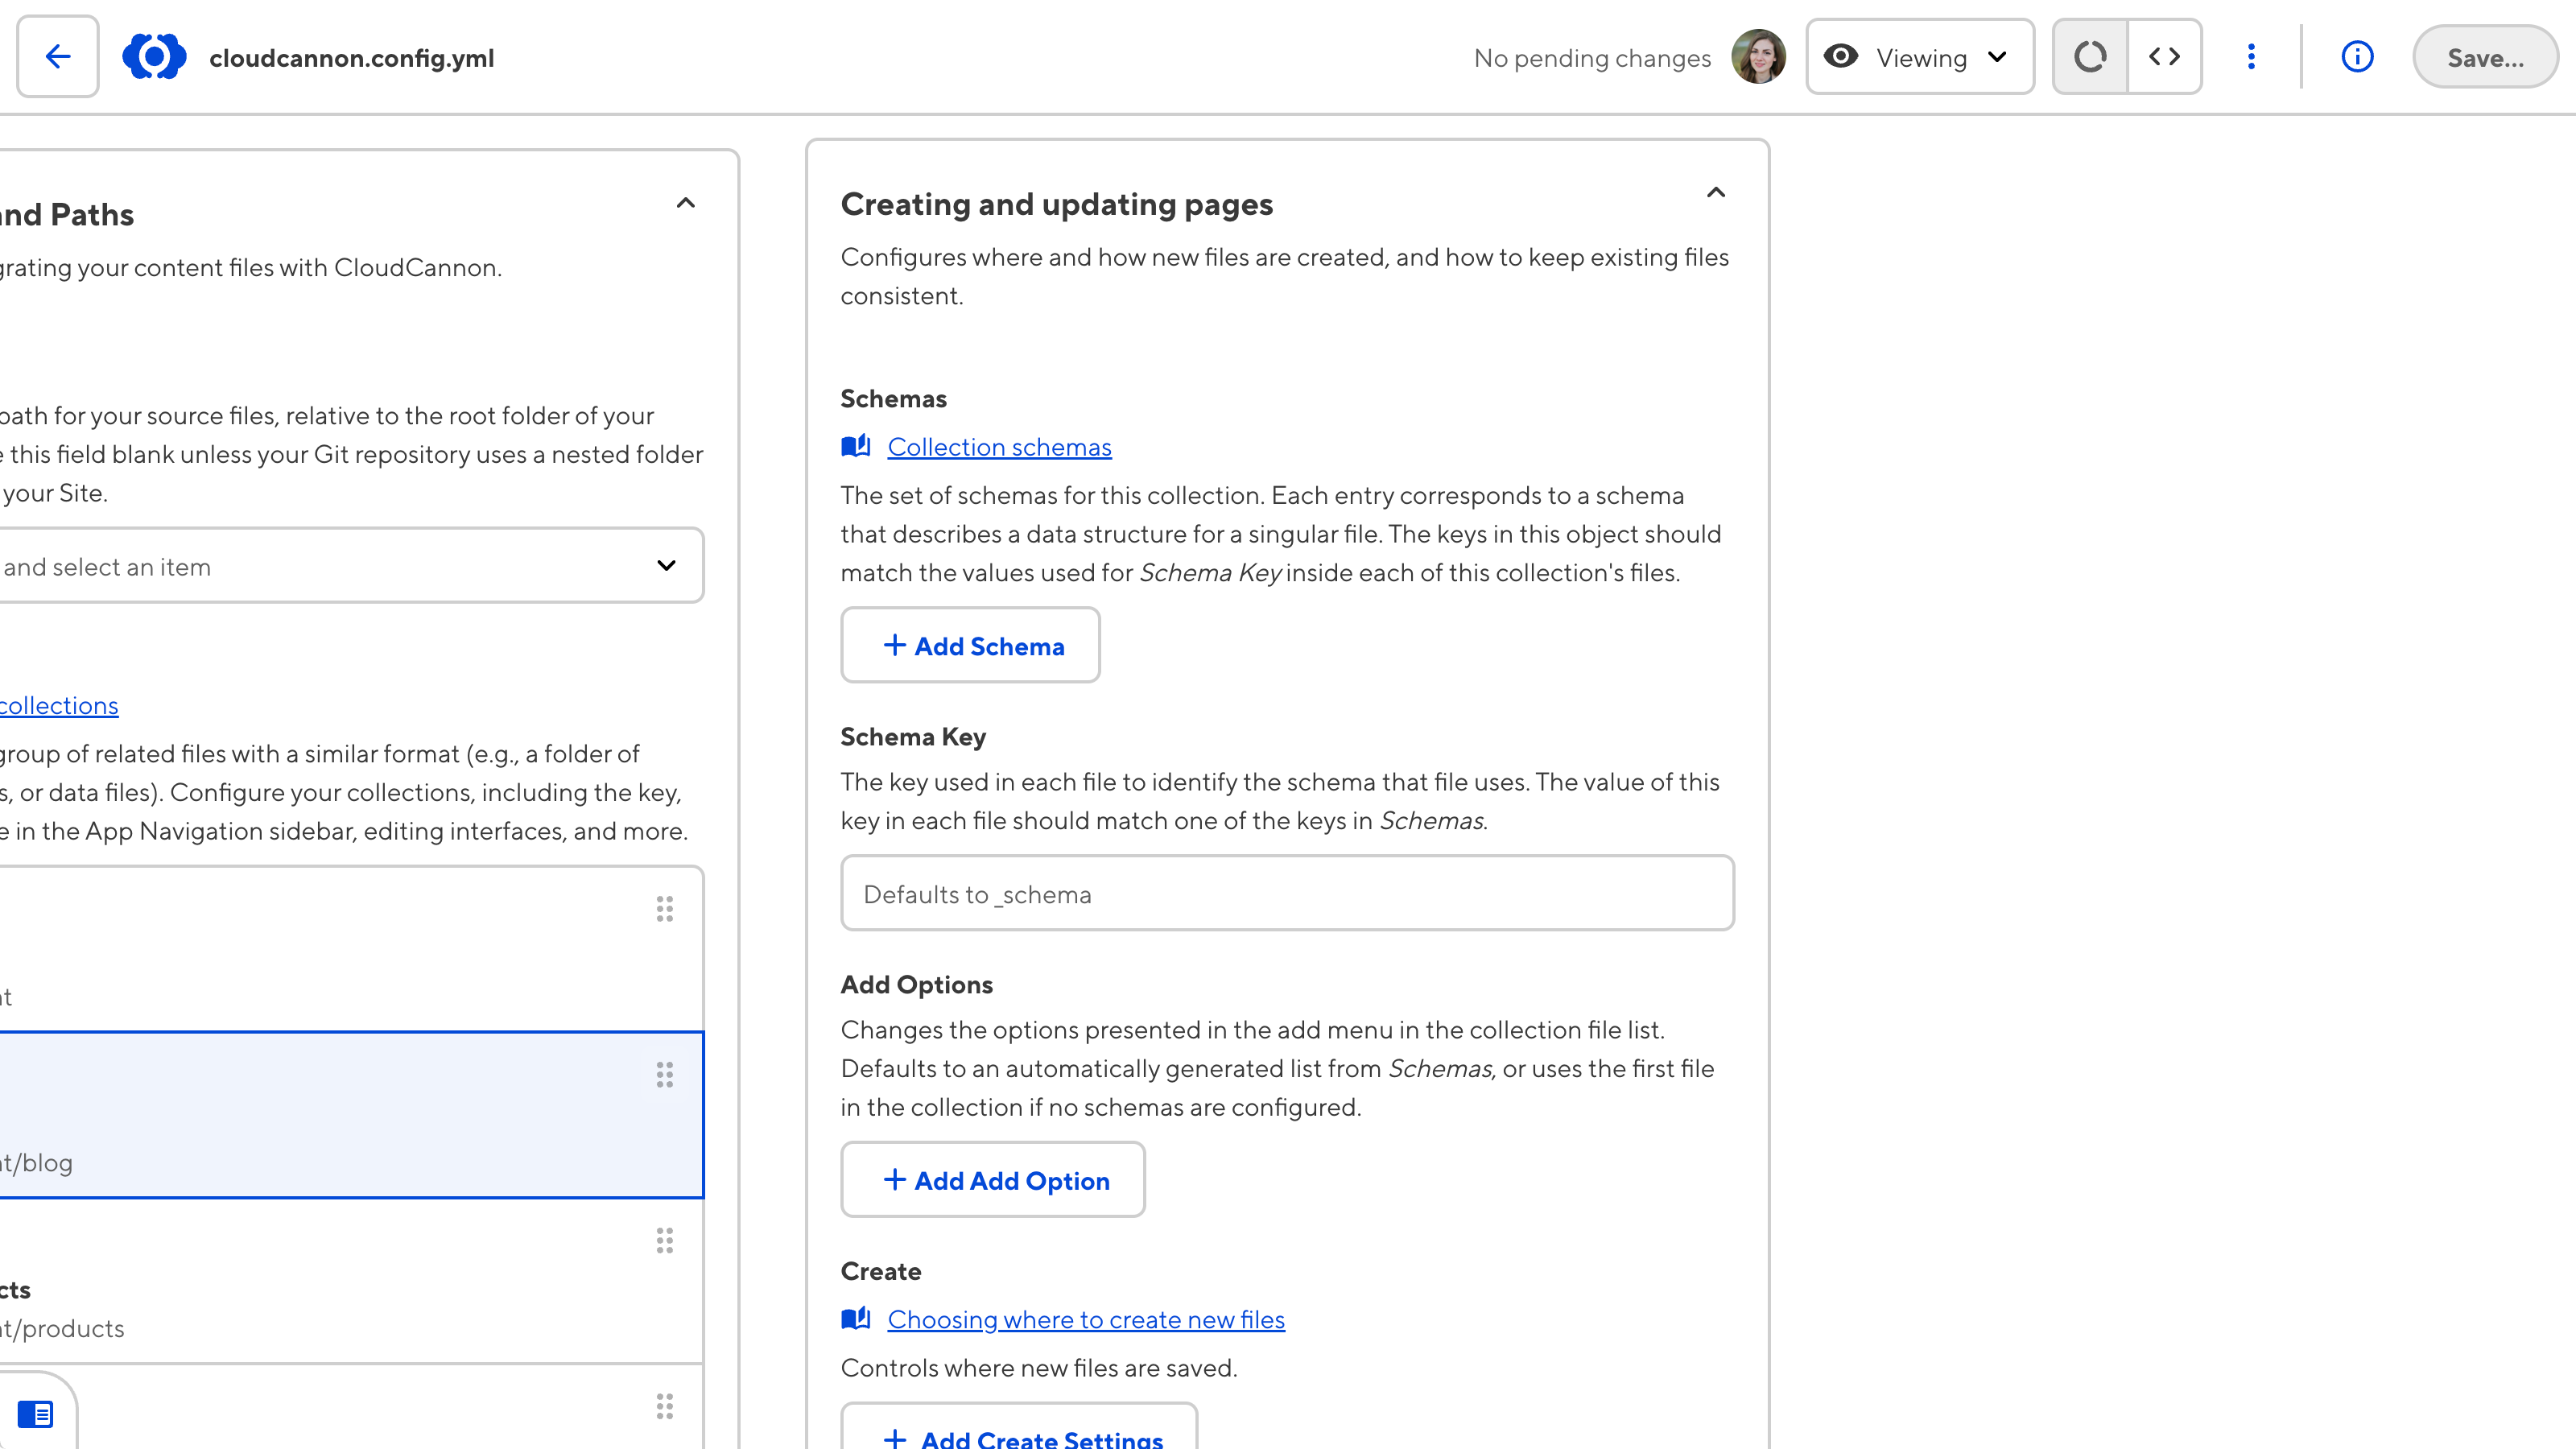
Click the + Add Schema button to open the Add Schema modal. In the New key name text input, enter the name of your Schema and then click the Add button. CloudCannon will open the Schema configuration panel.
The Schema configuration panel has four sections: Schema setup, Schema display, Editing interfaces, and Advanced. Under Schema setup, navigate to the Path text input and enter the file path for your Schema. In this example, the file path is schemas/post.md.
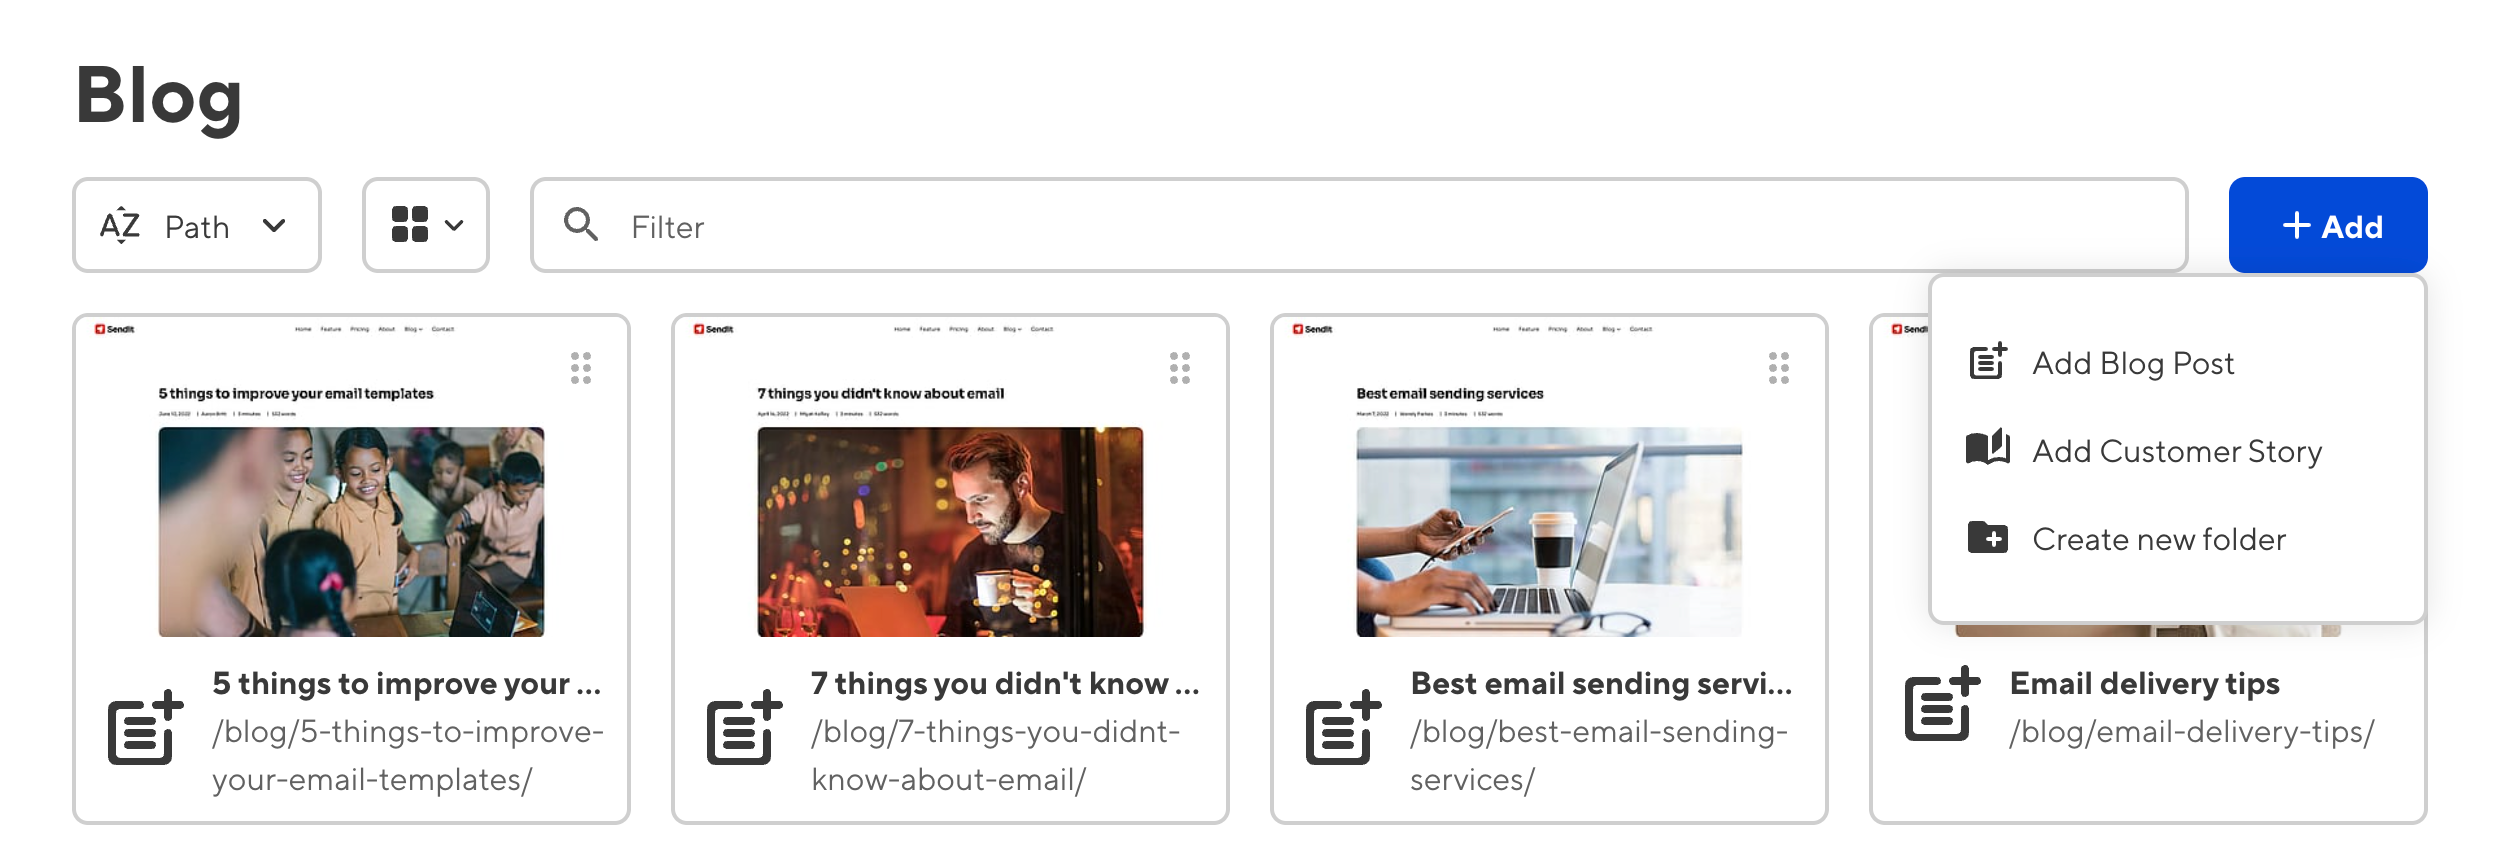
CloudCannon will automatically show your connected Schema in the + Add button dropdown for the relevant Collection, prefixed by "Add". When you click on a Schema option, CloudCannon will create a new file with the correct front matter fields.
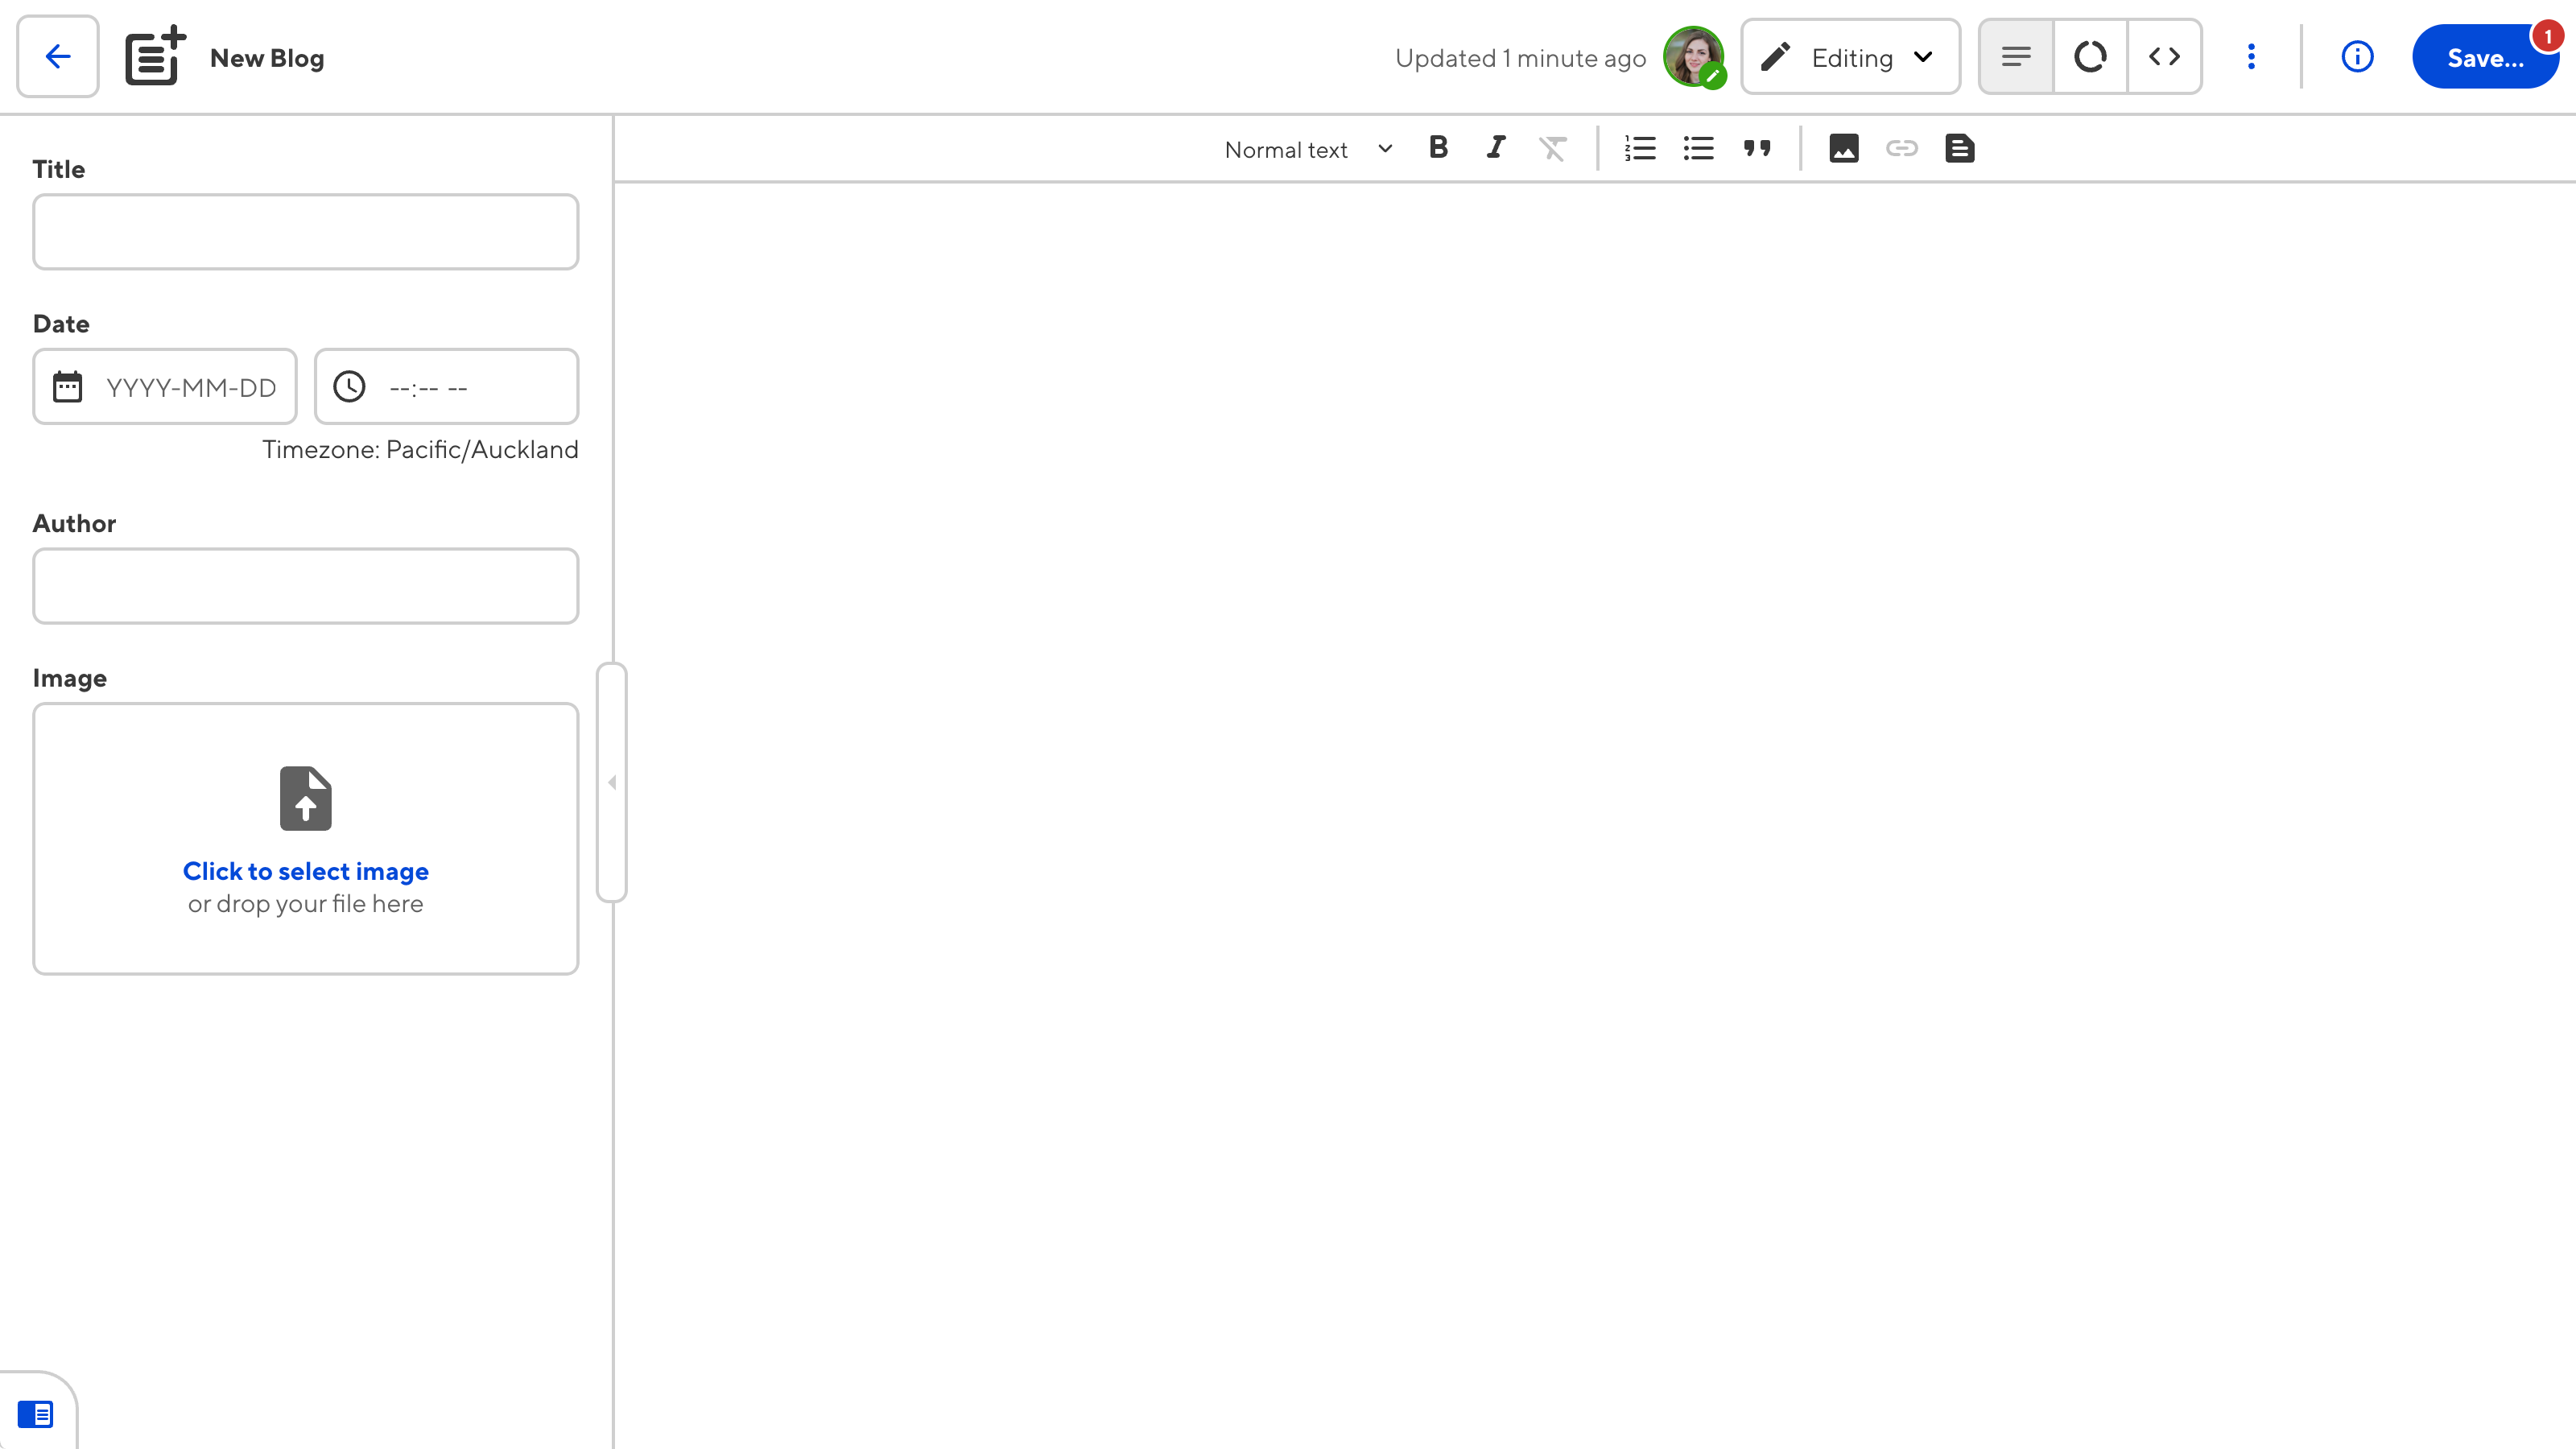
You can configure the appearance of each Schema in the + Add dropdown to create more visual distinction for your team members. This is useful if you have multiple Schemas for a given Collection.
In this example, we have two Schemas: post.md and customer-story.md. Let's update the display name of the post.md Schema and add icons.
To update the display name and icon for a Schema, navigate to the Name text input and the Icon dropdown under Schema display. We'll update the display name for post.md to "Blog Post" and the icon to post_add. Additionally, let's update the icon for customer-story.md to auto_stories.
After these configuration updates, here is what the Schemas list in the + Add dropdown looks like.
If you would prefer to configure the appearance of your Collections in the Source Editor or your local development environment, you can achieve the same configuration with the following code:
collections_config:
  blog:
    schemas:
      post:
        path: schemas/post.md
        name: Blog Post
        icon: post_add
      customer_story:
        path: schemas/customer-story.md
        icon: auto_stories
{
  "collections_config": {
    "blog": {
      "schemas": {
        "post": {
          "path": "schemas/post.md",
          "name": "Blog Post",
          "icon": "post_add"
        },
        "customer_story": {
          "path": "schemas/customer-story.md",
          "icon": "auto_stories"
        }
      }
    }
  }
}
Save your Collection configuration#
Once you have finished editing your CloudCannon configuration file, you can save your changes using the Save button at the top right of the Data Editor.
CloudCannon will push your cloudcannon.config.yml file back to your repository.