Some webpages, or webpage components, are constructed from arrays. An array is an ordered list of data, where data is grouped into array items. An array could be simple, where each item has the same structure (e.g., a testimonial component), or more complex, where each item has a different structure (e.g., a page with various components). You can use Array and Array Item Editable Regions to enable your team to visually edit arrays, including adding, deleting, and reordering items.
Array content is defined using structured data keys in the front matter of hybrid files (e.g., .mdx) or in data files (e.g., .yml) and referenced by templating in a layout. In both these cases, you should use Array and Array Item Editable Regions; however, there are some extra steps for complex arrays. Let's cover how to define these.
Nested text or image values
To avoid data-prop misconfiguration errors, it is best practice to define your Editable Regions from the root of your file first (i.e., from parent elements to child elements). If you want to edit text or image values in an array using the Visual Editor, you should define your Array and Array Item Editable Regions on the parent element before Text and Image.
Simple arrays#
A simple array is one where all the array items have the same structure (i.e., each item has the same fields).
Let's take a look at an example.
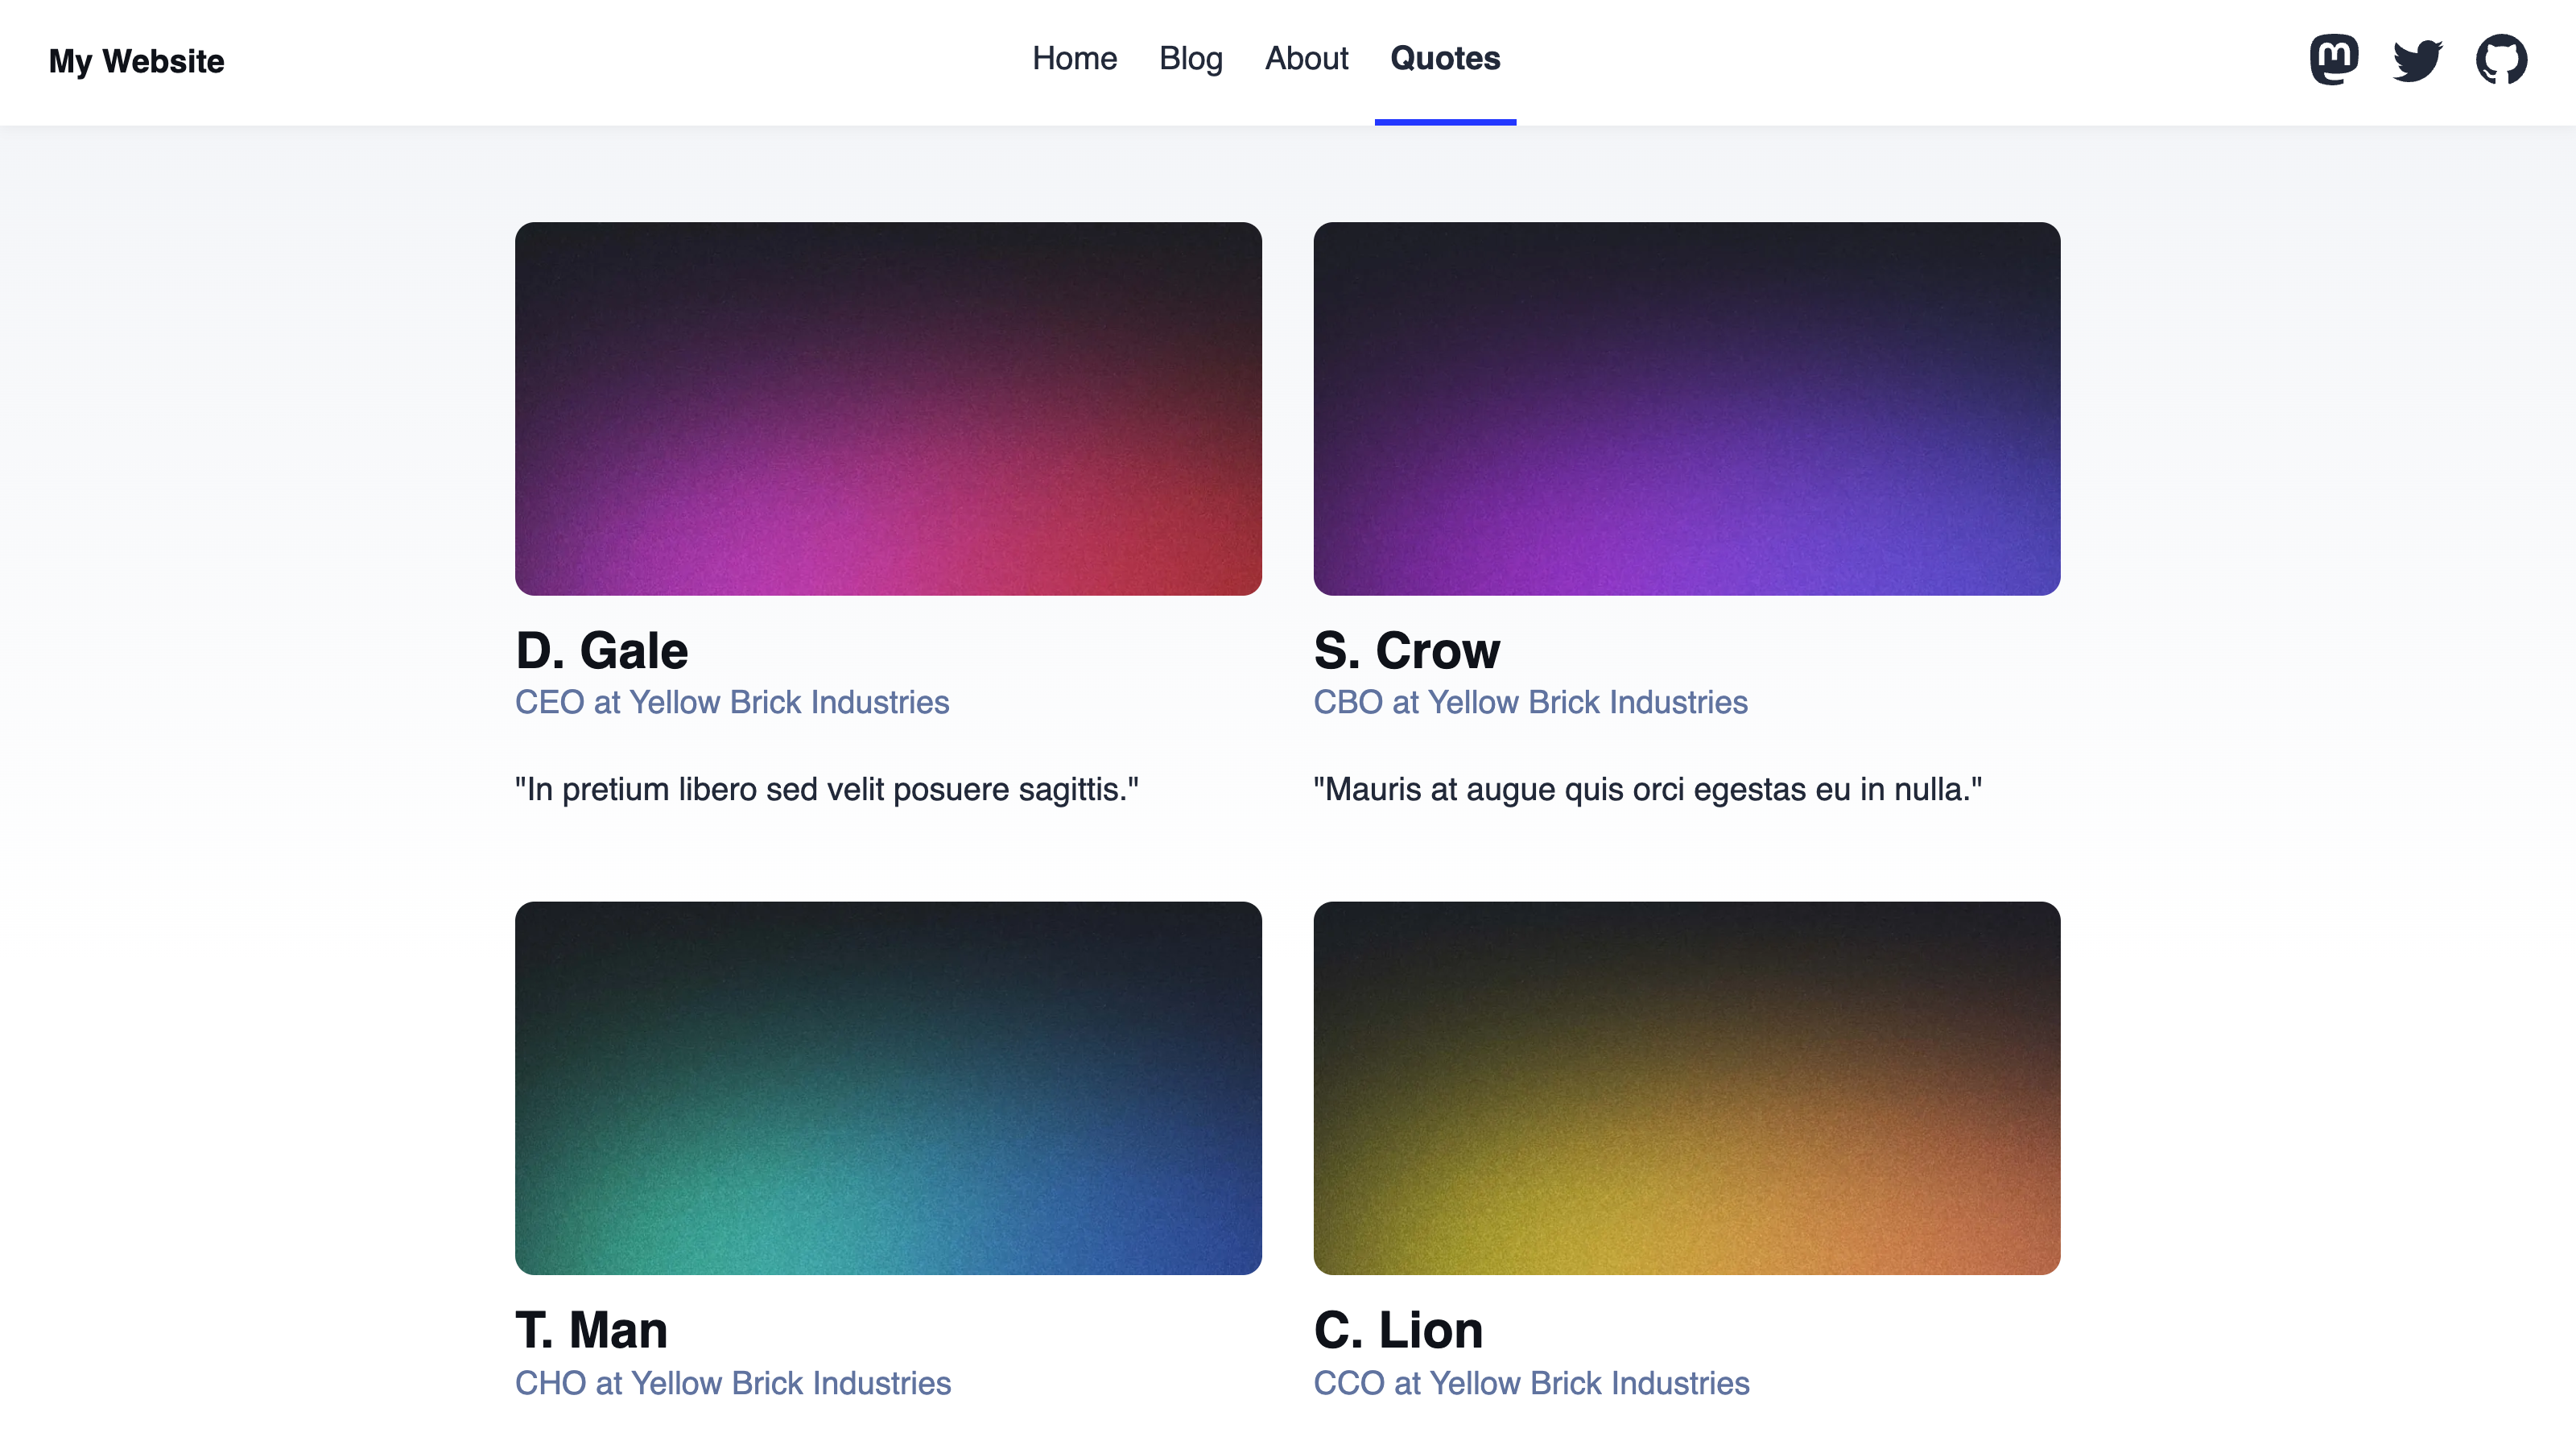
Our "Quotes" page is generated using an HTML layout and populated by a data file containing testimonial content. This file contains our testimonials array, with structured data keys for image, image_alt, name, job_title, and quote in each array item.
---
layout: ../layouts/TestimonialsLayout.astro
testimonials:
  - image: ../../assets/placeholder-1.jpg
    image_alt: Profile photo of D. Gale
    name: D. Gale
    job_title: CEO at Yellow Brick Industries
    quote: >-
      "In pretium libero sed velit posuere sagittis."
  - image: ../../assets/placeholder-2.jpg
    image_alt: Profile photo of S. Crow
    name: S. Crow
    job_title: CBO at Yellow Brick Industries
    quote: >-
      "Mauris at augue quis orci egestas eu in nulla."
  - image: ../../assets/placeholder-3.jpg
    image_alt: Profile photo of T. Man
    name: T. Man
    job_title: CHO at Yellow Brick Industries
    quote: >-
      "Nunc ut sem vitae tortor volutpat varius."
  - image: ../../assets/placeholder-4.jpg
    image_alt: Profile photo of C. Lion
    name: C. Lion
    job_title: CCO at Yellow Brick Industries
    quote: >-
      "Aenean pharetra orci ac tincidunt lobortis."
---
Here is an excerpt from our Testimonial Layout file. This section loops over all the items in the testimonials array, and populates the layout using the values.
---
const { testimonials } = Astro.props.frontmatter;
---

<ul>
  {
    testimonials.map((testimonial) => (
      <li>
        {testimonial.image && (
          <img
            src={testimonial.image}
            alt={testimonial.image_alt}
          />
        )}
        <h4>{testimonial.name}</h4>
        <p>{testimonial.job_title}</p>
        <p>{testimonial.quote}</p>
      </li>
    ))
  }
</ul>
This <img> element contains image source and alt text attributes. The src and alt attributes are set to the template {testimonial.image} and {testimonial.image_alt} respectively.
This <h4> element surrounds the template value {testimonial.name}.
This <p> element surrounds the template value {testimonial.job_title}.
This <p> element surrounds the template value {testimonial.quote}.
Together, these files output a webpage that looks like this:

In this example, the <ul> element wraps our array, with its contents looping over every array item stored under the testimonials key. We can add Array and Array Item Editable Region to our layout file to enable adding, deleting, and reordering of items using the Visual Editor.
Array and Array Item Editable Regions always work together, one defining the boundary of the array, and the other each item within the array. You must always have both.
To define an Array Editable Region, we can add the data-editable and data-prop HTML attributes to the <ul> DOM element. The data-editable HTML attribute defines which type of Editable Region you want to use which, in this case, is array. Alternatively, we could choose to wrap the array templating in the equivalent web component <editable-array>, however that is not as convenient as adding attributes to existing elements. Our Array Editable Region also needs a data-prop to define where our array data is stored which, in this case, will be the testimonials front matter key.
For the Array Item Editable Region, we can add the data-editable="array-item" HTML attribute to the <li> DOM element containing all our repeated content, or wrap the <li> in the equivalent web component <editable-array-item>.
Where should the Array and Array Item Editable Regions go?
The Array Editable Region attribute or web component should be the immediate parent element of your array templating. The Array Item Editable Region attribute or web component should be the first child element of your array templating. This way, Array and Array Item should flank the templating for looping over your array.
Try to avoid any nested elements between them; they should be as close together as possible, regardless of whether you use HTML attributes, web components, or both.
If we also want to visually edit the text and images inside each array item, we can define three Text Editable Regions for the name, job title, and quote, and an Image Editable Region for our image and alt text.
Here's what our Testimonial Layout code should look like:
---
const { testimonials } = Astro.props.frontmatter;
---

<ul data-editable="array" data-prop="testimonials">
  {
    testimonials.map((testimonial) => (
      <li data-editable="array-item">
        {testimonial.image && (
          <img
            data-editable="image"
            data-prop-src="image"
            data-prop-alt="image_alt"
            src={testimonial.image}
            alt={testimonial.image_alt}
          />
        )}
        <h4 data-editable="text" data-prop="name">{testimonial.name}</h4>
        <p data-editable="text" data-prop="job_title">{testimonial.job_title}</p>
        <p data-editable="text" data-prop="quote">{testimonial.quote}</p>
      </li>
    ))
  }
</ul>
The data-editable attribute defines what kind of data this element contains, and the data-prop attribute defines the path to the data we want to edit. In this case, we want an Array Editable Region, so the value of data-editable is array, and we want to edit the testimonials structured data key in the file front matter.
This <img> element contains data-editable="image", data-prop-src="image", and data-prop-alt="image_alt" to define an Image Editable Region.
This <h4> element contains data-editable="text" and data-prop="name" to define a Text Editable Region.
This <p> element contains data-editable="text" and data-prop="job_title" to define a Text Editable Region.
This <p> element contains data-editable="text" and data-prop="quote" to define a Text Editable Region.
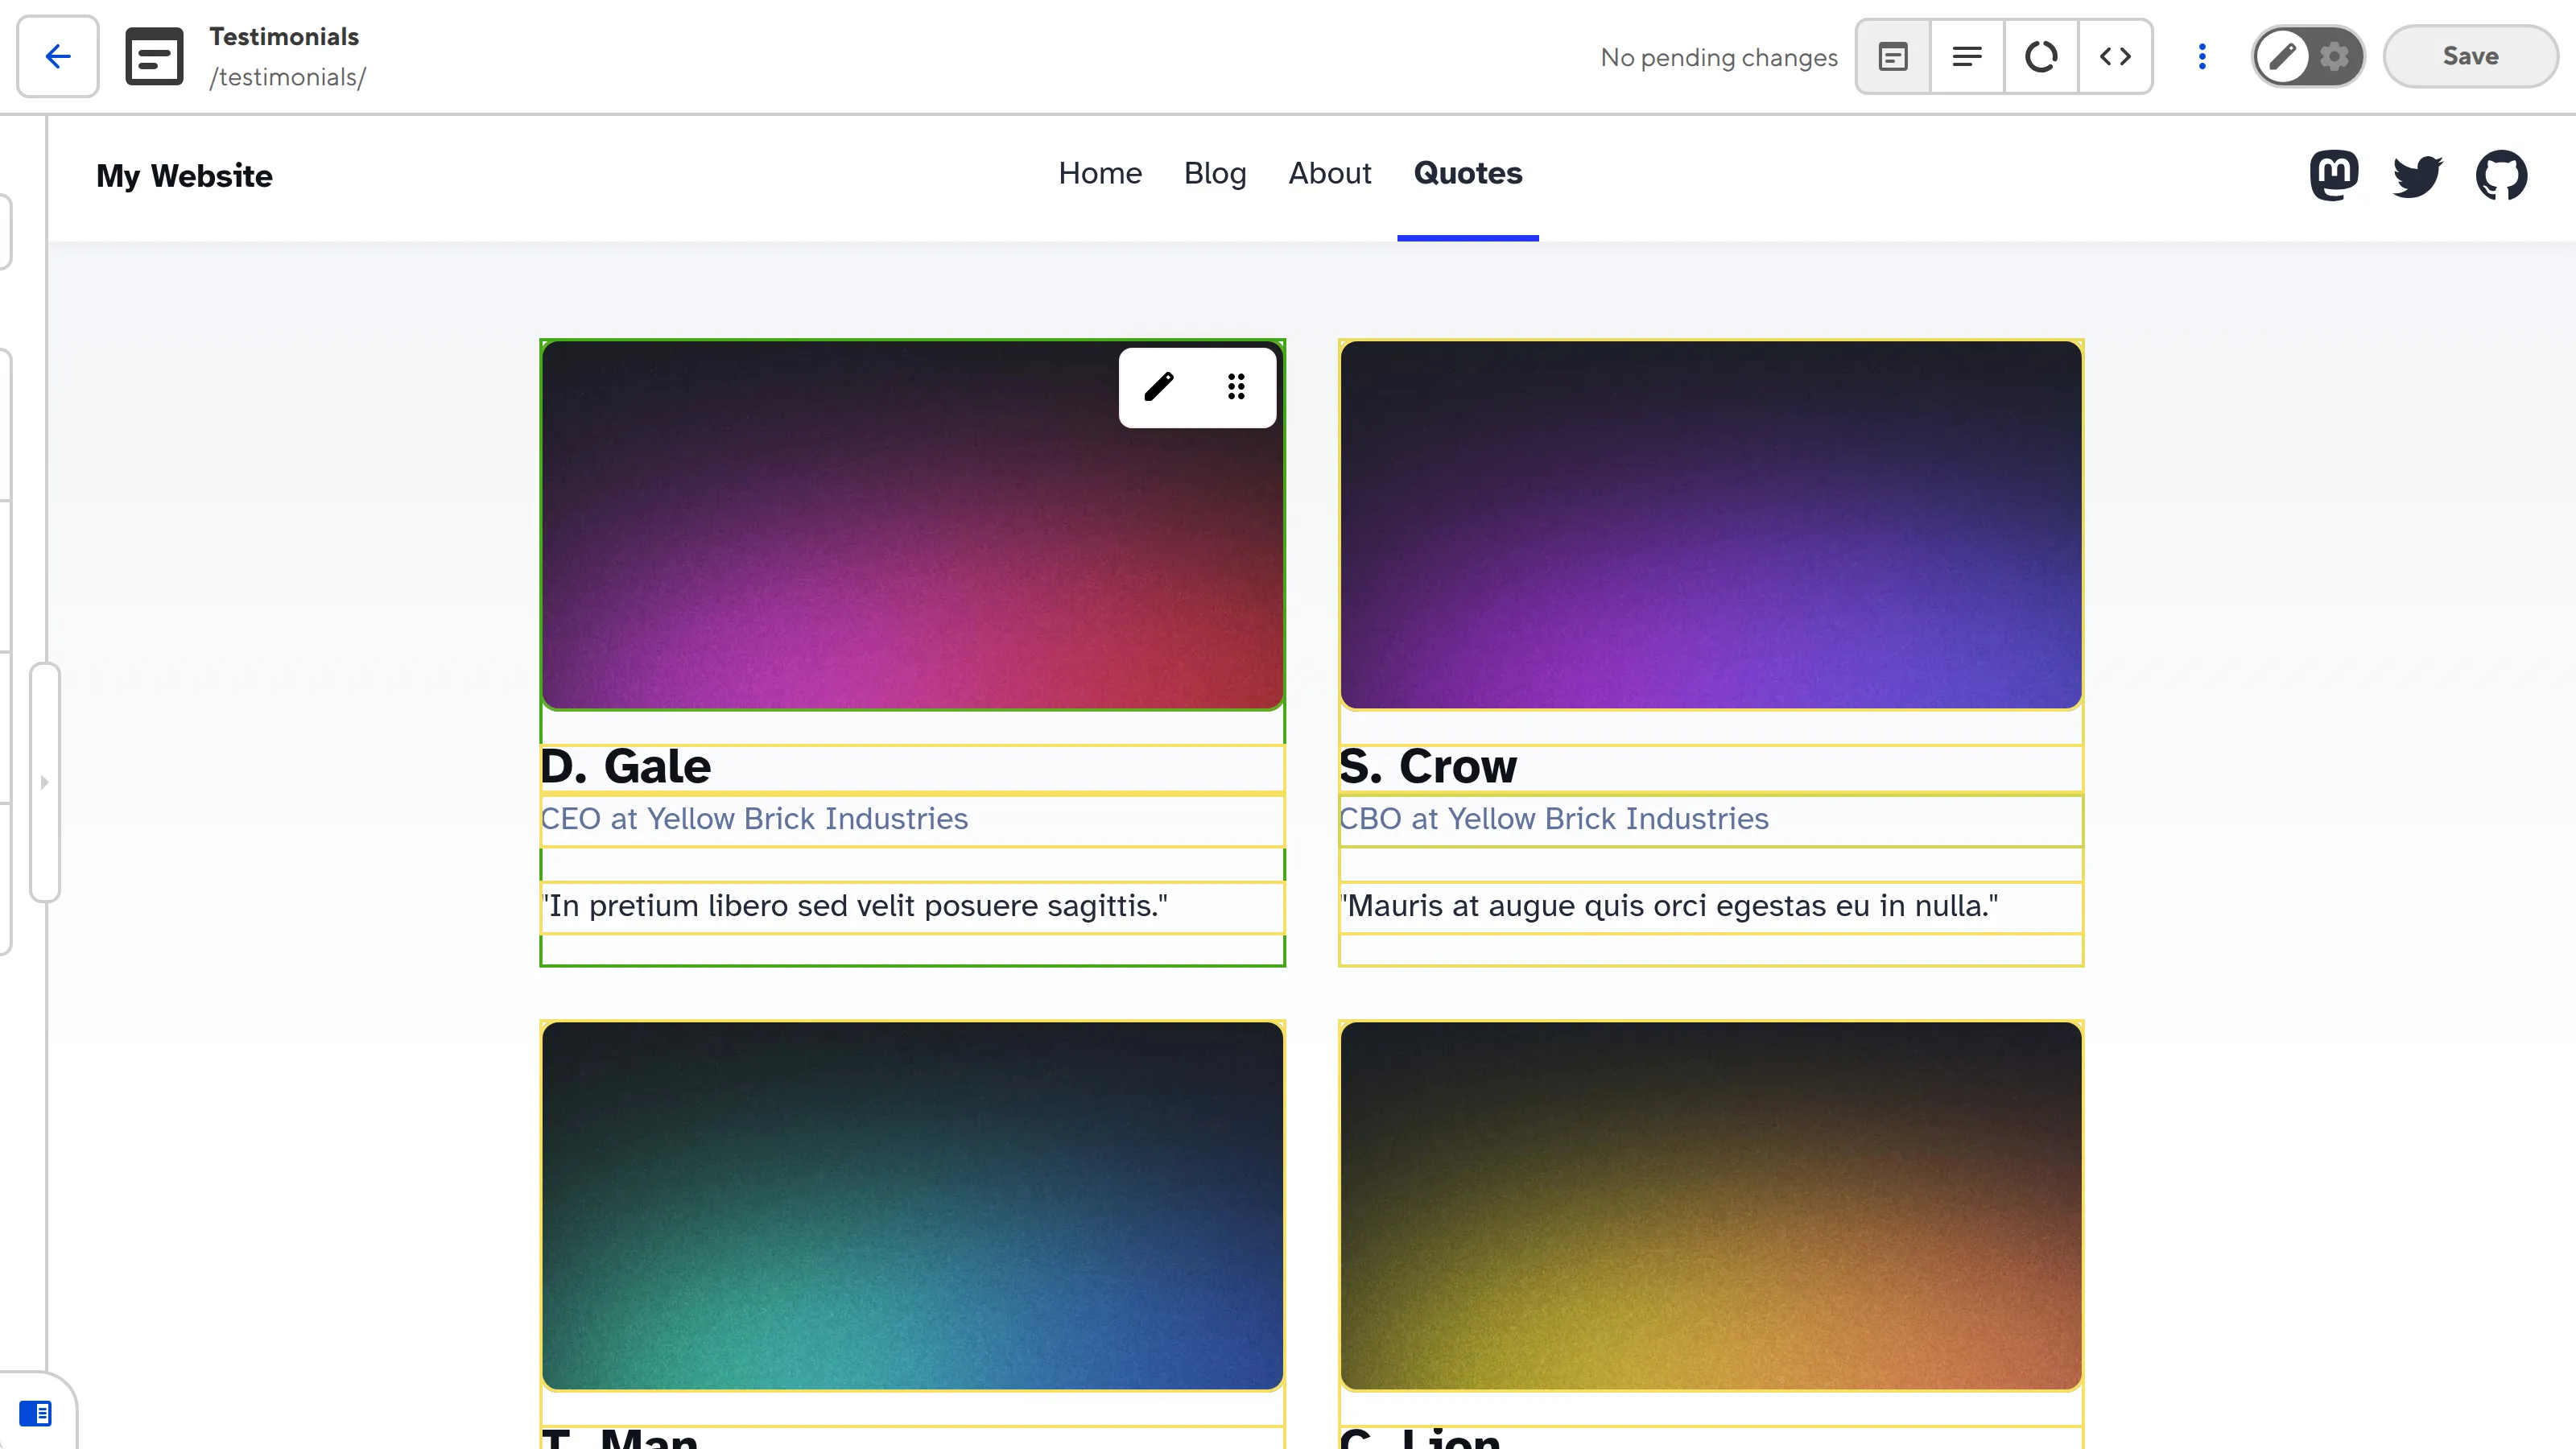
Once we save and rebuild our Site, CloudCannon will show a yellow Editable Regions box around each array item on the Testimonials page, and around each image and text field.

When you hover an array item, CloudCannon will show a small toolbar in the top right, containing an Edit button and a Drag handler. Clicking the Edit button will open a data panel containing your array item fields. Clicking the Drag handler will open a dropdown with options to move an array item one position to the left or right, and to delete the item, while clicking and holding the Drag handler allows you to visually move an array item to any position in the array.
Complex arrays or page building#
A complex array is one where the array items may not have the same structure. A common use case for complex arrays is page building, where you define the structure for several "content blocks" (e.g., a hero banner, video, image gallery, call-to-action) and add, remove, or reorder them within an array to build the content for your page.
Let's look at an example.
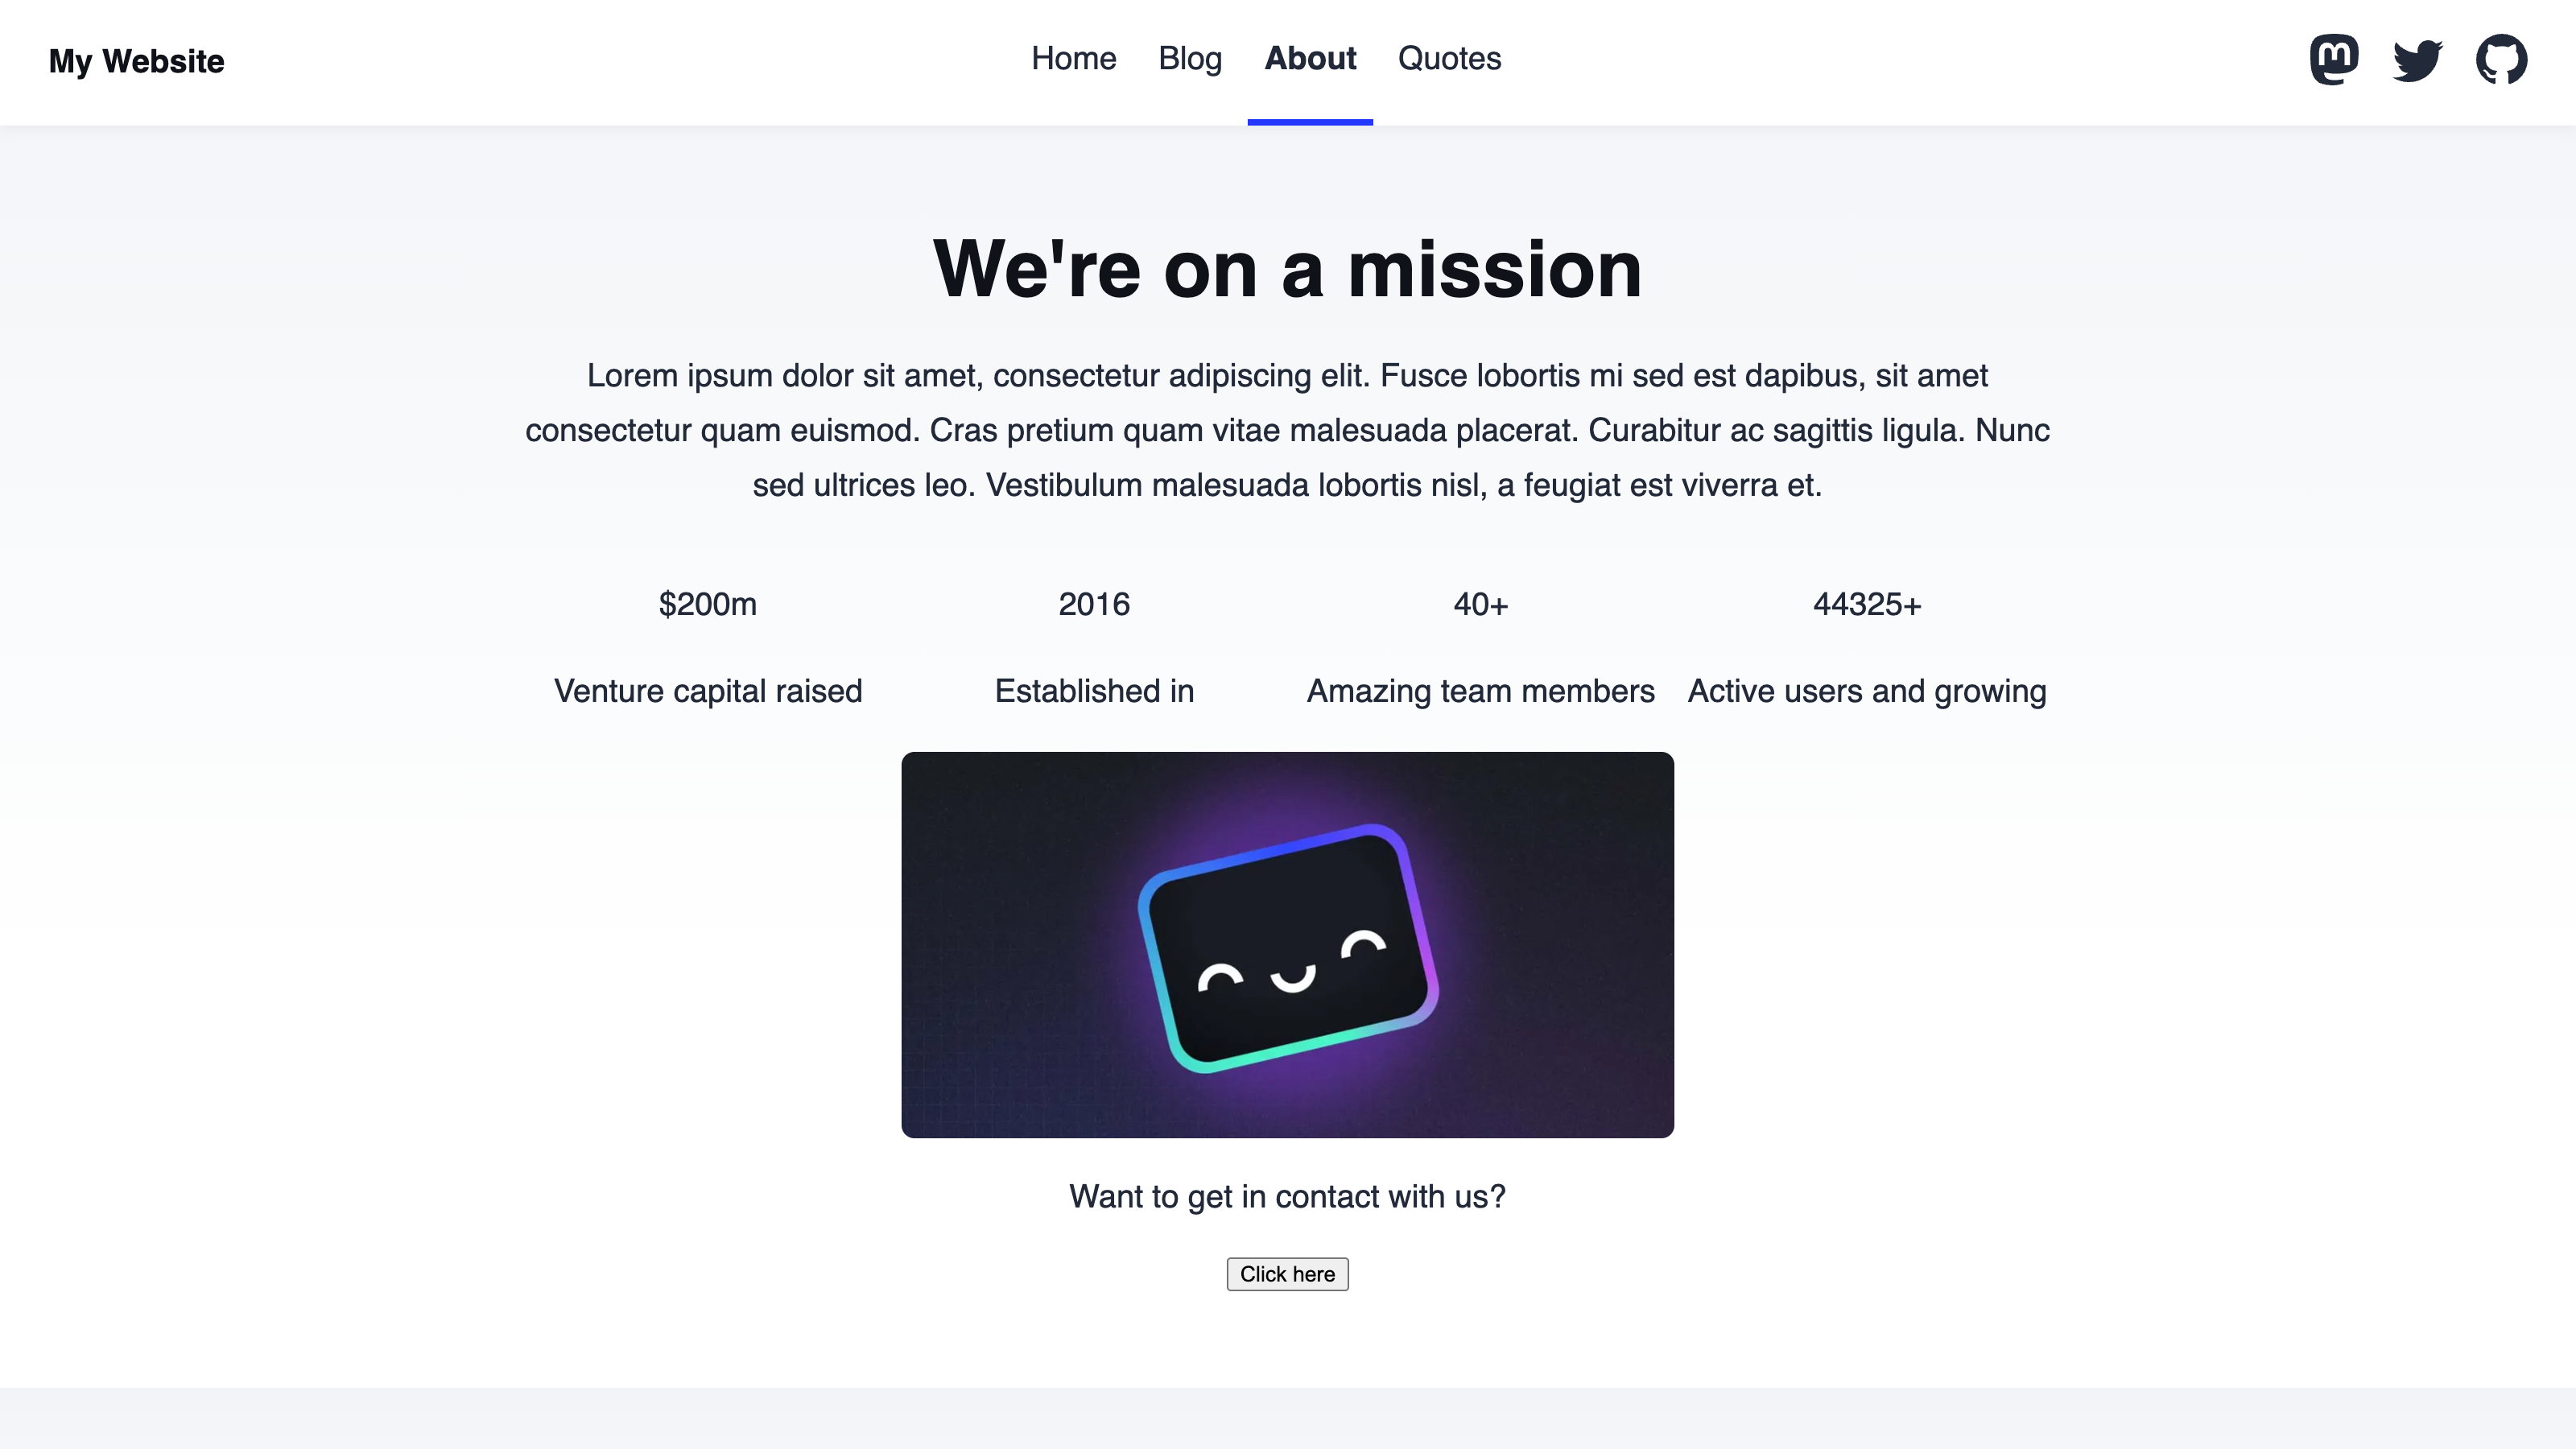
Our "About" page is generated using an HTML layout populated by several data files defining content blocks. Here are three of the content blocks we use on the "About" page: Hero, Stats, and Contact.
---
const { title, description } = Astro.props;
---

<h2>{title}</h2>
<p>{description}</p>
---
const { stats } = Astro.props;
---

<div>
  {
    stats.map(({ figure, text }) => {
      return (
        <div>
          <p>{figure}</p>
          <p>{text}</p>
        </div>
      );
    })
  }
</div>
---
const { text, button, image } = Astro.props;
---

<img src={image} />
<p>{text}</p>
<button type="button">{button}</button>
This file is the About page, containing our contentBlocks array. Each array item contains different structured data keys.
---
layout: ../layouts/AboutLayout.astro
contentBlocks:
  - _name: HeroBlock
    title: We're on a mission
    description: Lorem ipsum dolor sit amet, consectetur adipiscing elit. Fusce lobortis mi sed est dapibus, sit amet consectetur quam euismod. Cras pretium quam vitae malesuada placerat. Curabitur ac sagittis ligula. Nunc sed ultrices leo. Vestibulum malesuada lobortis nisl, a feugiat est viverra et.
  - _name: StatsBlock
    stats:
      - figure: $200m
        text: Venture capital raised
      - figure: "2016"
        text: Established in
      - figure: 40+
        text: Amazing team members
      - figure: 44325+
        text: Active users and growing
  - _name: ContactBlock
    text: Want to get in contact with us?
    button: Click here
    image: https://preview.astro.new/blog/_astro/blog-placeholder-about.BtEdEmGp_1cKsnD.webp
---
Here is an excerpt from our About Layout File. This section loops over all the items in the contentBlocks array and populates the layout using the values.
---
const components = {};
const componentImports = import.meta.glob("../components/**/*.astro", {
  eager: true,
});
Object.entries(componentImports).forEach(([path, obj]) => {
  const name = path.replace("../components/", "").split(".")[0];
  components[name] = obj.default;
});

const { contentBlocks } = Astro.props.frontmatter;
---

<main>
  {
    contentBlocks.map((block) => {
      const Component = components[block._name];
      return (
        <section>
          <Component {...block} />
        </section>
      );
    })
  }
</main>
Together, these files output a webpage that looks like this:

In this example, the <main> element wraps our array, with its contents looping over every array item stored under the contentBlocks key.
To define an Array Editable Region, we can add the data-editable="array" and data-prop="contentBlocks" HTML attributes to the <main> DOM element. Because this array is more complex, there is an extra step when defining the Array Editable Region: adding the data-id-key HTML attribute. The data-id-key attribute defines where the unique identifier for each array item is stored which, in this case, is _name.
To define an Array Item Editable Region, we can add the data-editable="array-item" to the <section> tag. Because this is a complex array, we must also add the data-id HTML attribute with a templating value, such as {block._name}. This field will populate with the unique identifier for each array item at build time.
Here's what our About Layout code should look like:
---
const components = {};
const componentImports = import.meta.glob("../components/**/*.astro", {
  eager: true,
});
Object.entries(componentImports).forEach(([path, obj]) => {
  const name = path.replace("../components/", "").split(".")[0];
  components[name] = obj.default;
});

const { contentBlocks } = Astro.props.frontmatter;
---

<main data-editable="array" data-prop="contentBlocks" data-id-key="_name">
  {
    contentBlocks.map((block) => {
      const Component = components[block._name];
      return (
        <section data-editable="array-item" data-id={block._name}>
          <Component {...block} />
        </section>
      );
    })
  }
</main>
If we also want to visually edit the text and images inside each array item, we can define Text and Image Editable Regions for in each of the data files defining our content blocks.
Once we save and rebuild our Site, CloudCannon will show a yellow Editable Regions box around each array item, and around the content inside each array item.
We can now build pages in the Visual Editor. We can add or delete content blocks, and reorder the content blocks in the array using the options in the Edit menu, or the Drag handler.
Common errors#
If you accidentally misconfigure your Editable Regions, CloudCannon will display a red warning box in the Visual Editor.
Here are a few common errors you might encounter with Array Editable Regions:
- You did not define the
data-propHTML attribute. - You did not define the
data-id-keyordata-idHTML attributes for a complex array. - The Editable Region has an invalid data type (e.g., your Text region has a number or object, instead of a string).
- You have one or more orphaned Array Item Editable Regions that are not contained within an Array Editable Region.
In the next step of this guide, we'll cover how to define Editable Regions for Astro or React components.