This step is optional!
If you want some parts of your website to require authentication and other parts to be publicly accessible, CloudCannon allows you to configure authenticated routes. You can control which pages, or groups of pages require authentication.
As we have already set our authentication method to SAML in the previous section of this guide, all the authenticated routes you configure will require visitors to sign in with their Google Workspace credentials.
Create a list of paths that require authentication#
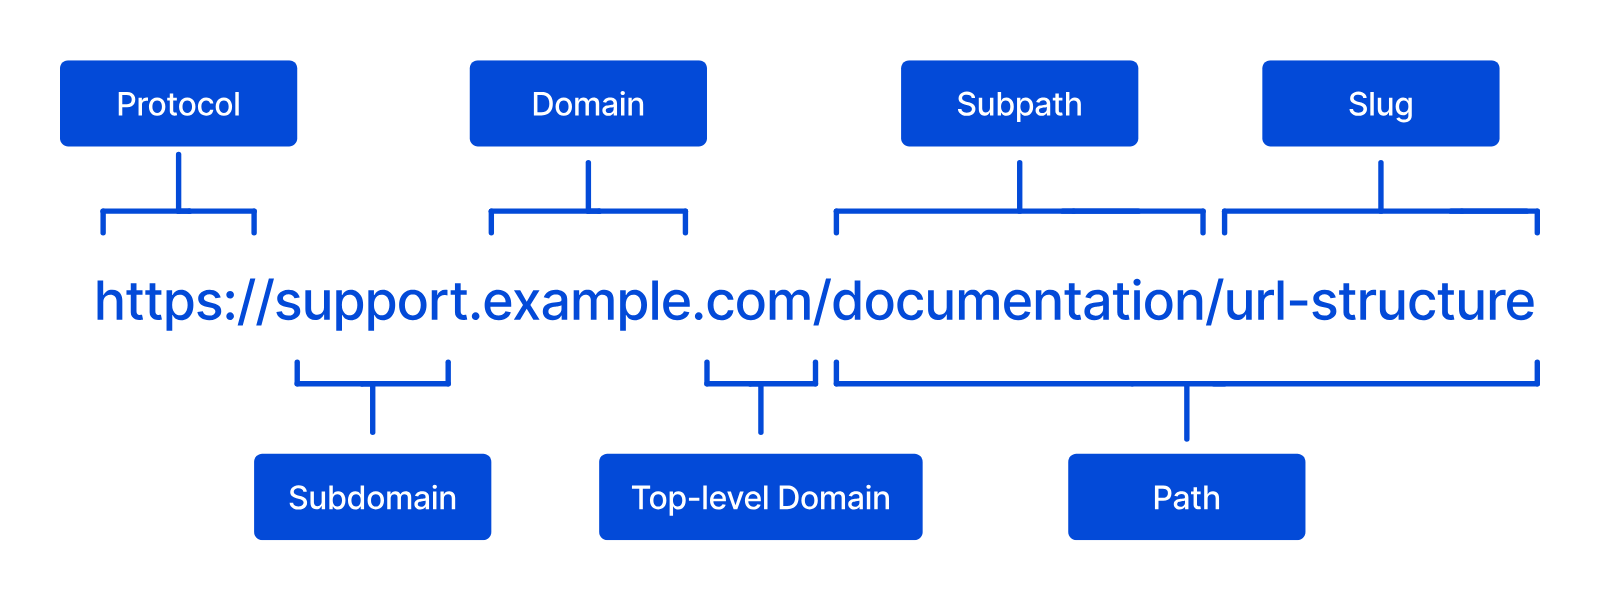
You can specify which URLs on your Site require authentication using the URL path. URL paths are made up of zero or more subdirectories and the slug for the current web page. You can use the wildcard * character to specify any number of pages or subdirectories.
For this guide, we want to configure authentication for every page in the "Staff" section of our website, and the "Internal Announcements" page. The URLs for these pages are https://example.com/staff/* and https://example.com/internal-announcements.html.
We only need the path information to create authenticated routes, so we can remove the domain name from the URLs to leave the following:
/staff/*/internal-announcements.html
Which paths require authentication on your Site? Create a list.
Configure authenticated routes#
In CloudCannon, you can specify authenticated routes in the auth-routes.txt file. This file should be in the root directory of your output Site. Where this is in your Site repository will depend on your SSG (e.g., the root of the repository for Jekyll, the static folder for Hugo, etc.).
- Log in to CloudCannon and open your Site.
- Navigate to the root directory of your output Site using the File browser.
- Create a file called
auth-routes.txt. - For each URL you want to authenticate, add the path on a new line of the file.
- Save the file to your Site.
CloudCannon will now require authentication on the routes specified in the auth-routes.txt file.
Here is an example of a basic authenticated routes file:
/staff/*
/internal-announcements.html